The Deli Classic with a Long, Slow Ferment
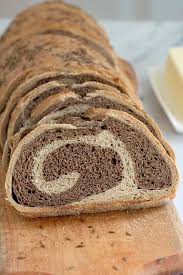
IntermediateMarble Rye Bread(Sourdough)
by Henry Hunter Jr.
Two naturally leavened rye doughs. One swirl. Better every day it sits.
Fermentation
6-8 hours bulk + 8-12 hours cold proof
Bake Time
40-45 minutes
Yield
One 9x5 inch loaf, about 12-14 slices

Perfection is not required
"Perfection is not required. Progress is."— Henry Hunter Jr.
By Henry Hunter Jr., founder of Crust & Crumb Academy and Baking Great Bread at Home.
Authentic Flavor
Henry developed the sourdough version of this marble rye for bakers who want the deli classic with the complexity only a long, slow ferment can deliver. The cold proof is where the magic happens.
Equipment Needed
Or mix by hand
For the classic marble swirl shape
For rolling dough layers flat
To verify internal temperature of 195-200°F (90-93°C)
Ingredients
Light Rye Levain Dough
Dark Rye Levain Dough
Non-negotiable. Natural cocoa is more acidic and interferes with fermentation.
Egg Wash
Finishing (Optional)
Day 1 Morning
Check Your Starter
Starter timing matters more here than in a lean sourdough. The slight butter and honey content slow fermentation. Start with a genuinely peak .
Click each step to mark complete
Float test
Drop a spoonful of starter into a glass of water. If it floats or hovers, it's ready. If it sinks, feed it and wait another 2-3 hours.
Visual check
Starter should be domed or just beginning to fall, with visible bubbles throughout. It should smell tangy and yeasty, not flat.
The enzymatic advantage
Rye flour is rich in enzymes, which break down starch into sugars aggressively during fermentation. This gives sourdough cultures plenty to eat. But at high rye percentages, excessive enzymatic activity degrades starch structure and leads to a gummy crumb.
The 30% sweet spot
The 30% rye in this formula gives enough rye flavor and enzymatic benefit without compromising crumb structure. More rye means more risk of over-fermentation.
The Takeaway
30% rye is the sweet spot: enough flavor without risking a gummy crumb from excessive enzyme activity.
Day 1 Morning
Mix the Light Rye Dough
The light rye dough is your canvas. It's the visual counterpoint to the dark dough and the flavor baseline for the whole loaf.
Click each step to mark complete
Combine wet ingredients
In your stand mixer bowl, whisk together the warm water, starter, and honey until combined.
Add flour, salt, and caraway
Add bread flour, rye flour, salt, and caraway seeds. Mix on low until a shaggy dough forms, then medium for 5-6 minutes. The dough will be sticky. Work with it. The in rye absorb water and create a gel-like quality.
Add butter
Add softened butter and knead 2 more minutes until incorporated. Transfer to an oiled bowl and cover while you mix the dark dough.
Pro Tip
Rye dough mixed with sourdough will feel noticeably more extensible and sticky than a wheat sourdough. Don't try to tighten it up with more flour.
Day 1 Morning
Mix the Dark Rye Dough
Same process as the light dough. The molasses adds a roasted, slightly bitter depth that pairs with the rye flavor and the cocoa color. These aren't separate flavor notes — they reinforce each other.
Click each step to mark complete
Combine wet ingredients
Whisk warm water, starter, molasses, and honey in your mixer bowl until combined.
Add dry ingredients
Add bread flour, rye flour, cocoa powder, salt, and caraway seeds. Mix on low then medium for 5-6 minutes.
Adjust and add butter
Add the additional 10g warm water and knead 1 minute. The dark dough should feel very close in consistency to the light dough. Add butter and knead 2 more minutes. Transfer to a second oiled bowl.
Day 1
Bulk Fermentation
Both doughs ferment simultaneously. Rye sourdough is more active than wheat sourdough at the same temperature because of rye's higher activity. Don't walk away for 8 hours without checking.
Click each step to mark complete
Stretch and fold (first 2 hours)
At 30, 60, and 90 minutes, perform one set of on each dough. Four folds per set, rotating the bowl 90 degrees between each fold. Do both doughs at each interval.
Rest undisturbed
After the third set of folds, let both doughs rest until they show 50-60% volume increase. At 75-78°F (24-26°C) this takes 5-7 hours total from the start of mixing.
The rye fermentation check
Don't rely on the jiggle test with rye. Instead: the dough should feel noticeably lighter and more airy than when you started. You should see bubbles throughout. The surface should look slightly domed and active.
⏱ Wait Time
5-7 hours
The starch degradation problem
When rye dough over-ferments, the amylase enzymes break down so much starch that the crumb loses structural integrity. The result is a dense, gummy loaf even though it looked fully risen.
Watch the clock and the dough
Stay at or under 75-78°F and check the dough at 5 hours. If it looks active and domed, it's likely ready. Waiting for a full double is the wrong target with rye.
The Takeaway
Check at 5 hours. 50-60% rise is the target with rye, not a full double.
Day 1 Afternoon/Evening
Divide and Laminate
Same technique as the yeasted version. The sourdough doughs will be slightly more extensible due to the acids produced during fermentation. Work efficiently.
Click each step to mark complete
Turn out both doughs
Lightly flour your surface. Turn out both doughs.
Divide each dough in half
4 pieces total, roughly 215g each.
Roll each piece
Roll each piece to a 10x8 inch rectangle. Keep flour minimal. Rye dough is extensible and won't fight you under the rolling pin.
Stack alternating dark and light
Dark, light, dark, light. Press firmly between each layer to eliminate air pockets.
Roll into a tight log
From the short end, roll with steady even pressure. Pinch the seam.
Pan and refrigerate
Place seam down in well-greased 9x5 loaf pan.
Pro Tip
Work quickly during lamination. The dough is still fermenting. Laminating over-fermented rye dough gives you a loaf that's slack and prone to spreading rather than rising.
Day 1 Evening
Cold Proof
The slows fermentation to a near stop and firms the dough for a cleaner bake. It also deepens the rye and sourdough flavors. The acidity continues to develop slowly overnight.
Click each step to mark complete
Cover tightly
Cover with plastic wrap.
Refrigerate overnight
Refrigerate 8-12 hours overnight. The next morning, the loaf should have grown slightly in the pan and look firm. It doesn't need to crown above the rim before baking.
⏱ Wait Time
8-12 hours
Pro Tip
The acids produced overnight deepen the rye flavor significantly. This loaf keeps 4-5 days and the flavor on day 2 is noticeably better than day 1.
Shaping
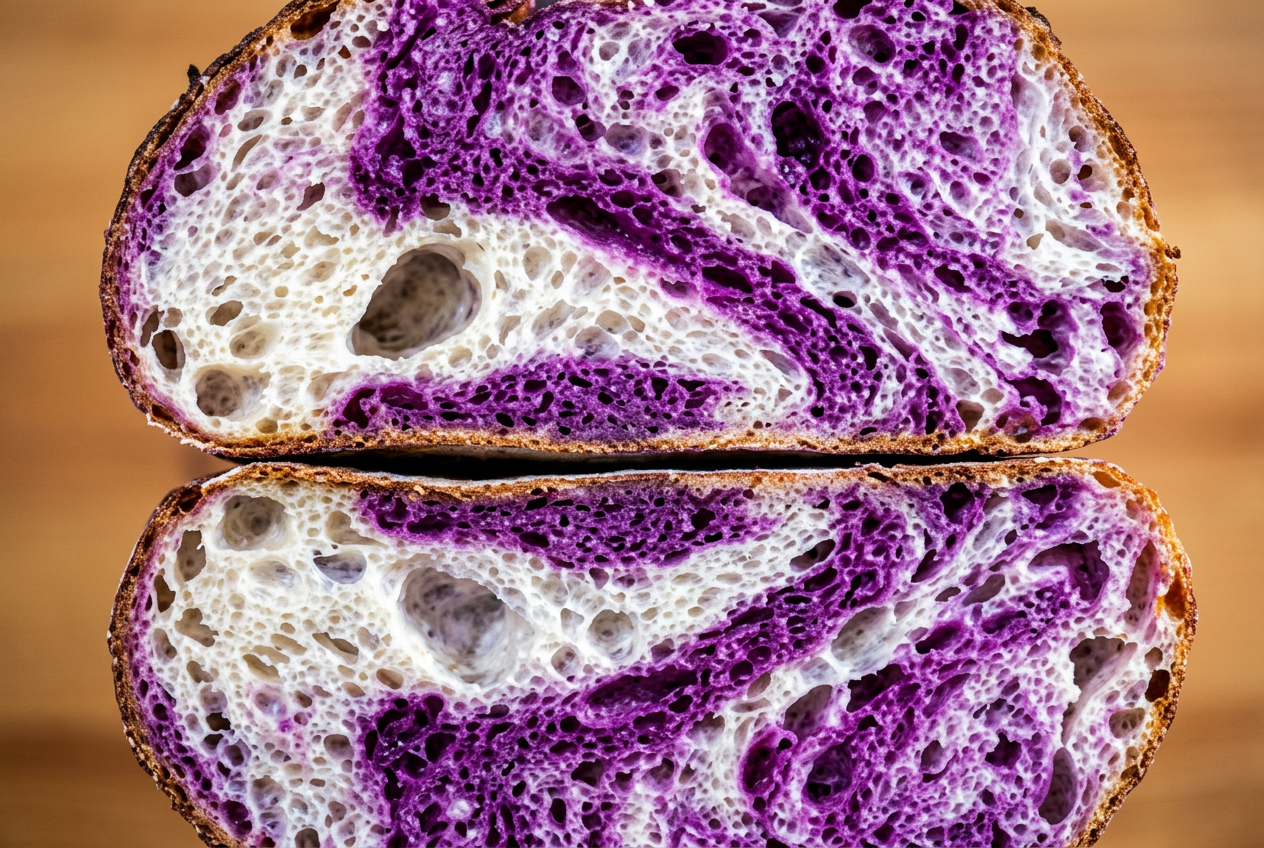
The Marble Lamination
Stack alternating layers of light and dark rye, then roll into a tight log for even swirl rings.
Classic Marble Swirl (Loaf Pan)
Stack-and-roll into a 9x5 pan. Best for sandwich use and the clearest swirl cross-section.
RecommendedClick each step to mark complete
Roll flat
Roll each piece to a 10x8 inch rectangle.
Stack alternating
Dark-light-dark-light. Press firmly between each layer.
Roll tight
Roll from short end into a tight log. Pinch the seam.
Pan seam down
Place seam side down in greased 9x5 loaf pan. Refrigerate overnight.
Freestanding Round (Boule)
After rolling the log, form into a round boule. More rustic with a more open crumb.
Click each step to mark complete
Form boule
Roll the log, then form into a round boule. Place seam down in a well-floured banneton.
Cold proof in banneton
Refrigerate overnight in the banneton.
Bake in Dutch oven
Preheat Dutch oven. Bake at 400°F (205°C), 20 minutes covered and 20-25 minutes uncovered.
Day 2 Morning
Final Proof and Bake
Pull it from the fridge, let it come to temperature, then bake. Cold rye sourdough doesn't need as long a room-temperature proof as cold-proofed wheat sourdough.
Step by Step
Remove from refrigerator
Set at room temperature for 30-45 minutes. The dough should feel firm but slightly yielding when you press it.
Preheat oven
Preheat to 375°F (190°C).
Egg wash
Whisk egg and water together. Brush gently across the top of the loaf.
Score
Three diagonal slashes with a or sharp knife, about ½ inch deep.
Add caraway topping (optional)
Sprinkle caraway seeds over the egg-washed top.
Bake covered
Tent loosely with foil. Bake at 375°F (190°C) for 15 minutes.
Remove foil and finish
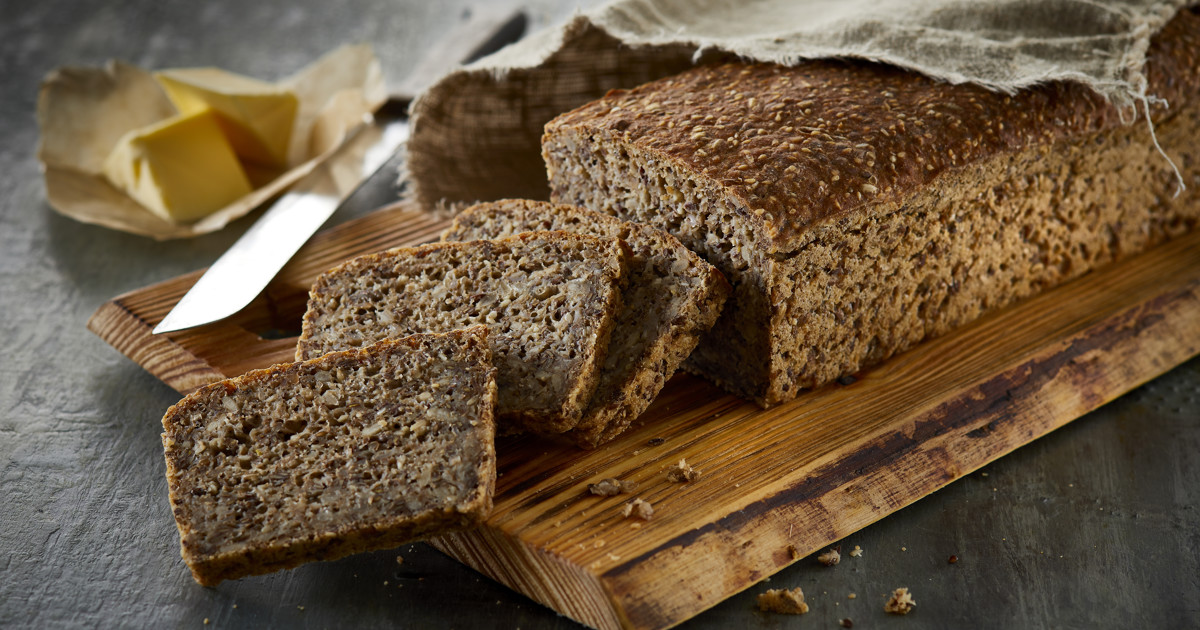
Remove foil. Bake uncovered 25-30 more minutes until deeply golden and internal temperature reaches 195-200°F (90-93°C). The crust will look darker than a wheat sourdough. That's the molasses and rye sugars caramelizing, not burning.
Cool completely
Remove from pan immediately. Cool on wire rack a minimum of 1 hour. For best results, wait 2 hours. Rye bread continues setting as it cools.
Baking Methods
9x5 inch loaf pan gives you the classic deli marble rye shape.
Equipment: 9x5 inch loaf pan
Preheat
Preheat oven to 375°F (190°C) for at least 20 minutes.
Egg wash and score
Brush with egg wash. Score 3 diagonal slashes ½ inch deep.
Bake covered
Tent with foil, bake 15 minutes.
Bake uncovered
Remove foil. Bake 25-30 minutes more until 195-200°F (90-93°C).
Cool completely
Remove from pan immediately. Cool 1 hour minimum. 2 hours for best results.
Nutrition Facts
Per 1 slice (~65g) • 13 servings per recipe
* Values are estimates based on standard ingredients
Storage
Room Temperature
4-5 days wrapped in a bread bag or beeswax wrap. Gets better on day 2. The crumb firms, the flavor deepens.
Frozen
Up to 3 months. Slice before freezing.
Refresh
Toast directly from frozen or warm at 325°F (165°C) for 8-10 minutes.
💡 The natural acids from sourdough fermentation act as a preservative and slow staling. This loaf outlasts the yeasted version by at least a day.
Your Feedback
Rate This Recipe
Loading ratings...
Troubleshooting
Baker's Notes
Common questions and solutions for perfect results
If you're serious about scoring, you need the right blade in your hand. Wire Monkey makes handcrafted bread lames from black walnut — built to last, balanced in the hand, and sharp enough to glide through cold dough cleanly every single time. No dragging, no hesitation marks. Just a clean cut.

Wire Monkey Handcrafted Bread Lames
You Might Also Enjoy
More recipes from our pantry that pair well with this bake.

Get More Recipes in Your Inbox
Join thousands of home bakers receiving weekly recipes, tips, and techniques to elevate your bread game.
No spam, ever. Unsubscribe anytime.
More from Baking Great Bread at Home
Tools, resources, and community to help you bake better bread

Crust & Crumb Academy
Go deeper into your craft. FREE courses, challenges, and real feedback. No gatekeeping. Perfection is not required.

Sourdough Starter Companion
Your AI-powered starter assistant. Track feedings, troubleshoot issues, and keep your starter thriving.

BakingGreatBread.com
Real bread for the rest of us

Baking Great Bread Blog
Recipes, tips, and stories from the bread journey

Recipe Converter
Convert sourdough recipes to yeast and back again

Crust & Crumb App
Your AI-powered baking assistant

Facebook Community
Join 50,000+ bakers sharing, learning, and supporting each other

Sourdough for the Rest of Us
Free beginner's guide to sourdough