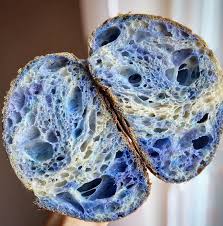
The same stunning marble. The added depth of a long, slow ferment.
IntermediateMarbled Bread(Sourdough)
by Henry Hunter Jr.
Natural colors. Natural leavening. One beautiful loaf.
Fermentation
4-6 hours bulk + 8-12 hours cold proof
Bake Time
35-40 minutes
Yield
One 9x5 inch loaf, about 12 slices

Perfection is not required
"Perfection is not required. Progress is."— Henry Hunter Jr.
By Henry Hunter Jr., founder of Crust & Crumb Academy and Baking Great Bread at Home.
Authentic Flavor
Henry developed the sourdough version of this recipe specifically for bakers who want the visual impact of marbling with the added complexity of long fermentation. The cold proof is where the magic happens.
Equipment Needed
Ingredients
Base Dough
Fat and sugar slow fermentation in enriched doughs, which is why we use 17% inoculation to keep the timeline manageable. Your starter should be active and at peak when you mix.
Color Options (choose one or two)
Same natural colorant options as the yeasted version. Pick what excites you.
Egg Wash
Pro Tip
The fat and sugar in this enriched dough slow fermentation considerably compared to a lean sourdough. That's why we use 17% inoculation. Don't be tempted to use less thinking you'll slow things down further. You need enough starter to actually move the dough forward in a reasonable timeframe.
Day 1 Morning
Check Your Starter
For enriched sourdough, starter timing matters more than usual. Fat and sugar compete with the yeast, so you need your starter genuinely at peak, not just active.
Click each step to mark complete
Float test
Drop a small spoonful of starter into a glass of water. If it floats or hovers, it's ready. If it sinks immediately, feed it and wait another 3-4 hours. Baking with an under-ripe starter in an enriched dough is the most common reason these loaves come out dense and under-risen.
Visual check
Your starter should be domed or just starting to fall, with visible bubbles throughout. It should smell tangy and yeasty, not flat or acetone-like.
The challenge of enriched dough
Butter coats yeast cells and makes it harder for them to absorb the sugars they need to produce CO2. Sugar, when present in significant amounts, can actually pull water away from yeast through osmotic pressure, stressing the cells. Together they slow fermentation significantly compared to a lean dough.
The 17% solution
We use 17% inoculation (starter as a percentage of total flour weight) rather than the typical 10-12% for a lean sourdough. The higher percentage gives you enough yeast activity to push through the enrichments and produce a proper rise within a reasonable timeframe.
The Takeaway
Strong starter plus 17% inoculation equals a dough that actually rises despite the enrichments slowing it down.
Day 1 Morning
Mix the Base Dough
Same process as the yeasted version but with your active starter replacing the commercial yeast.
Click each step to mark complete
Combine wet ingredients
In the bowl of your stand mixer, whisk together the warm water, warm milk, starter, and honey until combined.
Add flour and salt
Add the bread flour and salt. Mix on low until a shaggy dough forms, then increase to medium and knead for 6-8 minutes until smooth and slightly tacky.
Add butter slowly
Add softened butter one tablespoon at a time with the mixer running. Wait for full incorporation between additions. The dough will look greasy and break apart at first. Keep going. It comes together.
Windowpane check
Check for the . The dough should stretch thin without tearing. If it tears, knead 2-3 more minutes.
Pro Tip
Sourdough enriched doughs can feel stickier than their yeasted counterparts right after mixing. Resist the urge to add more flour. The butter is still warm and will firm the dough as it cools slightly.
Day 1
Bulk Fermentation
This is where the sourdough version earns its flavor. Longer and slower than the yeasted version, but mostly hands-off.
Click each step to mark complete
Transfer to bulk container
Transfer the dough to a lightly oiled container with a lid or cover. Note the starting volume. You're looking for roughly 50% growth, not a full double. Enriched doughs don't rise as dramatically as lean doughs. Don't wait for a full double.
Stretch and fold (first hour)
At 30 minutes and again at 60 minutes, perform one set of . Grab one side of the dough, stretch it up, fold it over to the opposite side. Rotate the container 90 degrees and repeat. Four folds equals one set. This builds structure.
Rest undisturbed
After two sets of folds, let the dough rest undisturbed until bulk is complete. Total bulk fermentation time at 75-78F (24-26C) is approximately 4-6 hours. Cooler kitchens will take longer. Watch the dough, not the clock.
⏱ Wait Time
4-6 hours
Why it doesn't double
Fat coats the CO2 bubbles and prevents the large air pockets that cause lean doughs to double. You're looking for 50% growth, a more domed surface, and a dough that feels noticeably lighter and more airy when you handle it.
The jiggle test
Gently shake the container. A properly fermented enriched dough will wobble and jiggle like set gelatin. Under-fermented dough feels stiff and resistant. Over-fermented dough will be very slack and may smell strongly acidic.
The Takeaway
50% rise plus a jiggly, airy texture means bulk is done. Don't wait for a full double.
Day 1 Afternoon/Evening
Divide and Add Color
Same process as the yeasted version. Work quickly so the dough doesn't over-ferment while you're adding colors.
Click each step to mark complete
Divide the dough
Turn the dough onto a clean surface, weigh it, and divide into equal portions. For two colors: two pieces of roughly 389g each. For three: three pieces of roughly 260g each.
Work in colorants
Flatten each portion and knead in your chosen colorant until fully and evenly incorporated, about 2-3 minutes per portion. Keep one portion plain for a white swirl if desired.
Pre-shape and rest
Shape each portion into a smooth ball. Cover and let rest 15 minutes. This rest relaxes the gluten so you can roll the dough flat without it fighting back.
Day 1 Evening
Laminate, Shape, and Refrigerate
The cold proof is what makes the sourdough version special. The overnight rest deepens the flavor and makes the colors more vivid in contrast.
Click each step to mark complete
Roll out each portion
On a lightly floured surface, roll each dough ball into a 10x8 inch rectangle. Match the sizes as closely as you can.
Stack and roll into a log
Stack the rectangles directly on top of each other, press firmly, then roll from the short end into a tight log. Pinch the seam closed.
Pan and refrigerate
Place seam side down in a well-greased 9x5 inch loaf pan. Cover tightly with plastic wrap and refrigerate for 8-12 hours.
Pro Tip
The cold retard does two things: it slows fermentation so you're not racing against over-proofing, and it firms up the butter in the dough, which actually helps keep the marble layers crisper and more defined.
Shaping
The Marble Roll
Same technique as the yeasted version. Stack, roll, seal, refrigerate.
Classic Marble Roll
Stack and roll for even swirl rings throughout.
RecommendedClick each step to mark complete
Roll flat
Roll each portion to a 10x8 inch rectangle.
Stack
Layer rectangles on top of each other, press firmly.
Roll tight
Roll from short end into a tight log. Pinch the seam.
Pan seam down
Place seam side down in greased loaf pan. Refrigerate overnight.
Twisted Marble
Twist the log before panning for a more rustic exterior swirl.
Click each step to mark complete
Roll and stack
Follow classic marble roll steps.
Twist
Hold both ends and twist 3-4 times in opposite directions.
Pan and refrigerate
Tuck into loaf pan and refrigerate overnight.
Day 2 Morning
Final Proof and Bake
Pull it from the fridge, let it wake up, then bake.
Step by Step
Remove from refrigerator
Take the loaf pan out of the fridge and set it at room temperature. Let it come to temperature and finish proofing for 30-60 minutes. The dough should crown about 1 inch above the rim of the pan before you bake.
Preheat oven
Preheat your oven to 350F (175C) while the dough finishes proofing.
Egg wash
Whisk together the egg and water. Gently brush the top of the loaf.
Bake
Bake at 350F (175C) for 35-40 minutes until deeply golden and internal temperature reaches 190-195F (88-91C).
Unmold and cool
Remove from the pan immediately. Cool on a wire rack for at least 1 hour before slicing. The cold proof means the crumb is more delicate when it first comes out of the oven. Give it the full hour.
Final Proof
Bake
Cool
Baking Methods
A loaf pan is the right tool here. It gives you clean, even slices that show the marble.
Equipment: 9x5 inch loaf pan
Preheat
Preheat oven to 350F (175C) for at least 20 minutes.
Egg wash
Brush top of proofed loaf with egg wash.
Bake
35-40 minutes until internal temp hits 190-195F (88-91C).
Unmold and cool
Pan out immediately. Cool 1 hour minimum before slicing.
Nutrition Facts
Per 1 slice (about 60g) • 12 servings per recipe
* Values are estimates based on standard ingredients
Storage
Room Temperature
3-4 days wrapped in a bread bag or beeswax wrap
Refrigerated
Not recommended. Refrigeration accelerates staling.
Frozen
Up to 3 months. Slice before freezing.
Refresh
Warm slices at 325F (165C) for 8 minutes or toast directly.
💡 The sourdough version keeps a day or two longer than the yeasted version due to the natural acids from fermentation, which act as a mild preservative.
Your Feedback
Rate This Recipe
Loading ratings...
Troubleshooting
Baker's Notes
Common questions and solutions for perfect results
If you're serious about scoring, you need the right blade in your hand. Wire Monkey makes handcrafted bread lames from black walnut — built to last, balanced in the hand, and sharp enough to glide through cold dough cleanly every single time. No dragging, no hesitation marks. Just a clean cut.

Wire Monkey Handcrafted Bread Lames
You Might Also Enjoy
More recipes from our pantry that pair well with this bake.

Marbled Bread (Yeasted)
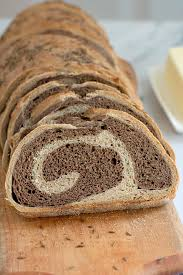
Marble Rye Bread (Sourdough) | Baking Great Bread at Home
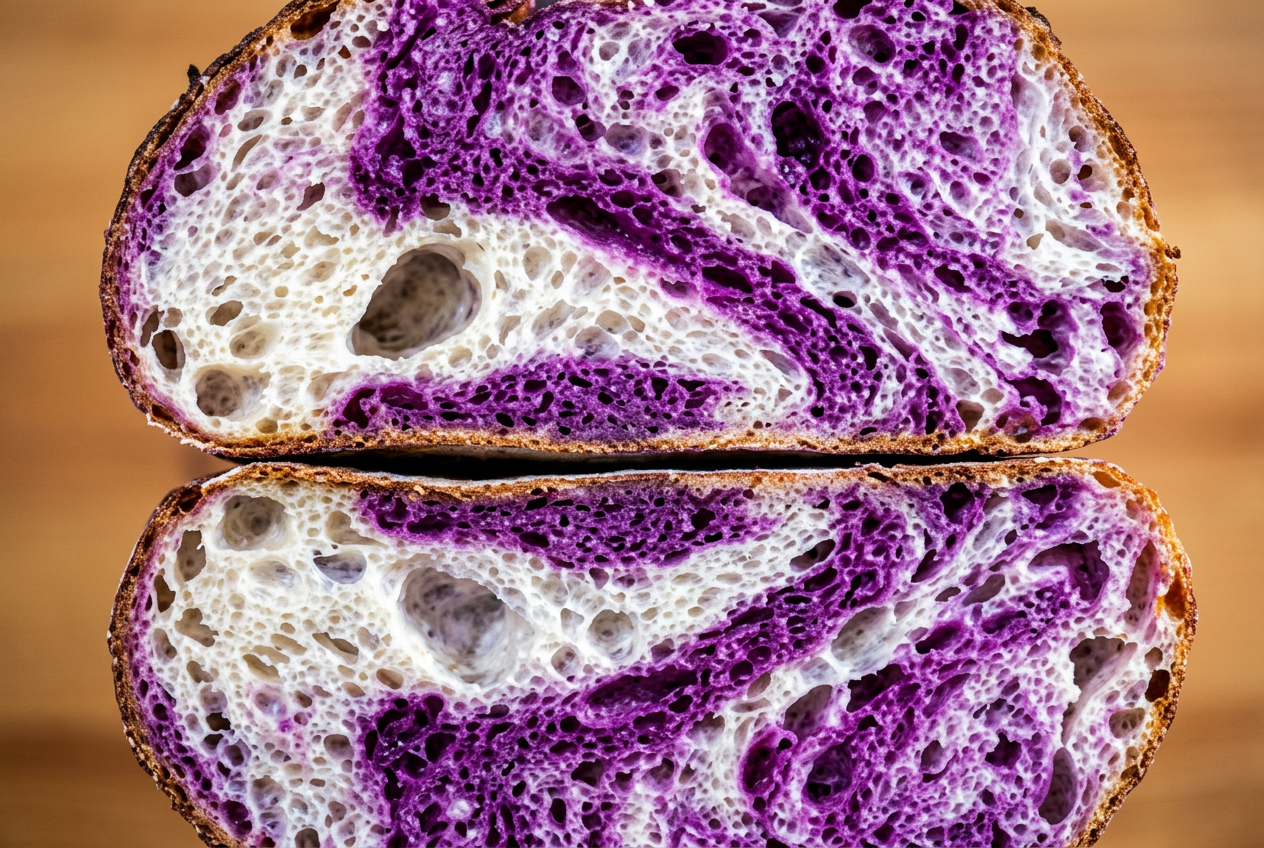
Purple Sweet Potato Sourdough | Baking Great Bread at Home
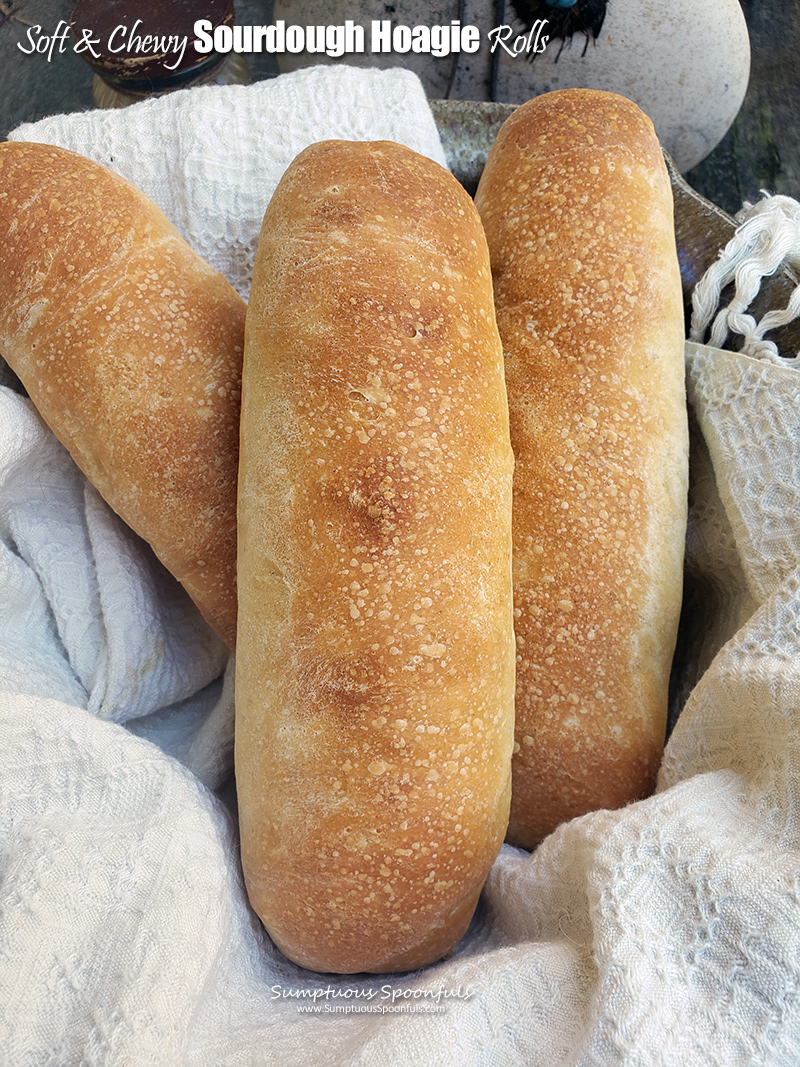
Sourdough Hoagie Rolls
Get More Recipes in Your Inbox
Join thousands of home bakers receiving weekly recipes, tips, and techniques to elevate your bread game.
No spam, ever. Unsubscribe anytime.
More from Baking Great Bread at Home
Tools, resources, and community to help you bake better bread

Crust & Crumb Academy
Go deeper into your craft. FREE courses, challenges, and real feedback. No gatekeeping. Perfection is not required.

Sourdough Starter Companion
Your AI-powered starter assistant. Track feedings, troubleshoot issues, and keep your starter thriving.

BakingGreatBread.com
Real bread for the rest of us

Baking Great Bread Blog
Recipes, tips, and stories from the bread journey

Recipe Converter
Convert sourdough recipes to yeast and back again

Crust & Crumb App
Your AI-powered baking assistant

Facebook Community
Join 50,000+ bakers sharing, learning, and supporting each other

Sourdough for the Rest of Us
Free beginner's guide to sourdough