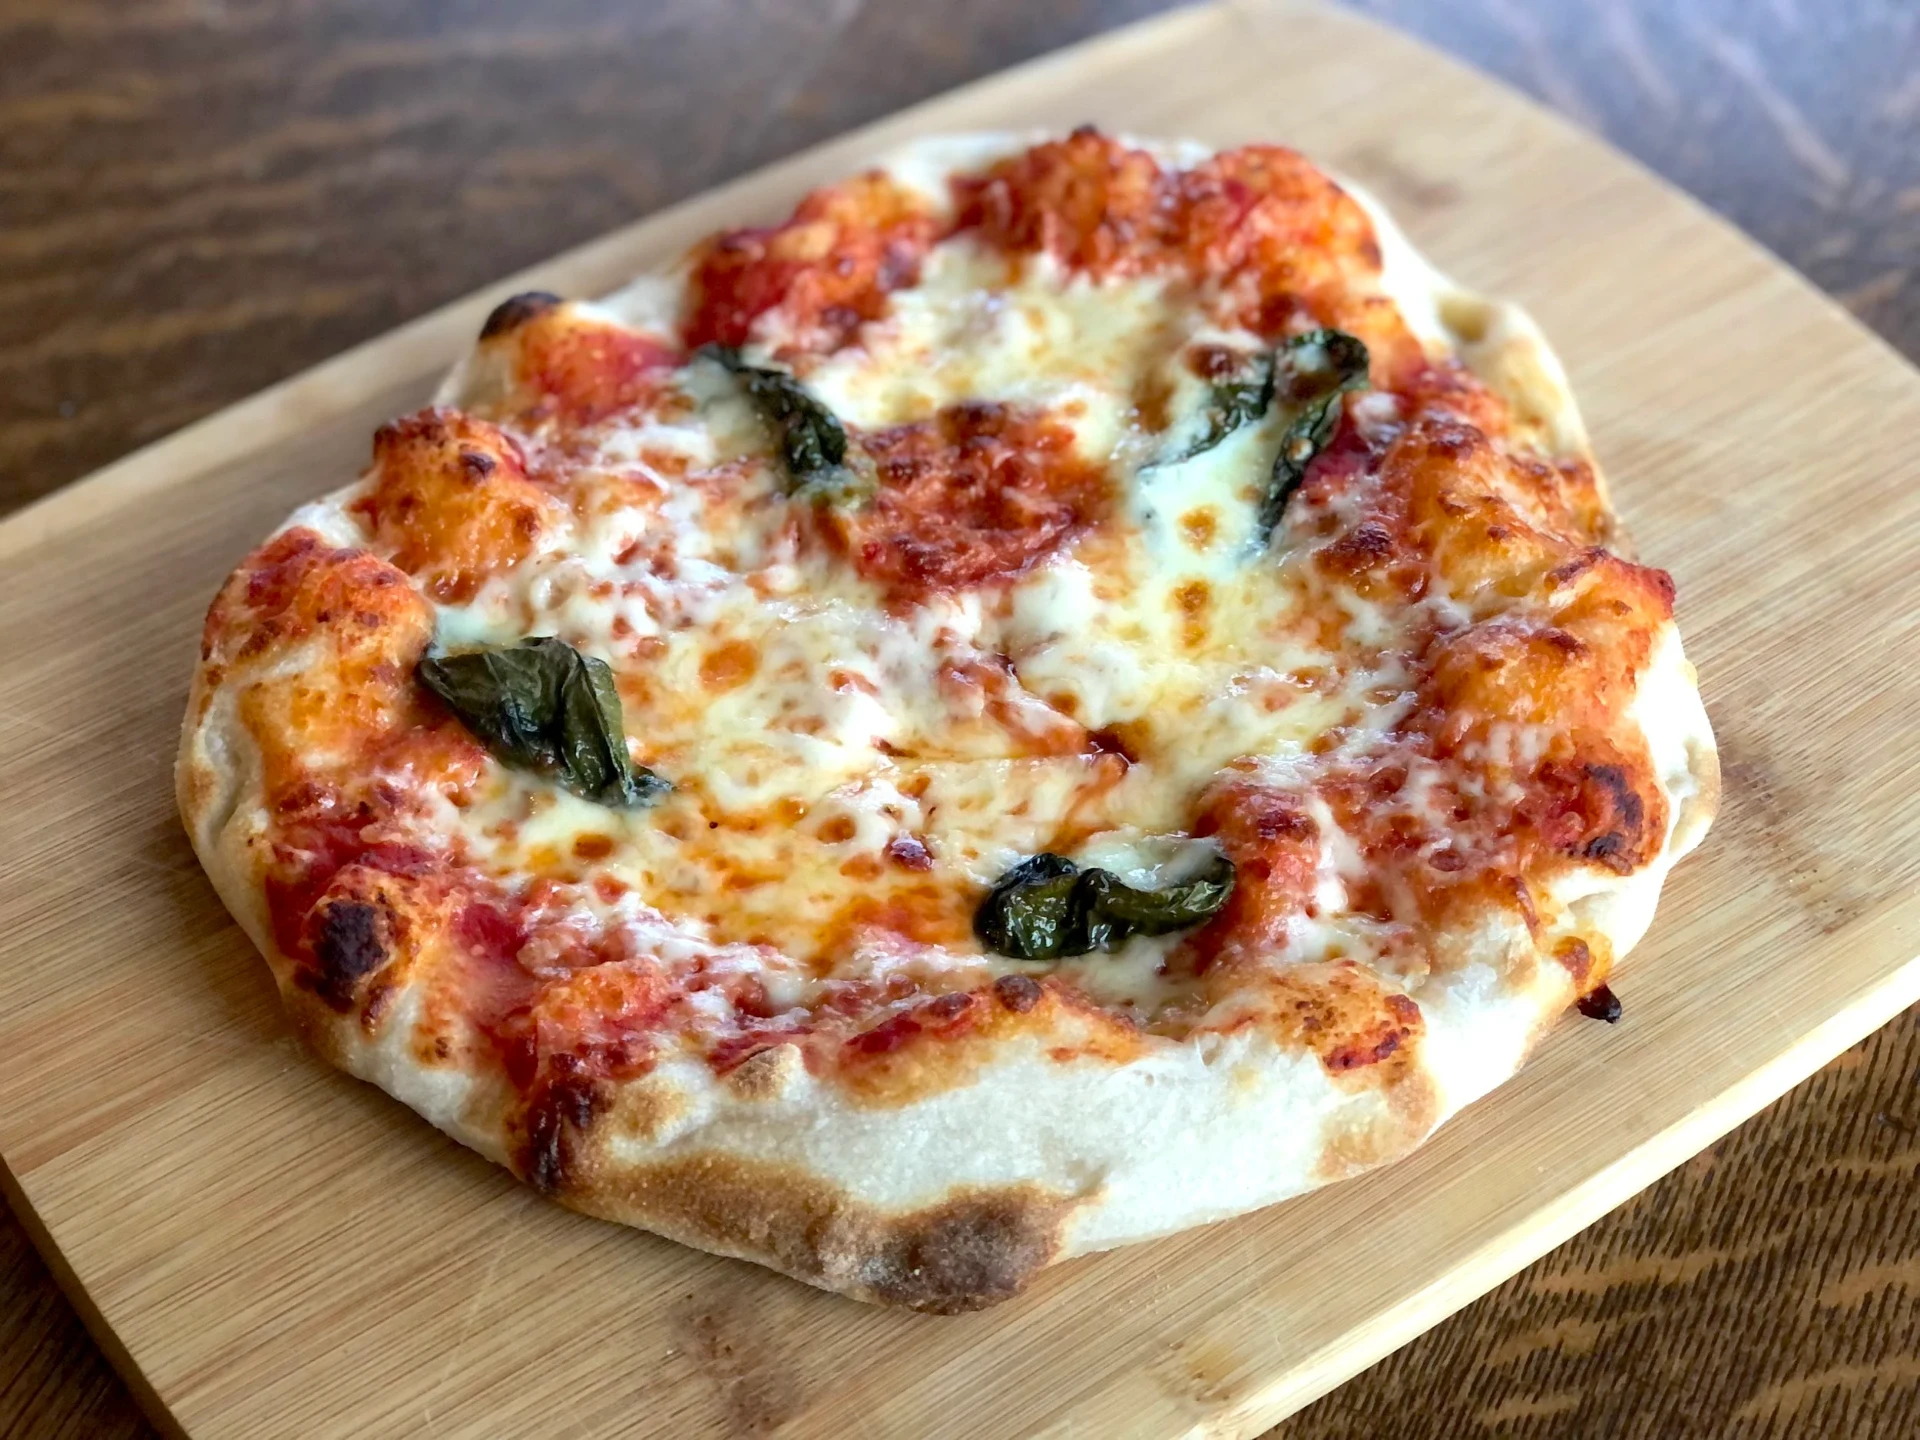
Crispy, Chewy, and Worth Every Bubble
IntermediateSourdough PizzaDough
by Henry Hunter Jr.
Long fermentation creates complex flavor, crispy edges, and that perfect chewy bite that makes you forget delivery exists.
Fermentation
8-12 hours bulk + 2-4 hours cold proof
Bake Time
8-12 minutes
Yield
4 personal pizzas (10-12 inch) or 2 large pizzas (14-16 inch)

Perfection is not required
"Great bread isn't about perfect technique—it's about understanding the dough."— Henry Hunter Jr.
By Henry Hunter Jr., founder of Crust & Crumb Academy and Baking Great Bread at Home.
Authentic Flavor
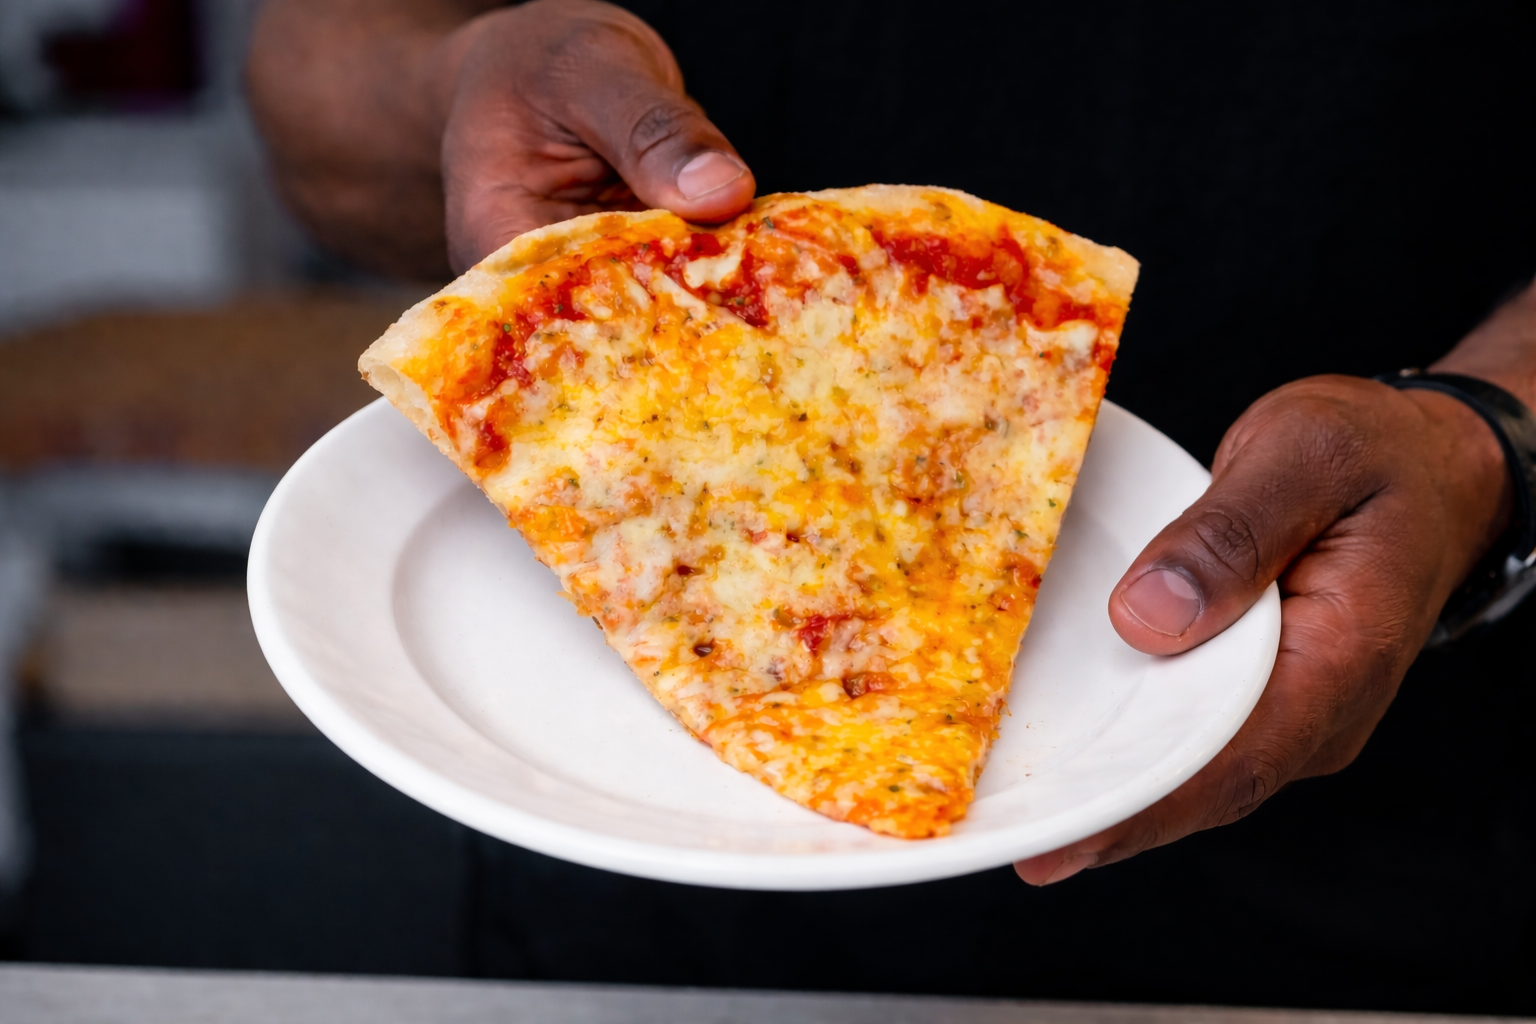
Once you taste sourdough pizza, there's no going back. The slow overnight fermentation develops flavors that commercial yeast can't touch, while the natural leavening creates those beautiful bubbles and charred spots that make artisan pizza so good. This dough is flexible enough to work in a home oven, on a pizza stone, in a cast iron skillet, or even on the grill.
Equipment Needed
Ingredients
Dough
High-protein for chew; 00 flour works too
Room temperature
Fed 4-8 hours before, bubbly and active
Extra virgin
Optional, helps browning in home ovens
Pro Tip
Your starter should be at peak activity, meaning it has doubled in size, is bubbly throughout, and domes slightly on top. If it has collapsed or smells strongly of alcohol, feed it first and wait 4-6 hours before using.
Day 1 (Morning or Previous Evening)
Feed Your Starter
A strong, active starter is the foundation of great sourdough pizza. Feed it at least 4-8 hours before you plan to mix the dough.
Click each step to mark complete
Feed your starter
Take your starter from the fridge. Discard all but 30g, then feed with 50g flour and 50g water. Stir well.
Let it rise
Cover and leave at room temperature (70-75°F ideal) until doubled in size and bubbly, about 4-8 hours depending on your starter's strength and ambient temperature.
Float test (optional)
Drop a small spoonful of starter into water. If it floats, it's ready. If it sinks, give it more time.
⏱ Wait Time
Pro Tip
If you maintain a 100% hydration starter (equal parts flour and water by weight), this recipe will work perfectly. Adjust water slightly if your starter is different.
Day 1 (Evening)
Mix the Dough
Bringing the dough together is simple. The key is dissolving the starter in water before adding flour for even distribution.
Click each step to mark complete
Combine starter and water
In a large bowl, add the active starter to the room temperature water. Use a fork or your hands to break up and dissolve the starter into the water until it looks milky.
Add olive oil and honey
Stir in the olive oil and honey (if using).
Add flour and salt
Add the bread flour and salt. Mix with a stiff spatula or your hands until a forms and no dry flour remains.
Rest (autolyse)
Cover and let rest for 30 minutes. This allows the flour to fully hydrate and makes the dough easier to work with.
Pro Tip
The dough will be sticky at this point. That's normal. Resist the urge to add more flour.
Precise Timers
Use these interactive timers to track your stages.
Autolyse Rest
Day 1 (Evening)
Develop the Dough
builds strength in the dough without heavy kneading. This develops gluten and creates structure for those beautiful bubbles.
Click each step to mark complete
First set of stretch and folds
After the 30-minute rest, wet your hands. Grab one side of the dough, stretch it up, and fold it over itself. Rotate the bowl 90 degrees and repeat. Do this 4 times (all around the bowl). The dough should feel tighter.
Rest 30 minutes
Cover and let rest.
Second set of stretch and folds
Repeat the folding process. The dough should be noticeably smoother and less sticky.
Rest 30 minutes
Cover and let rest.
Third set of stretch and folds
Repeat one more time. By now, the dough should be smooth, slightly puffy, and hold its shape better.
Pro Tip
You can do 2-4 sets of folds depending on your schedule. More folds = stronger dough, but even 2 sets will work fine for pizza.
Precise Timers
Use these interactive timers to track your stages.
Rest After First Fold
Rest After Second Fold
Day 1 (Night) into Day 2 (Morning)
Bulk Fermentation (Overnight)
This is where the magic happens. Overnight develops complex flavors and makes the dough incredibly easy to stretch.
Click each step to mark complete
Transfer to container
After the final fold, transfer the dough to a lightly oiled container or leave in the bowl. Cover tightly with plastic wrap or a lid.
Ferment at room temperature
Leave on the counter overnight, 8-12 hours, at room temperature (65-72°F ideal).
Check in the morning
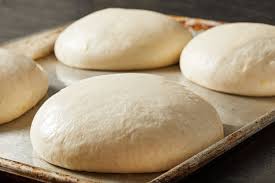
The dough should have roughly doubled in size, look puffy and bubbly, and smell pleasantly tangy.
⏱ Wait Time
Pro Tip
If your kitchen is very warm (above 75°F), the dough may over-ferment overnight. In this case, let it bulk ferment for just 3-4 hours at room temp, then move to the refrigerator to finish.
Day 2 (Morning)
Divide and Ball
Dividing the dough into balls and giving them a final makes them easier to stretch and adds even more flavor.
Click each step to mark complete
Turn out the dough
Lightly flour your work surface. Gently turn the dough out onto the surface, being careful not to deflate it too much.
Divide
Using a , divide the dough into 4 equal pieces (about 235-240g each for personal pizzas) or 2 pieces (about 470g each for large pizzas).
Shape into balls
Working with one piece at a time, pull the edges of the dough toward the center to create tension on the surface. Flip seam-side down and use your hands to rotate the ball on the counter, tucking the edges underneath to create a taut, smooth ball.
Oil and cover
Place the balls on an oiled sheet pan or in individual oiled containers. Brush or drizzle the tops lightly with olive oil to prevent drying. Cover with plastic wrap.
Cold proof
Place in the refrigerator for at least 2 hours, or up to 3 days. Longer cold proofing = more flavor.
Pro Tip
The cold proof relaxes the gluten, making the dough much easier to stretch without springing back. Don't skip this step!
Day 2 (Pizza Night!)
Shape the Pizza
Stretching sourdough pizza dough is easier than you think. The key is letting it warm up first and using gravity to your advantage.
Click each step to mark complete
Remove from fridge
Take the dough balls out of the refrigerator 1-2 hours before you plan to bake. They need to come to room temperature for easy stretching.
Preheat your oven
Set your oven as hot as it will go (500-550°F) with your or inside for at least 45-60 minutes. The stone needs to be screaming hot.
Flour your work surface
Generously flour your work surface and the top of one dough ball. Use a mix of flour and semolina for best results.
Press and stretch
Using your fingertips, press the dough from the center outward, leaving a ½-inch border around the edge for the crust. Don't press the border.
Drape and stretch
Drape the dough over your knuckles (not fingertips) and let gravity stretch it while you slowly rotate. Work around the edges, letting the weight of the dough do the work. Aim for 10-12 inches for personal pizzas, 14-16 inches for large.
Transfer to peel
Dust your generously with semolina or flour. Lay the stretched dough on the peel and give it a shake to make sure it slides freely. If it sticks, lift the edge and add more flour underneath.
Pro Tip
Small holes or thin spots happen. Just pinch them closed. The dough is forgiving. If the dough keeps springing back, let it rest for 5-10 minutes and try again.
Precise Timers
Use these interactive timers to track your stages.
Preheat Stone
Shaping
Choose the shape that works best for your baking method and preference.
Classic Round
RecommendedClick each step to mark complete
Press from center
Press dough from center outward, leaving border.
Drape and rotate
Drape over knuckles and rotate, letting gravity stretch.
Target size
Aim for 10-12 inch personal size or 14-16 inch large.
Transfer
Transfer to floured peel.
Oval/Oblong
Click each step to mark complete
Press into oval
Press and stretch into oval shape.
Fit two on stone
Great for fitting two pizzas on one stone.
Alternative uses
Works well for calzones and stromboli.
Sheet Pan (Grandma Style)
Click each step to mark complete
Oil the pan
Oil a sheet pan generously.
Press into pan
Press dough into pan, stretching to edges.
Rest if needed
Let rest 30 minutes if dough springs back.
Top and bake
Top and bake on bottom rack at 475°F for 15-20 minutes.
Day 2 (Pizza Night!)
Top and Bake
Less is more with toppings. A hot oven and quick bake creates the crispy, bubbly, charred pizza you're craving.
Step by Step
Add sauce
Spoon 3-4 tablespoons of sauce onto the center of the dough. Use the back of the spoon to spread in a spiral, leaving the border clean.
Add cheese
Scatter cheese evenly over the sauce. Don't overload it.
Add toppings
Add any other toppings sparingly. Remember, the dough has to support everything.
Slide onto stone
Give the peel one more shake to confirm the pizza slides freely. Open the oven and use a quick forward motion to slide the pizza onto the hot stone.
Bake
Bake for 8-12 minutes (depending on your oven temp) until the crust is golden brown with some charred spots, the cheese is bubbling and slightly browned, and the bottom is crisp.
Rotate if needed
If your oven has hot spots, rotate the pizza 180 degrees halfway through baking.
Remove and rest
Use the peel to remove the pizza from the oven. Let it rest on a wire rack or cutting board for 1-2 minutes before slicing.
Bake Pizza
For extra char on the crust, turn on the broiler for the last 1-2 minutes of baking. Watch it closely!
Baking Methods
Equipment: Pizza stone/steel, pizza peel
Position stone
Place stone on middle or upper rack.
Preheat
Preheat at max temp for 45-60 minutes.
Launch pizza
Launch pizza onto stone.
Bake
Bake 8-12 minutes.
Broil for char
Use broiler last 1-2 minutes for char.
Nutrition Facts
Per 1 dough ball (about 240g) • servings per recipe
* Values are estimates based on standard ingredients
Storage
Frozen
Coat balls in oil, place in freezer bags with air removed, and freeze for up to 3 months. Thaw overnight in refrigerator before using.
Your Feedback
Rate This Recipe
Loading ratings...
Troubleshooting
Baker's Notes
Common questions and solutions for perfect results
If you're serious about scoring, you need the right blade in your hand. Wire Monkey makes handcrafted bread lames from black walnut — built to last, balanced in the hand, and sharp enough to glide through cold dough cleanly every single time. No dragging, no hesitation marks. Just a clean cut.

Wire Monkey Handcrafted Bread Lames
You Might Also Enjoy
More recipes from our pantry that pair well with this bake.
Get More Recipes in Your Inbox
Join thousands of home bakers receiving weekly recipes, tips, and techniques to elevate your bread game.
No spam, ever. Unsubscribe anytime.
More from Baking Great Bread at Home
Tools, resources, and community to help you bake better bread

Crust & Crumb Academy
Go deeper into your craft. FREE courses, challenges, and real feedback. No gatekeeping. Perfection is not required.

Sourdough Starter Companion
Your AI-powered starter assistant. Track feedings, troubleshoot issues, and keep your starter thriving.

BakingGreatBread.com
Real bread for the rest of us

Baking Great Bread Blog
Recipes, tips, and stories from the bread journey

Recipe Converter
Convert sourdough recipes to yeast and back again

Crust & Crumb App
Your AI-powered baking assistant

Facebook Community
Join 50,000+ bakers sharing, learning, and supporting each other

Sourdough for the Rest of Us
Free beginner's guide to sourdough