The Loaf That Started It All
IntermediateHenry's Foolproof SourdoughLoaf
by Henry Hunter Jr.
A simple, reliable, and flavorful sourdough that delivers great results every time
Fermentation
10-26 hours
Bake Time
32-37 minutes
Yield
About 12 slices

Perfection is not required
"Perfection is not required. Progress is."— Henry Hunter Jr.
By Henry Hunter Jr., founder of Crust & Crumb Academy and Baking Great Bread at Home.
Authentic Flavor
Founder of Crust & Crumb Academy and Baking Great Bread at Home. This is the recipe I wish someone had handed me when I started — simple, forgiving, and built to actually work.
Equipment Needed
Ingredients
The Dough
Four ingredients. The technique does the rest.
Pro Tip
Make sure your starter is active and bubbly — doubled within 4-6 hours of its last feeding. A sluggish starter is the number one reason sourdough loaves don't rise.
Step 1
Mix & Fermentolyse
5 minutes active, 45 minutes rest
We're combining flour, water, and starter all at once and letting the mixture rest before adding salt. This is called — because the starter is already in the mix, fermentation starts from minute one. The flour hydrates, the gluten begins developing, and the wild yeast gets a head start — all while you're doing nothing.
Click each step to mark complete
Combine ingredients
In a large bowl, mix the flour, water, and active sourdough starter together until no dry flour remains. The dough will look rough and shaggy. That's exactly right.
Rest — Fermentolyse
Cover the bowl with a damp towel or plastic wrap. Let it rest for 45 minutes. Don't touch it. The flour is hydrating, the gluten is beginning to develop on its own, and fermentation has already started.
⏱ Wait Time
45 minutes
Pro Tip
The dough will look completely different after the rest — smoother, more cohesive, more alive. That's the fermentolyse doing its job.
Fermentolyse vs. Autolyse
A traditional autolyse mixes only flour and water, then adds the starter later. Fermentolyse adds the starter from the start. Because wild yeast works slowly, starting fermentation early gives you deeper flavor development and a stronger dough without any extra work.
The practical result
By the time you add salt after 45 minutes, your dough has already been fermenting. The gluten has had time to develop passively. The whole process is more efficient — and more forgiving.
The Takeaway
Start fermentation early, let time do the work.
Precise Timers
Use these interactive timers to track your stages.
Fermentolyse Rest
Step 2
Add Salt & Rubaud Mix
10 minutes active
After the rest, we add salt and work it into the dough using the method. This develops without traditional kneading — and you'll feel the dough transform in your hands.
Click each step to mark complete
Add salt
Sprinkle the salt evenly over the surface of the dough. Dimple it in gently with wet fingers.
Rubaud method
Wet your hands. Cup your hand underneath the dough and scoop upward, lifting the dough and letting it fold back on itself. Rotate the bowl slightly and repeat. Work continuously for about 10 minutes until the salt is fully incorporated and the dough feels smooth, cohesive, and noticeably stronger.
⏱ Wait Time
45 minutes
Pro Tip
The Rubaud method is gentle but effective. You're not kneading — you're developing gluten through repeated lifting and folding. By the end, the dough should feel completely different from when you started.
Precise Timers
Use these interactive timers to track your stages.
Rubaud Mixing
Step 3
Bulk Fermentation — 3 Sets of Coil Folds
3 sets, 30-45 minutes apart
This is where the dough builds strength and flavor. Three sets of , each followed by a rest. Between every fold, fermentation is actively happening. By the time you finish the third set, the dough will be noticeably stronger, more elastic, and full of gas.
Click each step to mark complete
Coil fold — Set 1
Wet your hands. Slide both hands under the center of the dough and gently lift. Let the ends hang and fold under naturally as you lower the dough back. Rotate the bowl 180 degrees and repeat. That's one coil fold. Do 3-4 passes per set. Cover and rest 30-45 minutes.
Coil fold — Set 2
Repeat the coil fold sequence. The dough should already feel stronger and less sticky than during Set 1. Cover and rest another 30-45 minutes.
Coil fold — Set 3
Repeat the coil fold sequence one final time. By now the dough should feel strong, elastic, and hold its shape when lifted. It will be noticeably less sticky and full of gas bubbles. Cover and rest 30-45 minutes before shaping.
⏱ Wait Time
1.5-2.5 hours total
Pro Tip
Wet hands for every fold. Don't add flour. The stickiness is normal and will diminish with each set. Trust the process.
The folds build strength
Each coil fold stretches and stacks the gluten network, creating the structure that will trap gas and give you oven spring. Without this structure, the gas escapes and the loaf goes flat.
The rests build flavor
The 30-45 minutes between folds isn't downtime — it's active fermentation. The wild yeast and bacteria are producing gas and developing flavor acids the entire time. The rest is as important as the fold.
The Takeaway
Three folds. Three rests. That's the whole bulk fermentation.
Precise Timers
Use these interactive timers to track your stages.
After Set 1
After Set 2
After Set 3
Step 4
Pre-Shape & Bench Rest
5 minutes active, 15 minutes rest
After the final fold and rest, we turn the dough out and do a relaxed pre-shape. This is not tight shaping — it's just organizing the dough and giving the gluten a chance to relax before the final shape.
Click each step to mark complete
Turn out the dough
Lightly flour your work surface. Turn the dough out of the bowl, letting gravity do the work. Don't force it — let it release naturally.
Gentle stretch
With light hands, gently stretch the dough outward into a rough square. Don't press down or degas it — just encourage it to spread slightly.
Letter fold — relaxed pre-shape
Fold the bottom edge up to the center. Fold the bottom corners inward slightly. Take the top edge and fold it down toward you. Roll the dough up loosely from bottom to top. This is a relaxed pre-shape — not tight.
Bench rest
Cover the pre-shaped dough on the counter and let it rest for 15 minutes. This gives the gluten time to relax so the final shaping is easier and more precise.
⏱ Wait Time
15 minutes
Pro Tip
The pre-shape should feel easy and natural. If the dough is fighting you — tearing or springing back aggressively — give it a few more minutes to relax.
Precise Timers
Use these interactive timers to track your stages.
Bench Rest
Step 5
Final Shape
5 minutes active
This is where surface tension is built — and surface tension is what gives you a tall loaf with a dramatic ear. Take your time here.
Click each step to mark complete
Tighten with the counter
Use a bench scraper to drag the dough toward you across an unfloured section of the counter. The friction grips the bottom of the dough and tightens the surface. Rotate the dough and repeat. Do this 4-6 times until the surface feels taut and the dough holds a round shape without spreading.
Into the banneton
Flour your banneton well — rice flour works best if you have it, otherwise all-purpose is fine. Place the shaped dough seam-side up. The seam becomes the bottom after you flip it out for scoring.
Pro Tip
The key to good shaping is the friction of the counter, not pressure from your hands. Drag, don't push.
Step 6
Cold Proof
Straight into the fridge — no counter rest
Cover the banneton and place it directly into the refrigerator. No counter rest. The dough goes straight from the final shape into the fridge.
Click each step to mark complete
Cover and refrigerate
Cover the banneton with a damp towel or slide it into a large plastic bag. Place it in the refrigerator for a minimum of 8 hours and up to 16 hours. Longer cold proofs develop more complex, tangy flavor.
⏱ Wait Time
8-16 hours
Pro Tip
Cold dough is significantly easier to score than room temperature dough. The cold proof isn't just about flavor — it's a practical advantage at bake time.
Fermentation started at the beginning
The moment you mixed your starter into the flour, fermentation began. Every 45-minute rest between coil folds was active fermentation time. By the time you finish the final shape, the dough has been fermenting for hours. There is nothing left to prove at room temperature.
A counter rest at this point is a liability
Leaving a well-fermented dough at room temperature after shaping only increases the risk of overproofing. The window is narrow and it's easy to miss. The fridge removes that risk entirely — it slows fermentation way down and gives you a controlled environment instead of a race against the clock.
The cold proof is doing the work
The refrigerator isn't stopping fermentation — it's slowing it to a crawl. The dough continues to develop flavor overnight at a pace you can control. This is why loaves cold-proofed for 16 hours taste more complex than ones proofed for 8.
The Takeaway
Final shape goes straight into the fridge. Every time. The fermentation was already done.
Precise Timers
Use these interactive timers to track your stages.
Cold Proof (minimum)
Cold Proof (maximum)
Step 7
Preheat, Freeze & Score
45 minutes preheat, 15 minutes freezer
The next morning — or whenever you're ready to bake — pull the Dutch oven into the oven and get it screaming hot. While it preheats, you'll use the freezer to firm up the dough for scoring.
Watch the Technique
How to score bread for a clean ear
Click each step to mark complete
Preheat the oven and vessel
Place your Dutch oven with the lid on inside the oven. Preheat to 475°F (245°C). Give it a full 45 minutes — not just until the oven beeps. The vessel needs to be completely saturated with heat.
Freezer trick
While the oven preheats, pull the banneton from the refrigerator and place it in the freezer for 15 minutes. This firms up the surface of the dough and makes scoring significantly cleaner and more precise — especially in warm weather.
Score
Remove the dough from the freezer and turn it out onto a piece of parchment paper. Working quickly, score the top with a lame or sharp knife — one confident cut, slightly off-center, at a 30-45 degree angle. One smooth motion, start to finish. Don't hesitate, don't go back over it.
⏱ Wait Time
45 minutes
Pro Tip
A fully preheated vessel bakes a fundamentally different loaf than one that only preheated for 20 minutes. Don't rush this step.
Precise Timers
Use these interactive timers to track your stages.
Oven Preheat
Freezer
Shaping
Shape the Dough
This recipe uses a classic round boule. Pre-shape first, bench rest 15 minutes, then final shape using counter friction to build surface tension.
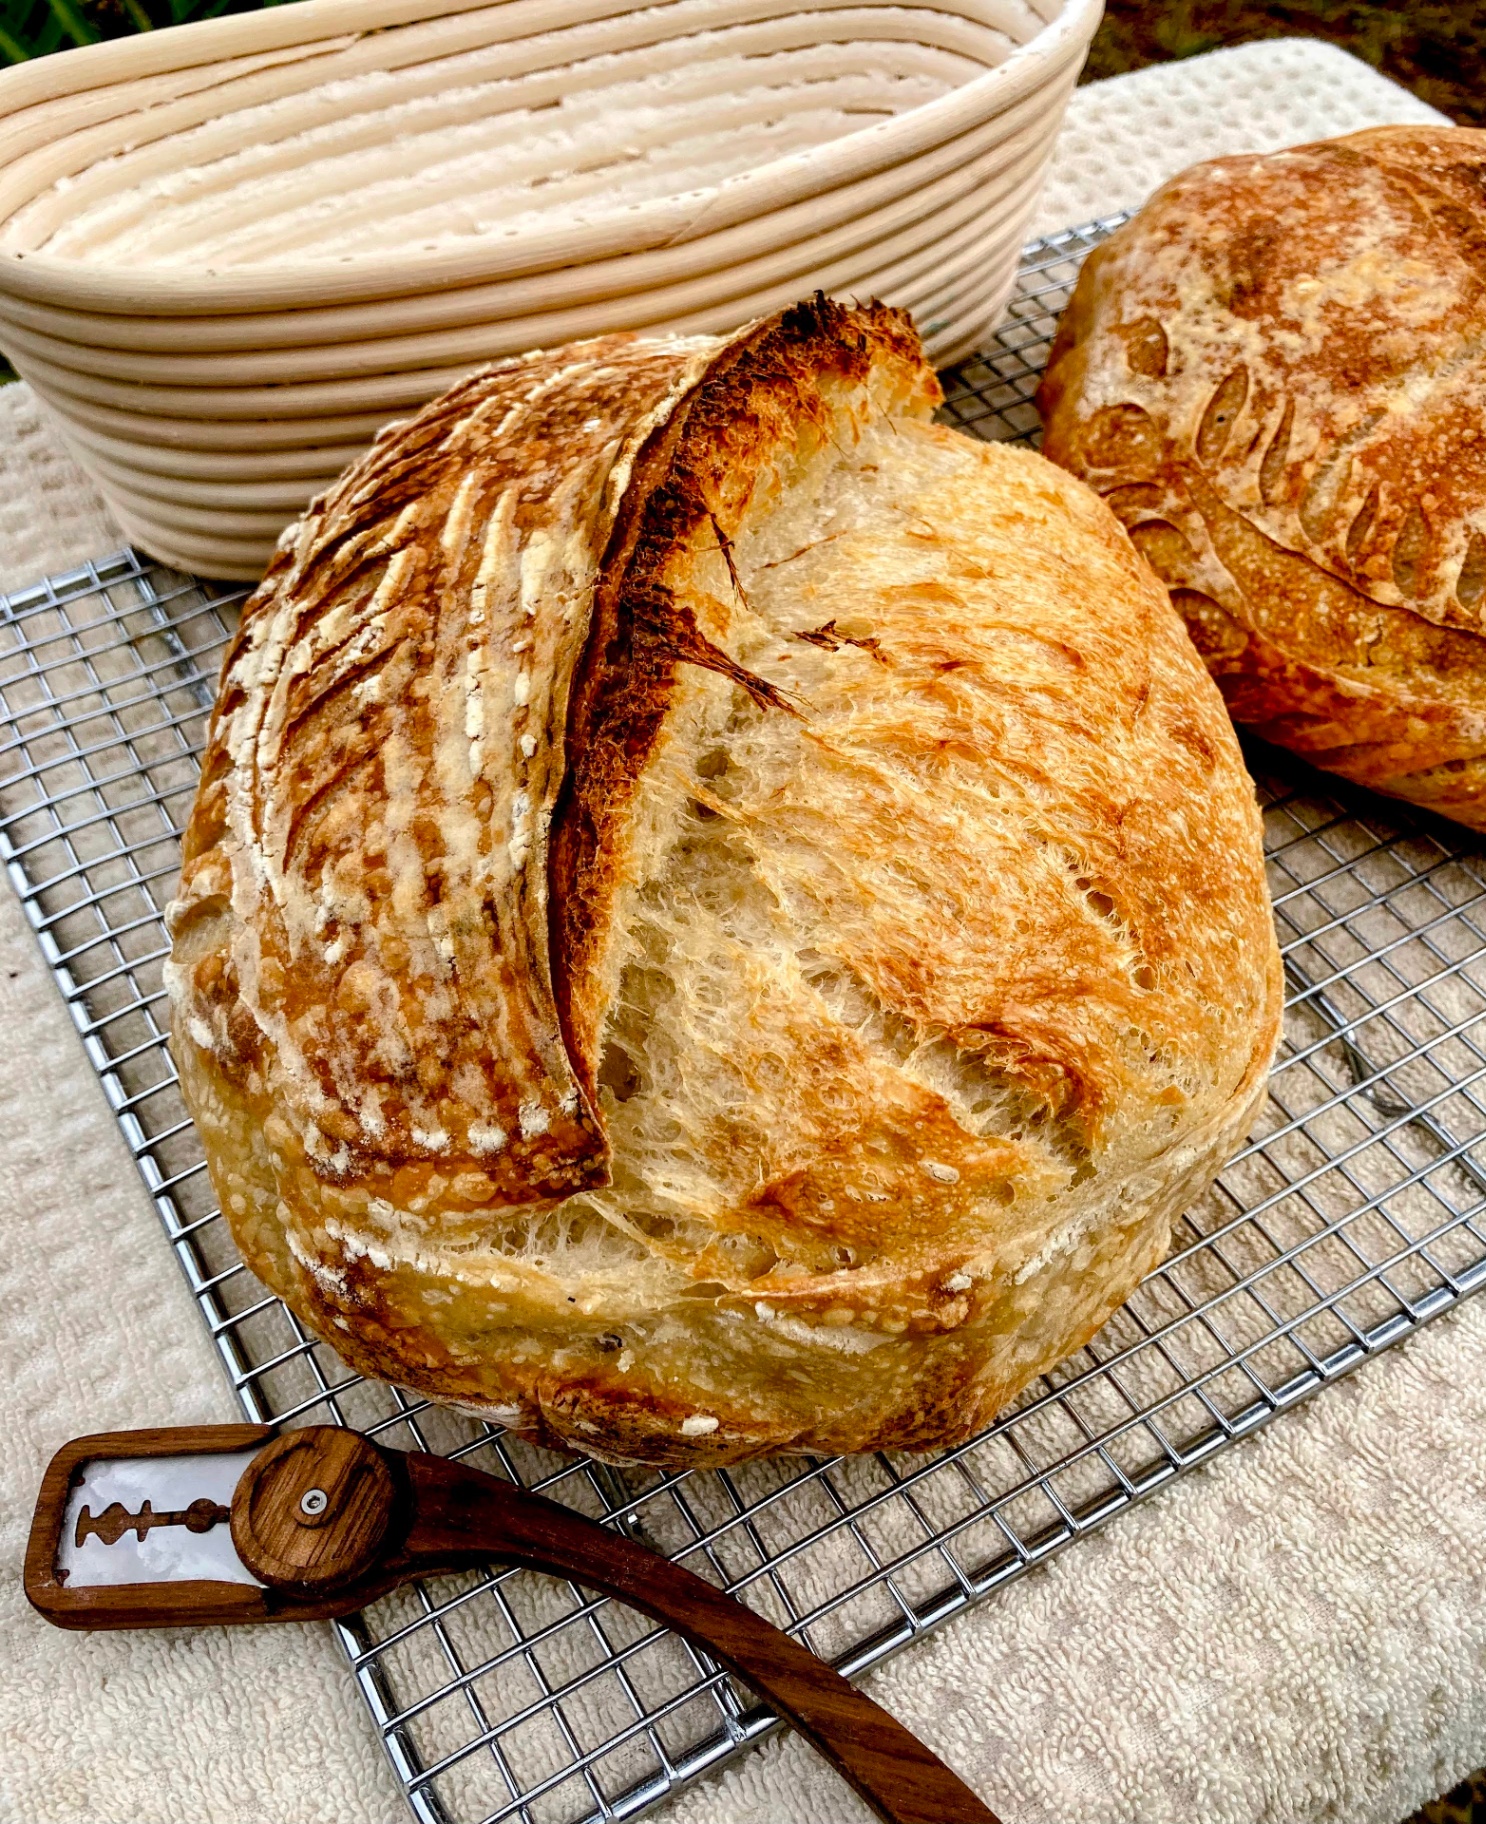
Boule (Round Loaf)
The classic shape for this recipe. Works perfectly in Dutch ovens and baking shells.
RecommendedClick each step to mark complete
Turn out
Turn the dough onto a lightly floured surface after the final coil fold rest. Let gravity release it from the bowl.
Gentle stretch
Gently stretch into a rough square without degassing.
Letter fold — relaxed pre-shape
Fold bottom to center. Fold corners in. Fold top down. Roll loosely from bottom to top. Cover and bench rest 15 minutes.
Final shape — friction method
Use a bench scraper to drag the dough toward you across an unfloured counter 4-6 times, rotating as you go. The friction builds surface tension. The surface should feel taut and the loaf should hold its shape.
Into the banneton
Place seam-side up in a well-floured banneton. Cover and refrigerate immediately — no counter rest.
Batard (Oval Loaf)
An elongated oval shape that fits oblong Dutch ovens and gives you more even slices. Same technique — just a different final shape.
Click each step to mark complete
Turn out
Turn the dough onto a lightly floured surface. Let gravity release it — don't pull.
Gentle stretch
Gently stretch into a rough rectangle, longer than it is wide, without degassing.
Letter fold — relaxed pre-shape
Fold bottom third up to center. Fold top third down over it, like a letter. Gently seal the seam. Cover and bench rest 15 minutes.
Final shape — tension roll
Flip seam-side up. Fold bottom edge up two-thirds. Fold top edge down to meet it. Roll toward you to seal, applying gentle pressure. Use the edge of your hands to taper the ends slightly.
Into the banneton
Place seam-side up in a well-floured oval banneton or a towel-lined loaf pan. Cover and refrigerate immediately — no counter rest.
Proof Test: After the cold proof, the dough should be noticeably puffy but still firm and cold. If you poke it with a floured finger, it should spring back slowly and leave a slight indent. If it doesn't spring back at all, it may be overproofed — bake it immediately without the freezer step.
Step 8
Bake & Cool
Two phases. Steam first for maximum oven spring. Open vessel second for crust color and crunch.
Step by Step
Load the dough
Using the parchment paper, carefully lower the scored dough into the screaming hot Dutch oven. Put the lid on immediately.
Bake covered
Bake at 475°F (245°C) with the lid on for 22 minutes. The trapped steam allows the loaf to expand fully before the crust sets — this is where oven spring happens.
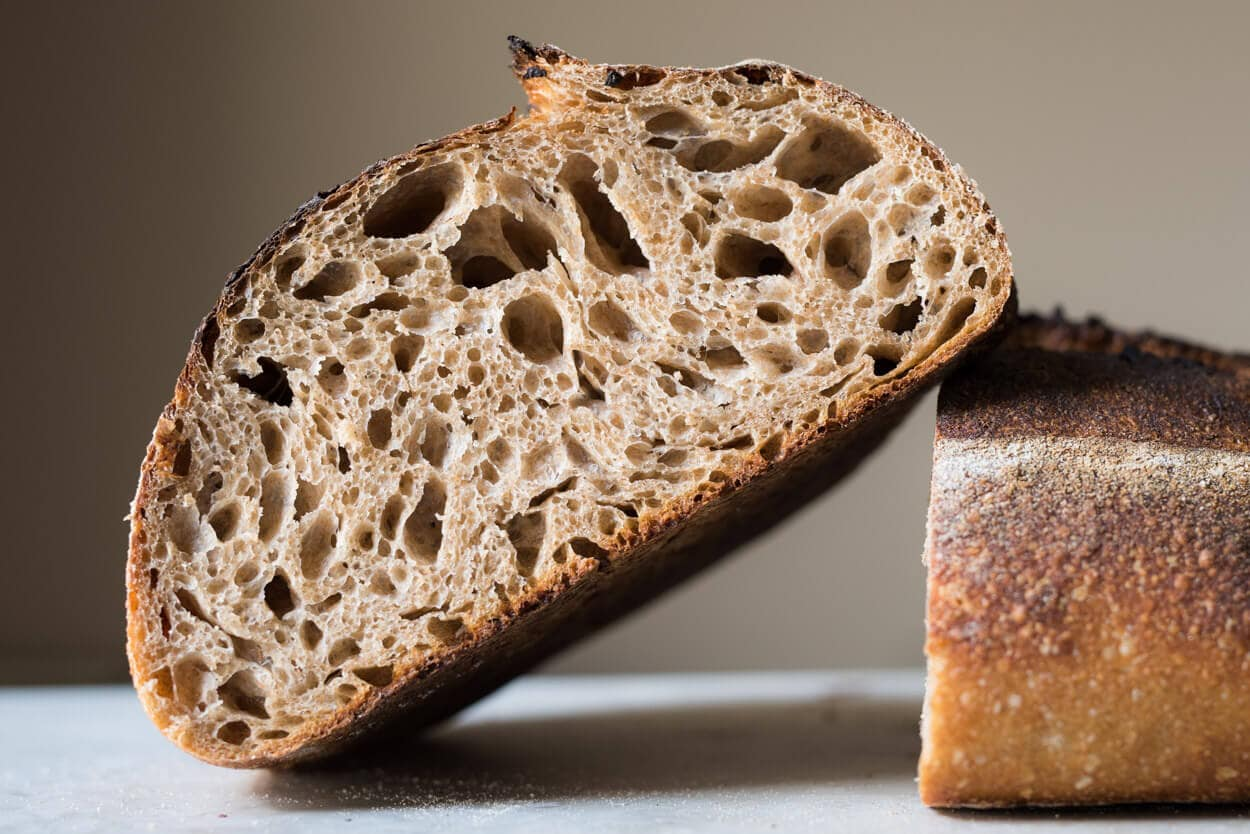
Bake uncovered
Remove the lid and continue baking for 10-15 minutes until the crust is deep golden brown and the internal temperature reaches 200°F (93°C). Check at 10 minutes and adjust based on color.
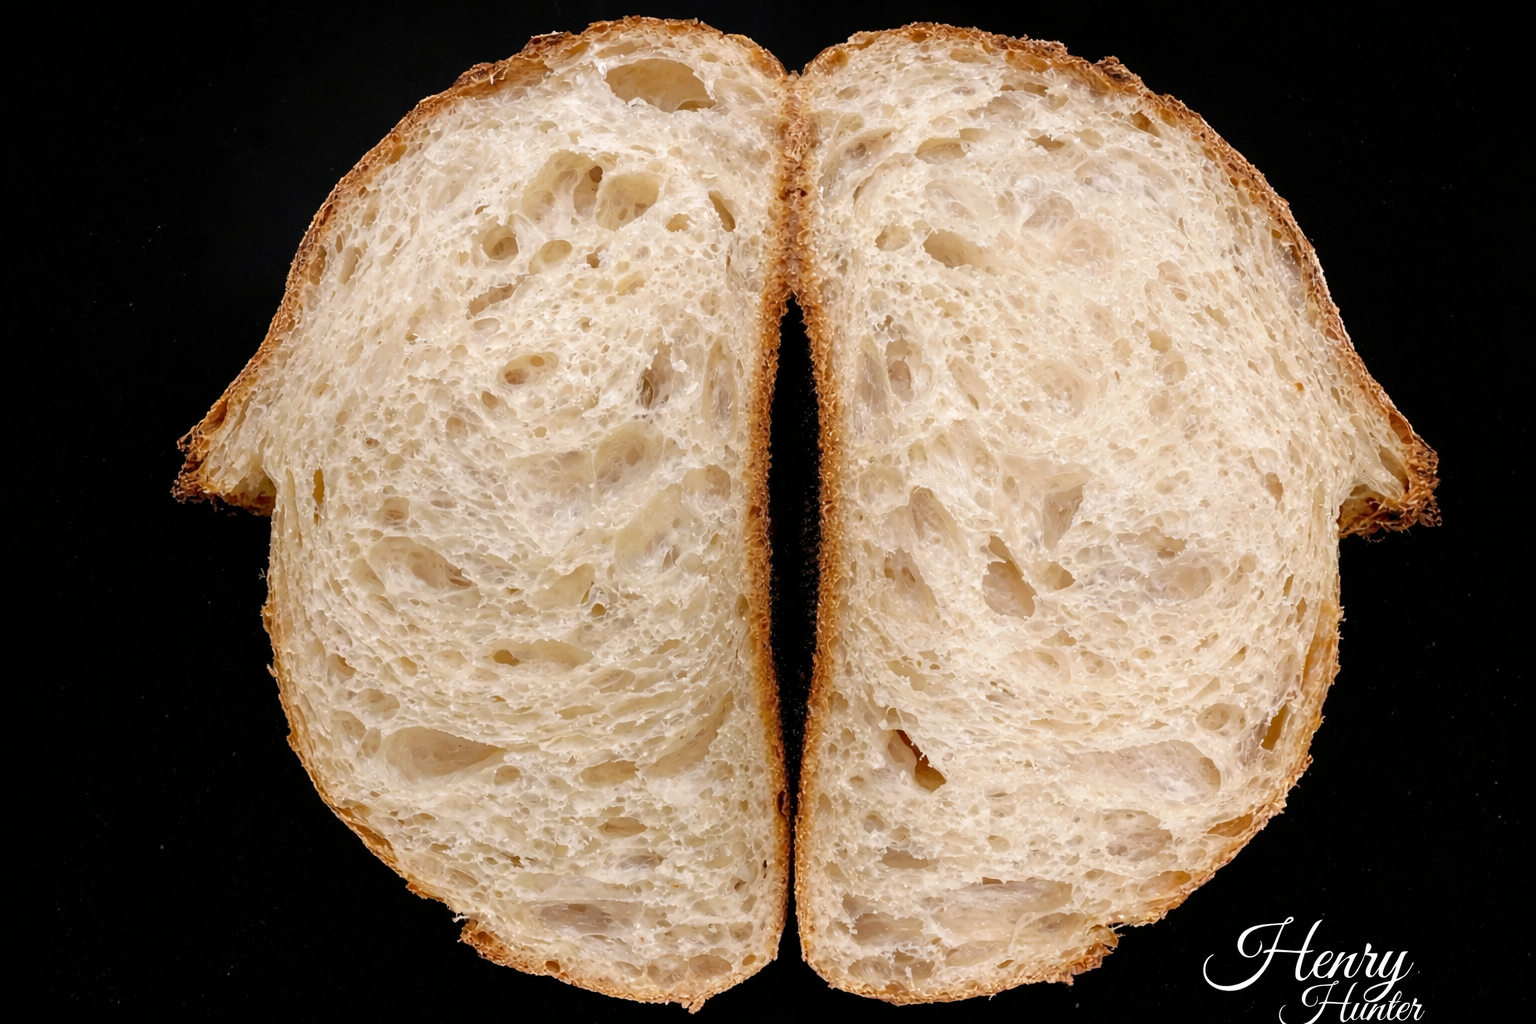
Cool completely
Transfer to a wire rack. Let the loaf cool for at least 1 hour before slicing. The crumb is still setting as it cools — slicing too early gives you a gummy interior. It's worth the wait.
Bake Covered
Bake Uncovered
Cool
When you tap the bottom of the baked loaf, it should sound hollow. That's the sound of a properly baked loaf.
Baking Methods
The covered vessel traps steam in the critical first minutes, allowing maximum oven spring before the crust sets. This is the recommended method.
Equipment: Dutch oven, combo cooker, or Challenger Breadware baking shell
Load the dough
Lower scored dough on parchment into the preheated Dutch oven. Put the lid on immediately.
Bake covered
Bake covered at 475°F (245°C) for 22 minutes.
Bake uncovered
Remove lid. Bake 10-15 more minutes until deep golden brown and internal temp reaches 200°F (93°C).
Cool
Wire rack, at least 1 hour before slicing.
"Don't rush the preheat. A vessel that's been in a 475°F oven for 45 minutes bakes a fundamentally different loaf than one that's only been in for 20 minutes."
Nutrition Facts
Per 1 slice (about 50g) • 12 servings per recipe
* Values are estimates based on standard ingredients
Storage
Room Temperature
Best the day it's baked. Store cut-side down on a cutting board for 2-3 days. Avoid plastic bags — they trap moisture and soften the crust.
Frozen
Slice first, then freeze in a zip bag for up to 3 months. Toast frozen slices directly — no thawing needed.
💡 Day-old loaf? Spritz lightly with water and warm at 350°F (175°C) for 8-10 minutes. The crust comes back almost completely.
Your Feedback
Rate This Recipe
Loading ratings...
Troubleshooting
Baker's Notes
Common questions and solutions for perfect results
If you're serious about scoring, you need the right blade in your hand. Wire Monkey makes handcrafted bread lames from black walnut — built to last, balanced in the hand, and sharp enough to glide through cold dough cleanly every single time. No dragging, no hesitation marks. Just a clean cut.

Wire Monkey Handcrafted Bread Lames
You Might Also Enjoy
More recipes from our pantry that pair well with this bake.

Get More Recipes in Your Inbox
Join thousands of home bakers receiving weekly recipes, tips, and techniques to elevate your bread game.
No spam, ever. Unsubscribe anytime.
More from Baking Great Bread at Home
Tools, resources, and community to help you bake better bread

Crust & Crumb Academy
Go deeper into your craft. FREE courses, challenges, and real feedback. No gatekeeping. Perfection is not required.

Sourdough Starter Companion
Your AI-powered starter assistant. Track feedings, troubleshoot issues, and keep your starter thriving.

BakingGreatBread.com
Real bread for the rest of us

Baking Great Bread Blog
Recipes, tips, and stories from the bread journey

Recipe Converter
Convert sourdough recipes to yeast and back again

Crust & Crumb App
Your AI-powered baking assistant

Facebook Community
Join 50,000+ bakers sharing, learning, and supporting each other

Sourdough for the Rest of Us
Free beginner's guide to sourdough