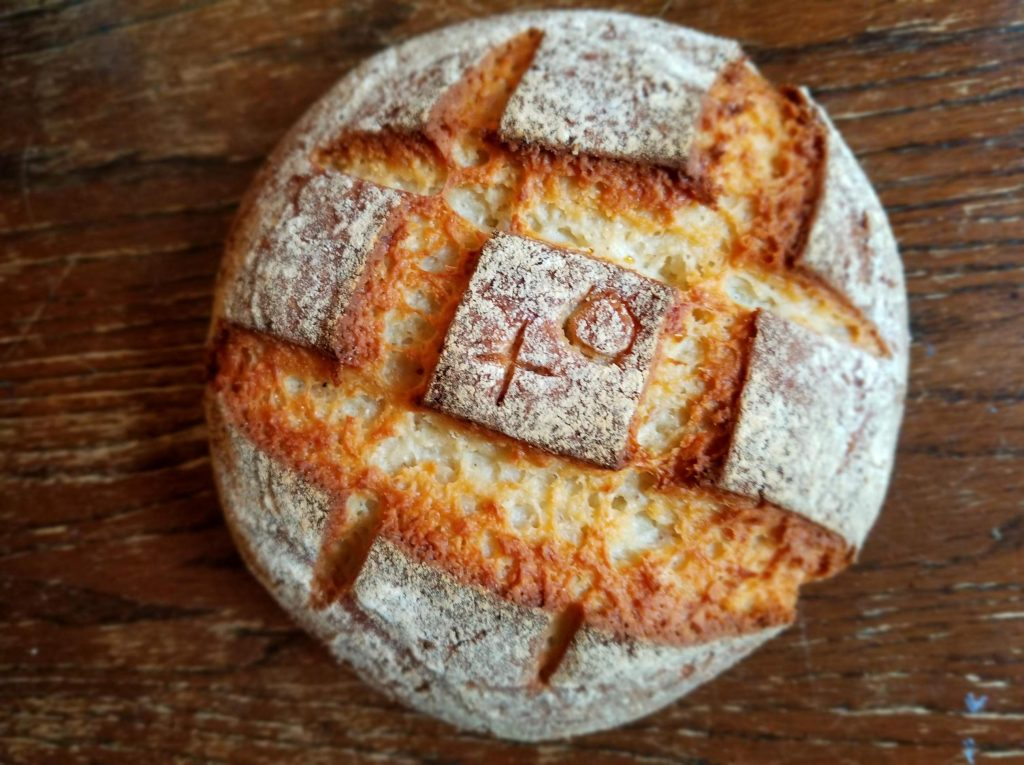
Crusty outside, chewy inside — the artisan loaf everyone deserves
BeginnerGluten-Free ArtisanBoule
by Henry Hunter Jr.
No knead. No gluten. No compromise.
Rise Time
1–2 hours
Bake Time
50–55 minutes
Yield
One round artisan loaf, approximately 700g

Perfection is not required
"Perfection is not required. Progress is."— Henry Hunter Jr.
By Henry Hunter Jr., founder of Crust & Crumb Academy and Baking Great Bread at Home.
Authentic Bread Flavor
Baker, author, and founder of Crust & Crumb Academy
Ingredients
Dough
Pro Tip
Combine white and brown rice flour for the best flavor. White rice alone is bland; brown rice brings nuttiness and a slight earthiness that makes this taste like real artisan bread.
Step 1
Mix the Dough
This is a true no-knead bread — the psyllium husk does the structural work for you. The dough mixes in under 5 minutes and requires no kneading, no folding, no fuss.
Click each step to mark complete
Combine dry ingredients
In a large bowl, whisk together white rice flour, brown rice flour, , , psyllium husk powder, salt, and . Note: Unlike sourdough, instant yeast goes directly into the dry mix — no separate proofing step needed.
Add liquids and mix
Add warm water, apple cider vinegar, and olive oil to the dry ingredients. Stir vigorously for 2 minutes until no dry patches remain and the dough comes together into a thick, slightly sticky ball. The dough will firm up as the psyllium activates — this is normal and correct.
Kneading in Wheat vs. GF Bread
In wheat bread, kneading aligns and strengthens protein strands. In GF bread, there is no gluten to develop — kneading would only work air out of the psyllium gel and break down the structure we're building. The no-knead method lets psyllium hydrate fully and the from yeast build structure naturally, without mechanical intervention.
The Takeaway
No kneading = better structure in GF bread. Trust the process.
Step 2
Shape the Boule
GF dough shapes differently than wheat dough — you're forming a ball with wet hands, not building surface tension through friction. The goal is a smooth, round shape that will hold in the oven.
Click each step to mark complete
Shape with wet hands
Wet your hands thoroughly. Turn the dough onto a lightly rice-floured surface. With wet hands, gently form the dough into a round ball, rotating it and smoothing the surface. Don't try to build tension like a wheat — just create a smooth round shape. The dough should be firm enough to hold its form.
Place in proofing vessel
You have two options: (1) Place the shaped boule on a parchment-lined sheet pan, cover with a bowl, and proof. (2) Place in a rice-flour-dusted , cover, and proof. The banneton gives a more dramatic pattern, but the sheet pan method is more beginner-friendly.
Step 3
Rise
Cover your shaped boule and proof at room temperature for 60–90 minutes until noticeably puffed and the surface springs back slowly when lightly pressed.
Click each step to mark complete
Proof until puffed
Cover loosely and let rise at room temperature (75–78°F / 24–26°C). The boule should increase in size by about 30–40%. Use the : gently press a floured finger into the surface — if it springs back slowly, it's ready to bake. If it springs back immediately, give it more time. If it doesn't spring back at all, it's overproofed.
⏱ Wait Time
60–90 minutes
Precise Timers
Use these interactive timers to track your stages.
Proof Time
Step 4
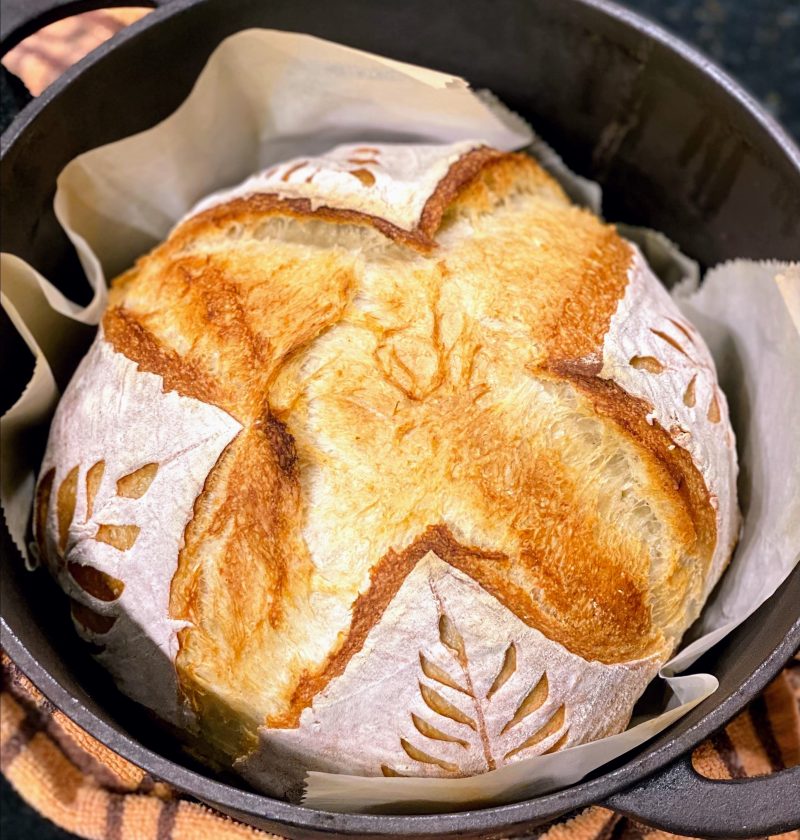
Score and Bake
The is your secret weapon. It traps steam from the dough during the first phase of baking, which keeps the crust soft and extensible — allowing the loaf to expand fully before the crust sets. Remove the lid in the second phase to develop color and crunch.
Why Steam Matters
Steam keeps the crust moist and extensible during the first 15–20 minutes of baking. This allows the dough to expand freely () before the crust hardens. A crisp, crackling GF crust is only possible if the dough gets a chance to expand fully first. Without the lid, you'd get a thick, tough, constricted crust.
The Takeaway
Lid on = steam = crust expands. Lid off = steam escapes = crust crisps.
Step by Step
Preheat Dutch oven
While the dough proofs, place the Dutch oven (with lid) in your oven and preheat to 500°F (260°C) for 45 minutes minimum. A fully preheated Dutch oven is non-negotiable for proper crust and .
Score the loaf
Just before loading, score the top of the boule with a or sharp serrated knife. A single deep slash (½ inch / 1.25 cm) or an X pattern works beautifully. controls where the loaf opens in the oven — without it, the crust can tear randomly or restrict oven spring.
Bake covered
Lower the scored loaf (on parchment) into the blazing Dutch oven. Cover and bake at 500°F (260°C) for 20 minutes.
Bake uncovered
Remove the lid, reduce to 450°F (230°C), and bake 28–32 more minutes until deeply golden brown. Internal temperature: 205–210°F (96–99°C).
Cool on a wire rack
Remove from the Dutch oven and cool on a wire rack for at least 90 minutes before cutting. You'll hear the crust crackling as it cools — that's the moisture escaping and the crust setting. Don't cut into it yet. That crackle is the sound of bread doing its job.
Covered Bake
Uncovered Bake
Cool
Baking Methods
The recommended method for the best crust and oven spring
Equipment: 5–7 Qt Dutch oven, preheated
Preheat
Preheat Dutch oven at 500°F (260°C) for 45 minutes.
Score
Score the top with a or sharp knife.
Bake covered
Bake covered at 500°F (260°C) for 20 minutes.
Bake uncovered
Remove lid, reduce to 450°F (230°C), bake 28–32 minutes until deep golden.
Cool
Cool on wire rack 90 minutes before slicing.
Nutrition Facts
Per 1 slice (about 60g) • 12 servings per recipe
* Values are estimates based on standard ingredients
Storage
Room Temperature
2 days in a linen bread bag or cut-side down on a board
Refrigerated
Not recommended — accelerates staling
Frozen
Up to 3 months. Slice before freezing for easy toasting.
Refresh
Run the loaf briefly under cold water and place in a 400°F (200°C) oven for 8 minutes. The water re-steams the crust from inside.
Your Feedback
Rate This Recipe
Loading ratings...
Troubleshooting
Baker's Notes
Common questions and solutions for perfect results
You Might Also Enjoy
More recipes from our pantry that pair well with this bake.


Get More Recipes in Your Inbox
Join thousands of home bakers receiving weekly recipes, tips, and techniques to elevate your bread game.
No spam, ever. Unsubscribe anytime.
More from Baking Great Bread at Home
Tools, resources, and community to help you bake better bread

Crust & Crumb Academy
Go deeper into your craft. FREE courses, challenges, and real feedback. No gatekeeping. Perfection is not required.

Sourdough Starter Companion
Your AI-powered starter assistant. Track feedings, troubleshoot issues, and keep your starter thriving.

BakingGreatBread.com
Real bread for the rest of us

Baking Great Bread Blog
Recipes, tips, and stories from the bread journey

Recipe Converter
Convert sourdough recipes to yeast and back again

Crust & Crumb App
Your AI-powered baking assistant

Facebook Community
Join 50,000+ bakers sharing, learning, and supporting each other

Sourdough for the Rest of Us
Free beginner's guide to sourdough