Crispy Outside, Fluffy Inside
BeginnerGluten-FreeFocaccia
by Henry Hunter Jr.
The gluten-free bread that makes people say "wait, this is gluten-free?"
Bake Time
25-30 minutes
Yield
1 focaccia (about 12 pieces)

Perfection is not required
"Great bread isn't about perfect technique—it's about understanding the dough."— Henry Hunter Jr.
By Henry Hunter Jr., founder of Crust & Crumb Academy and Baking Great Bread at Home.
Authentic Flavor
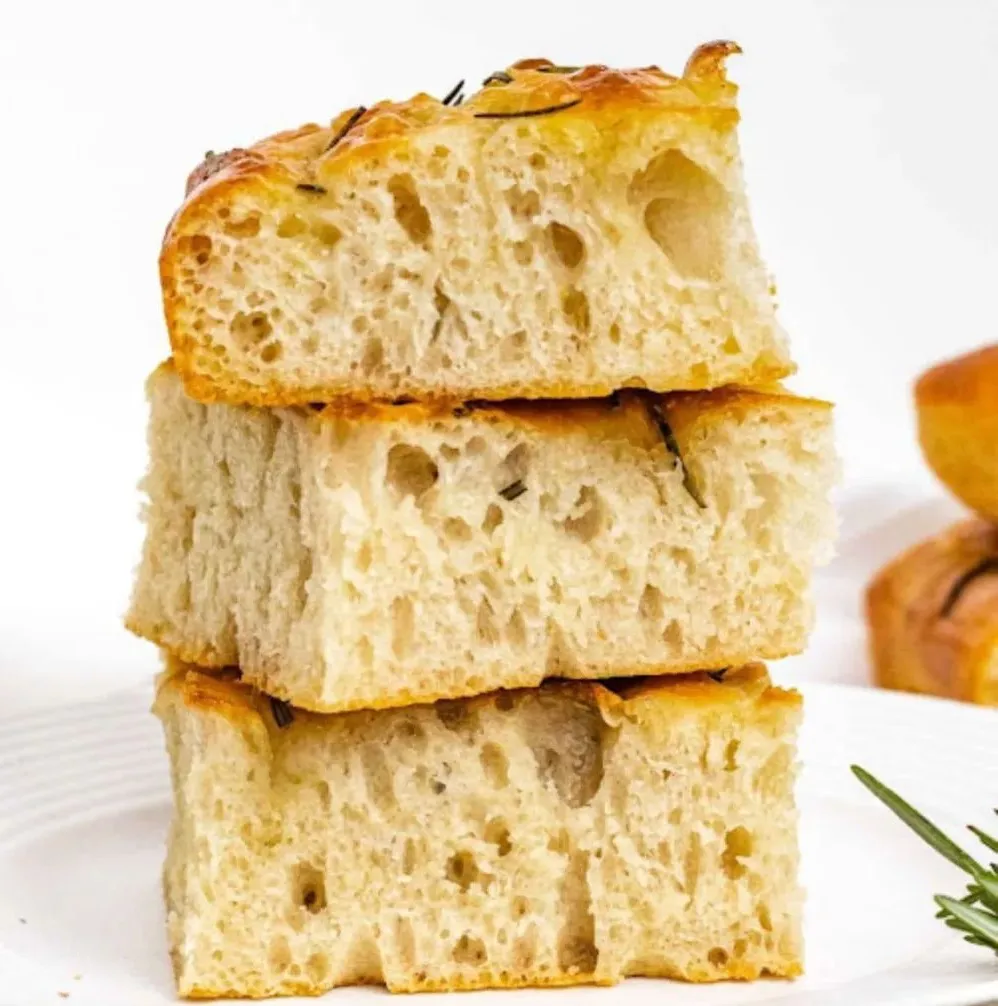
This defies everything you thought you knew about gluten-free bread. It's crispy on the outside, soft and airy on the inside, and loaded with olive oil and rosemary flavor. Perfect as a side dish, split for sandwiches, or eaten warm straight from the oven.
Equipment Needed
Ingredients
Gluten-Free Flour Blend (From Scratch)
Make your own blend or use 300g store-bought GF flour
Dough
The main focaccia dough
Toppings
The signature focaccia toppings
Pro Tip
is all about the olive oil. Use the good stuff here—you'll taste it. This high dough is more like a thick batter, which creates the airy texture.
Step 1
Make the Dough
10 minutes active time
Gluten-free dough is more like a thick batter than traditional dough. Don't worry if it seems too wet—that high is what creates the airy texture.
Click each step to mark complete
Combine dry ingredients
In a large bowl or , whisk together the flour blend, (if using), , salt, , and sugar.
Add wet ingredients
Pour in warm water, ¼ cup olive oil, and apple cider vinegar.
Mix until smooth
Stir with a spatula or mix on low speed until combined. Then beat vigorously for 2-3 minutes until smooth. The dough will be thick and sticky, like thick pancake batter.
⏱ Wait Time
Beat the dough until smooth
Pro Tip
The dough should be wet enough that it spreads when you pour it into the pan but thick enough to hold some shape.
Precise Timers
Use these interactive timers to track your stages.
Mix Dough
Step 2
Prepare the Pan
5 minutes
A well-oiled pan is the secret to that crispy, golden bottom that makes irresistible.
Click each step to mark complete
Oil the pan generously
Pour 2-3 tablespoons of olive oil into your (9x13-inch). Tilt to coat the bottom and sides completely.
Transfer dough
Scrape the dough into the oiled pan.
Spread to edges
Using oiled hands or a wet spatula, spread the dough to reach the edges of the pan. It doesn't need to be perfect—the dough will relax and fill in during rising.
Pro Tip
Oiling your hands makes spreading the sticky dough much easier.
Step 3
Rise
60-75 minutes
Unlike traditional , gluten-free focaccia only needs one rise. The and help compensate for the lack of .
Click each step to mark complete
Cover loosely
Cover the pan loosely with oiled plastic wrap to prevent sticking.
Let rise until doubled
Let rise in a warm spot until the dough has puffed up noticeably and nearly doubled, 60-75 minutes. Use the : the dough should spring back slowly.
Preheat oven
About 20 minutes before baking, preheat your oven to 425°F (220°C).
⏱ Wait Time
Let the dough rise until nearly doubled
Pro Tip
If your kitchen is cold, turn your oven to 200°F, then turn it off and let the dough rise inside with the door cracked.
Precise Timers
Use these interactive timers to track your stages.
Rise Check
Preheat Oven
Step 4
Dimple and Top
5 minutes
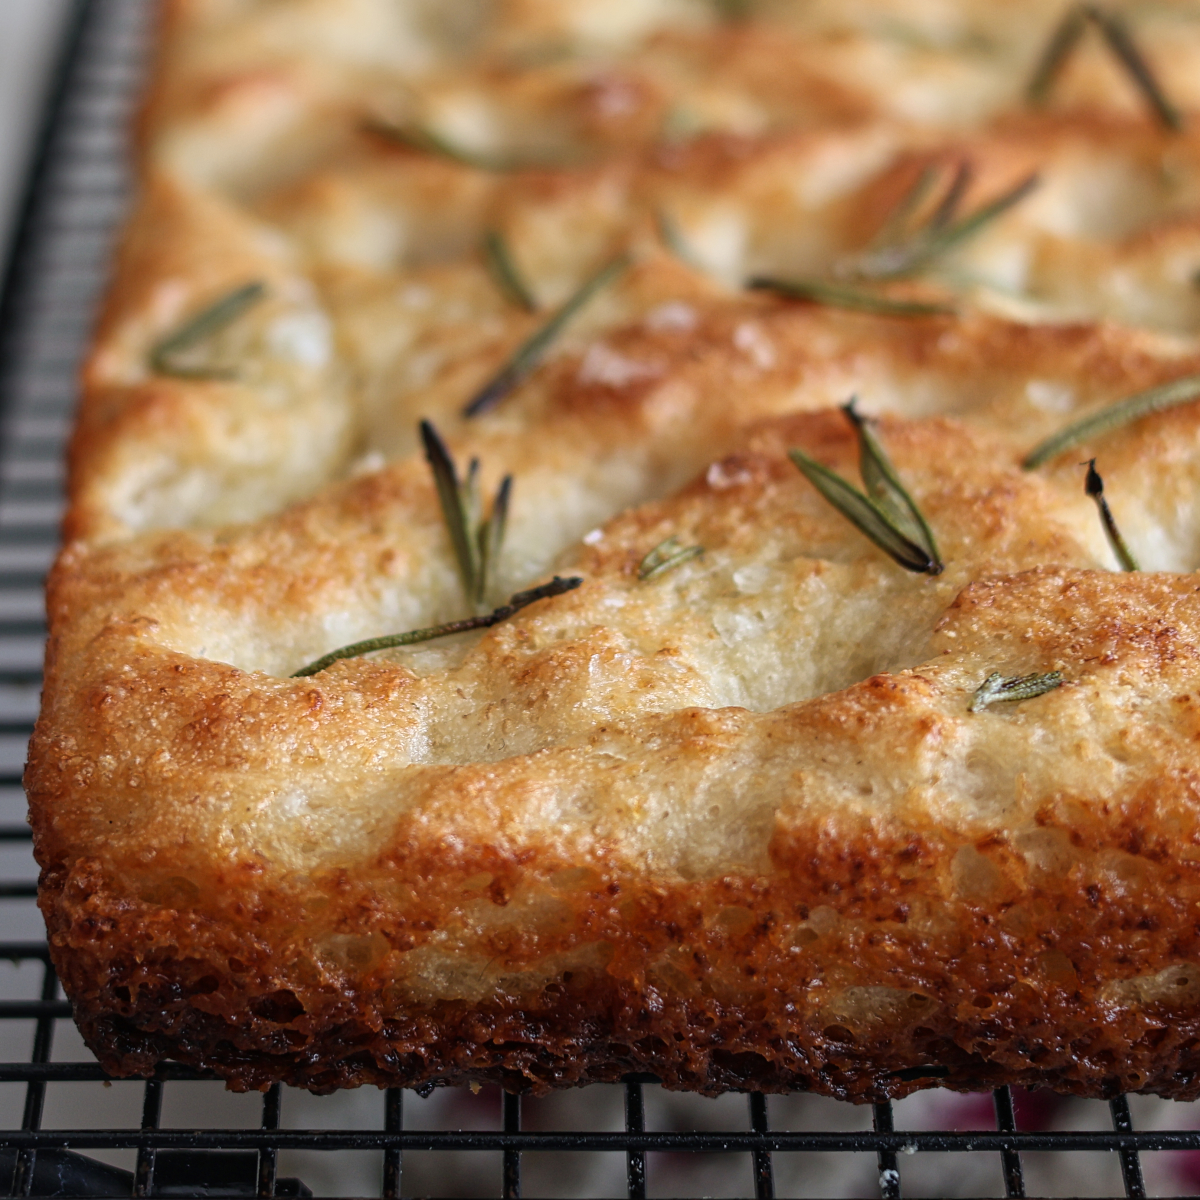
The signature creates little pools of olive oil and helps the bake evenly. This is where the magic happens.
Click each step to mark complete
Drizzle with olive oil
Pour 3 tablespoons of olive oil over the risen dough.
Create dimples
Using oiled fingertips, press straight down into the dough to create all over the surface. Be gentle—you want to create wells, not deflate the dough completely.
Add toppings
Scatter sliced garlic (if using) and fresh rosemary over the top. Sprinkle generously with flaky sea salt.
Pro Tip
The dimples should go almost to the bottom of the dough. That's where the olive oil pools and creates those crispy, flavorful bits everyone fights over.
Shaping
Shaping Options
Gluten-free is shaped directly in the pan. Choose your vessel based on what you have and the results you want.
Rectangle Pan (9x13)
The classic shape. Perfect for sharing and easy slicing.
RecommendedClick each step to mark complete
Oil the pan
Generously oil a 9x13-inch .
Spread the dough
Scrape dough into pan and spread to edges with oiled hands.
Rise and dimple
Let rise, then create and add toppings.
Round Cast Iron (12-inch)
Gives an extra crispy bottom from the retained heat of the cast iron.
Click each step to mark complete
Oil the skillet
Generously oil a 12-inch cast iron skillet.
Spread to edges
Spread dough to the edges of the skillet.
Rise and top
Rise, , and bake as directed. The cast iron gives extra crispy edges.
Proof Test: : Press lightly on the risen dough—it should spring back slowly with a slight indent remaining.
The Final Step
Baking
High heat gives you the crispy exterior and chewy interior that makes special. Use an to check doneness.
Baking Methods
The standard method for reliable results
Equipment: 9x13-inch baking pan
Position and bake
Place the pan on the lower third of your oven (for a crispier bottom) and bake for 20 minutes.
Check color
The top should be golden brown. If it's getting too dark, tent with foil.
Finish baking
Bake another 5-10 minutes until deep golden brown and the internal temperature reaches 200°F (93°C). Use an to check.
Optional crisp
For an extra crispy top, broil for 30 seconds to 1 minute. Watch carefully!
Cool briefly
Let cool in the pan for 5 minutes, then transfer to a or cutting board.
Nutrition Facts
Per 1 piece (about 65g) • 12 servings per recipe
* Values are estimates based on standard ingredients
Storage
Room Temperature
1-2 days wrapped in foil (best eaten day-of)
Frozen
Up to 2 months wrapped in plastic then foil. Reheat at 375°F for 15-20 minutes from frozen.
Your Feedback
Rate This Recipe
Loading ratings...
Troubleshooting
Baker's Notes
Common questions and solutions for perfect results
If you're serious about scoring, you need the right blade in your hand. Wire Monkey makes handcrafted bread lames from black walnut — built to last, balanced in the hand, and sharp enough to glide through cold dough cleanly every single time. No dragging, no hesitation marks. Just a clean cut.

Wire Monkey Handcrafted Bread Lames
You Might Also Enjoy
More recipes from our pantry that pair well with this bake.


Get More Recipes in Your Inbox
Join thousands of home bakers receiving weekly recipes, tips, and techniques to elevate your bread game.
No spam, ever. Unsubscribe anytime.
More from Baking Great Bread at Home
Tools, resources, and community to help you bake better bread

Crust & Crumb Academy
Go deeper into your craft. FREE courses, challenges, and real feedback. No gatekeeping. Perfection is not required.

Sourdough Starter Companion
Your AI-powered starter assistant. Track feedings, troubleshoot issues, and keep your starter thriving.

BakingGreatBread.com
Real bread for the rest of us

Baking Great Bread Blog
Recipes, tips, and stories from the bread journey

Recipe Converter
Convert sourdough recipes to yeast and back again

Crust & Crumb App
Your AI-powered baking assistant

Facebook Community
Join 50,000+ bakers sharing, learning, and supporting each other

Sourdough for the Rest of Us
Free beginner's guide to sourdough