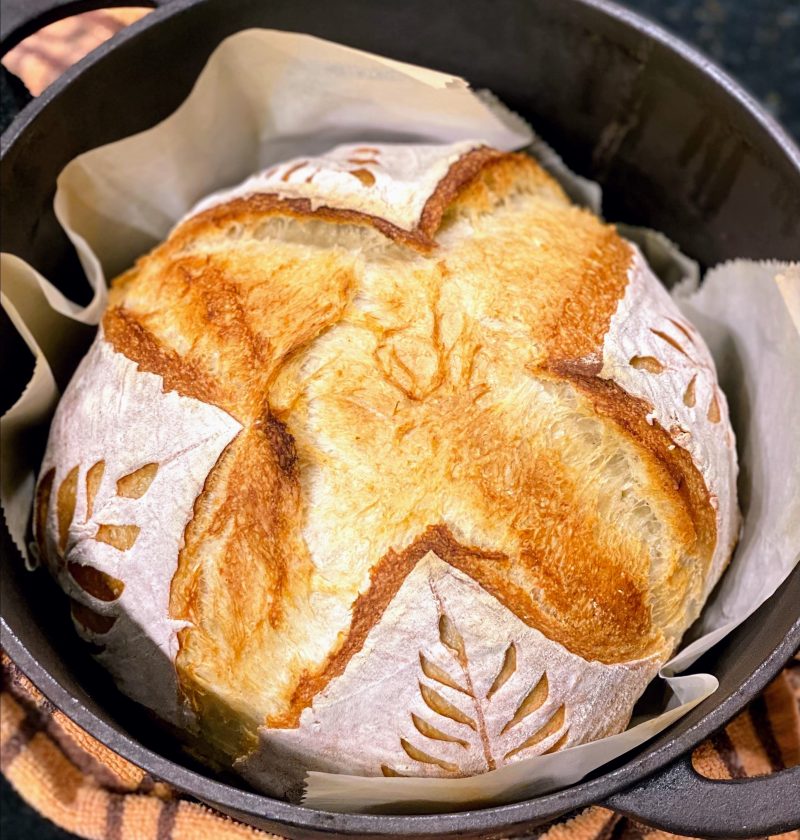
The Loaf That Started It All
BeginnerHenry's Market Day White | Baking Great Bread atHome
by Henry Hunter Jr.
Simple, adaptable, and market-tested.
Fermentation
2.5 hours
Bake Time
30 min
Yield
1 loaf (approximately 850g)

Perfection is not required
"Great bread isn't about perfect technique—it's about understanding the dough."— Henry Hunter Jr.
By Henry Hunter Jr., founder of Crust & Crumb Academy and Baking Great Bread at Home.
Authentic Flavor
This is the bread that started everything for me. I baked this loaf every week for farmers markets, sometimes plain, sometimes loaded with herbs, cheese, or olives. It's the recipe that taught me how one dough can become a dozen different loaves. If you're just getting started or you want a reliable base to build on, this is it.
Equipment Needed
Ingredients
Main Dough
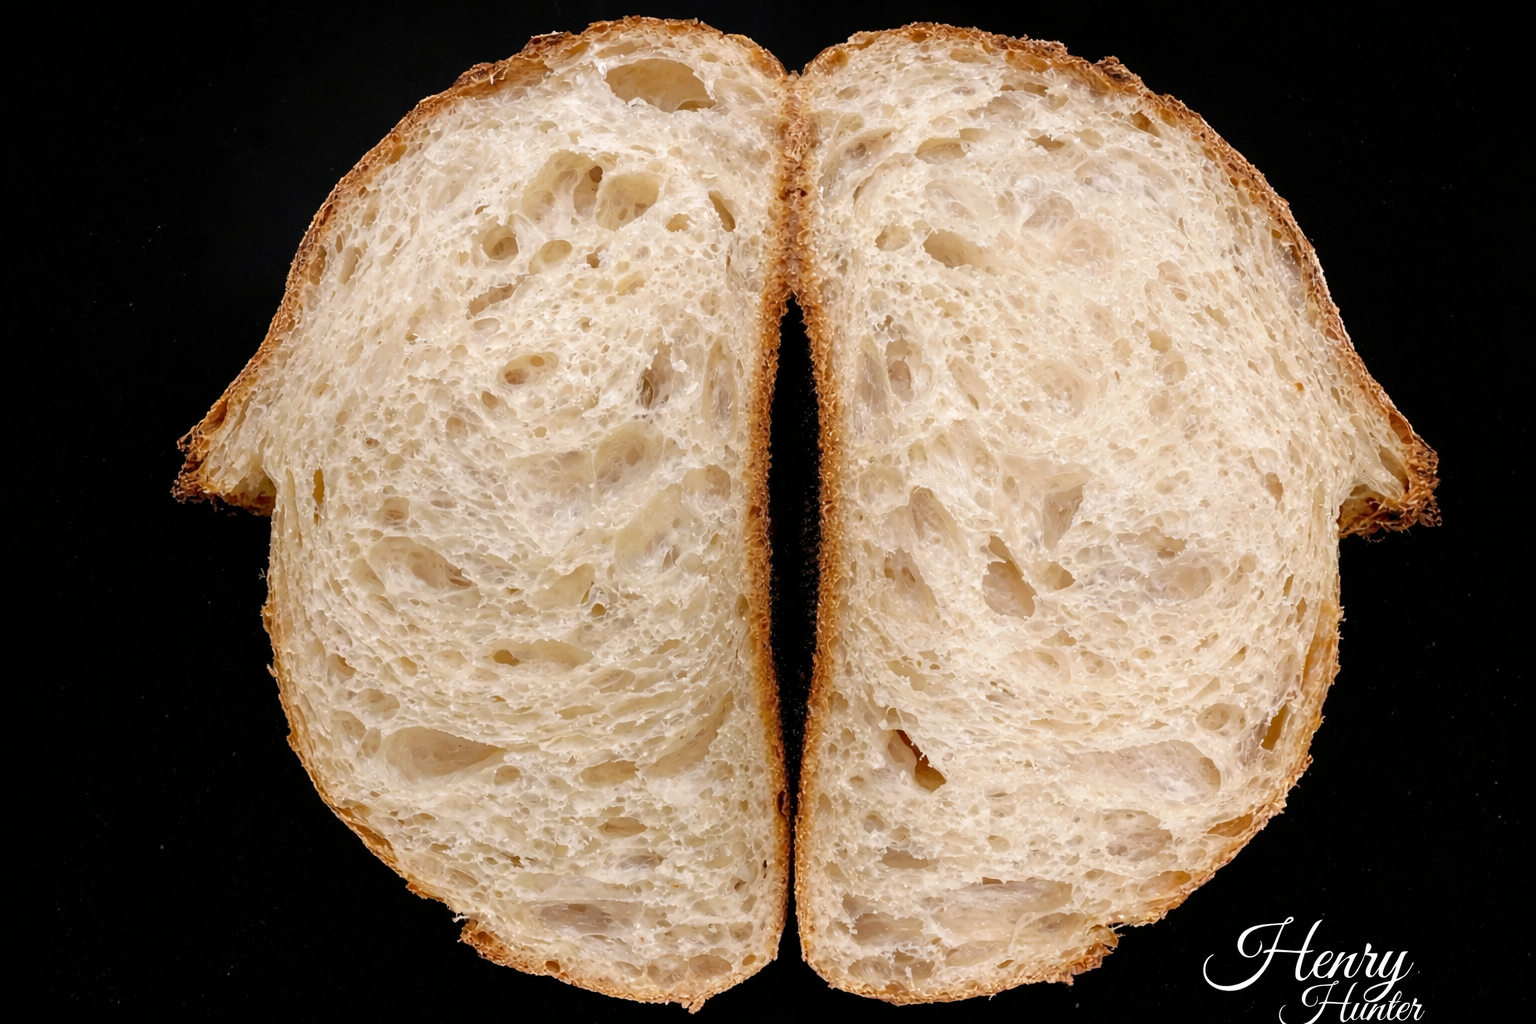
Beginner tip: 340g is the sweet spot for most bread flours. Once you're comfortable with the dough, you can push toward 360–375g for a more open crumb. If your dough feels unmanageable during shaping, hydration is usually why.
Day 1
Mix the Dough
Bring everything together into a shaggy dough before resting. This simple dough is forgiving and perfect for beginners.
Click each step to mark complete
Weigh ingredients
Use a kitchen scale for best results.
Combine and mix
Add flour, salt, and instant yeast to the water. Stir until a shaggy dough forms with no dry spots.
Cover
Place a damp towel or plastic wrap over the bowl.
Day 1
Rest
Let the flour hydrate before kneading. This rest makes kneading easier as the starts developing on its own.
Click each step to mark complete
Rest
Let the dough sit covered for 30 minutes.
⏱ Wait Time
Flour hydrates and gluten begins developing
Precise Timers
Use these interactive timers to track your stages.
Rest
Day 1
Knead
Develop the through traditional kneading until smooth and elastic.
Click each step to mark complete
Turn out
Transfer dough to a lightly floured surface.
Knead
Work the dough for 8-10 minutes until smooth and elastic.
Windowpane test (optional)
Stretch a small piece thin. If it holds without tearing, you're done.
Pro Tip
If the dough is sticky, resist adding flour. Wet your hands slightly instead.
Precise Timers
Use these interactive timers to track your stages.
Knead
Day 1
First Rise (Bulk Fermentation)
Let the yeast do its work during . The dough should double in size.
Click each step to mark complete
Oil the bowl
Lightly coat a clean bowl with oil.
Place dough
Set the kneaded dough in the bowl, turning once to coat.
Cover and rise
Cover with plastic wrap or a damp towel. Let sit in a warm place until doubled in size, 1-2 hours.
⏱ Wait Time
Until doubled in size
Pro Tip
A warm oven with just the light on works well. Aim for 75-78°F (24-26°C).
Precise Timers
Use these interactive timers to track your stages.
First Rise
Day 1
Shape
Form the dough into your desired shape with good surface tension for optimal .
Click each step to mark complete
Turn out
Gently transfer dough to a lightly floured surface.
Deflate
Press down gently to release large gas bubbles.
Shape
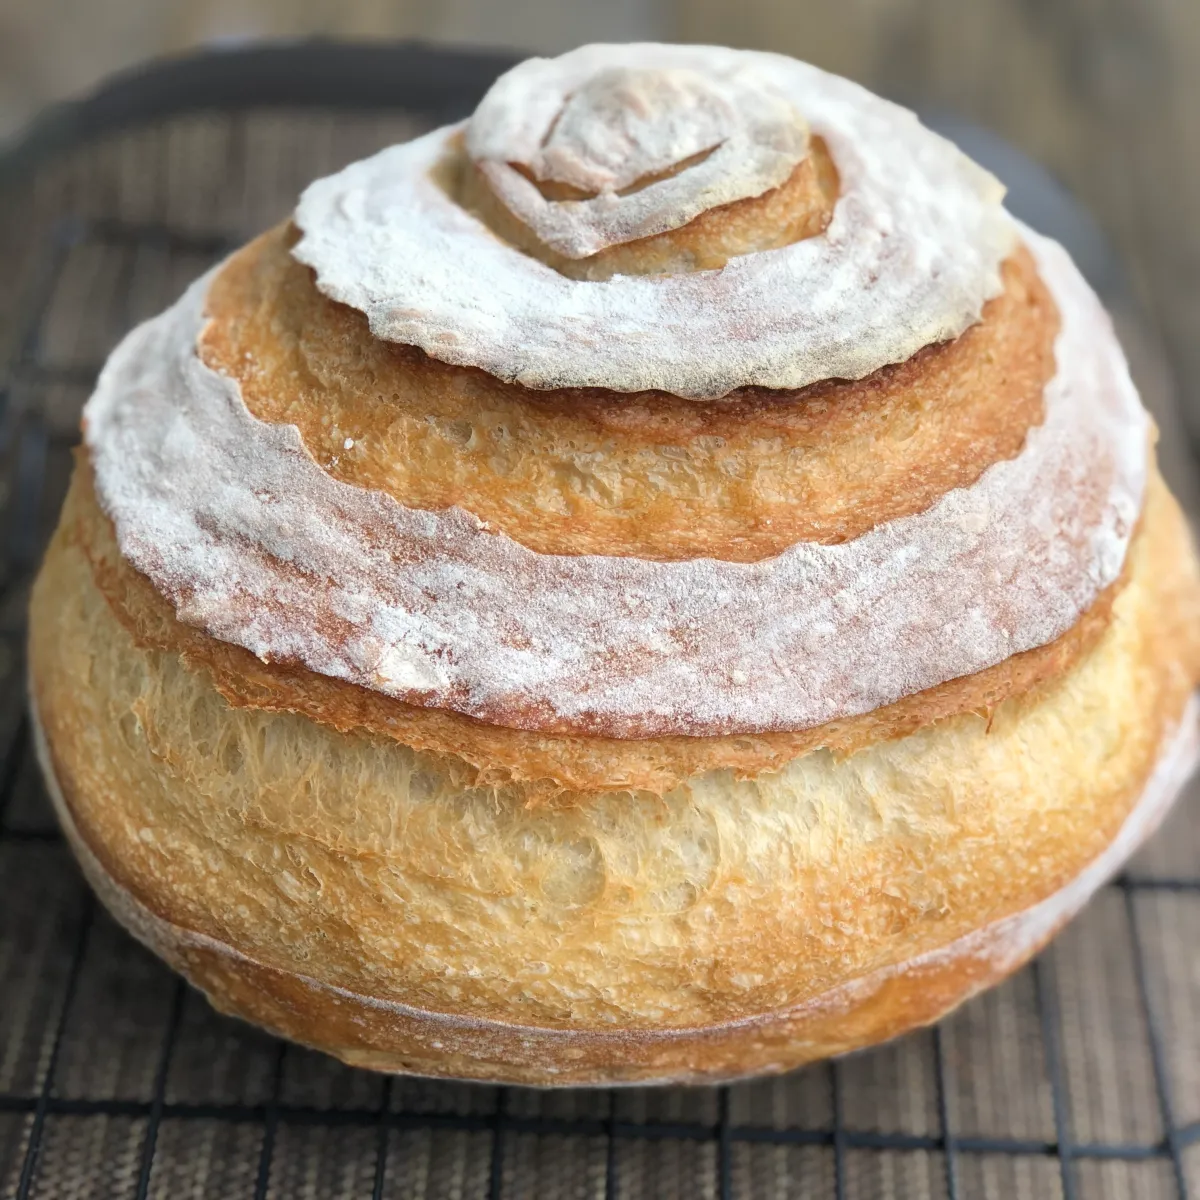
Form into a round boule or oblong bâtard.
Transfer
Place on a floured baking sheet, parchment-lined pan, or into a floured (seam-side up if using a basket).
Day 1
Second Rise (Proof)
Final before baking. Use the poke test to check readiness.
Click each step to mark complete
Cover
Drape with a damp cloth or plastic.
Rise
Let proof until puffy, 30-60 minutes.
Poke test
Gently poke the dough. If it springs back slowly, it's ready to bake.
⏱ Wait Time
Until puffy and passing the poke test
Precise Timers
Use these interactive timers to track your stages.
Second Rise
Day 1
Cold Retard (Optional but Recommended)
Give the dough time in the fridge and it pays you back in flavor.
Click each step to mark complete
Cover the banneton
Wrap tightly with plastic wrap or use a shower cap. Make sure it's sealed.
Refrigerate
Place in the refrigerator for a minimum of 4 hours and up to 48 hours. The dough is fine in there. Don't rush it.
Bake from cold
When ready, go straight from the fridge to the preheated . No need to bring it to room temperature first.
⏱ Wait Time
Cold fermentation builds flavor and improves scoring
Pro Tip
Cold dough scores cleaner. Your glides better, your pattern holds its shape, and the ear develops more dramatically in the oven. It's one of the best reasons to do this step.
Day 1
Preheat
Get your oven and screaming hot for the best crust development.
Click each step to mark complete
Preheat oven
Set to 450°F (230°C).
Heat vessel
Place Dutch oven or baking stone inside while preheating, at least 30 minutes.
Precise Timers
Use these interactive timers to track your stages.
Preheat
Shaping
Shape the Loaf
Create surface tension for optimal rise and crust.
Boule (Round)
RecommendedClick each step to mark complete
Turn out
After first rise, turn dough onto a floured surface.
Gather and tuck
Gently deflate and pull edges toward the center.
Flip
Flip seam-side down.
Build tension
Cup hands around the dough and drag toward you to create surface tension.
Transfer
Place in a seam-side up, or on parchment seam-side down.
Bâtard (Oval)
Click each step to mark complete
Turn out
After first rise, turn dough onto a floured surface.
Pat and fold
Gently deflate and pat into a rectangle. Fold top third down, bottom third up.
Seal
Seal seam with the heel of your hand.
Taper
Roll gently to taper the ends.
Day 1
Score and Bake
controls the expansion. Bake until deep golden brown.
Step by Step
Transfer
If using a proofing basket, invert dough onto parchment paper. If on a baking sheet, it's ready to go.
Score
Use a to score at least ½ inch deep for the expansion cut. This is what controls where the bread opens in the oven. Shallow cuts are for decoration only.
Load
Carefully place dough into the preheated or onto the baking stone.
Bake
Bake covered 15 minutes, then remove the lid and bake 10-15 minutes more until deep golden brown and internal temperature reaches 205-210°F (96-99°C).
Bake Covered
Bake Uncovered
If using a Dutch oven, bake covered for the first 15 minutes, then remove the lid to finish.
Baking Methods
Equipment: Dutch oven with lid, parchment paper
Preheat
Preheat for 30-45 minutes at 450°F (230°C).
Bake covered
Bake covered 15-20 minutes to trap steam.
Bake uncovered
Remove lid and bake 10-15 minutes until deep golden brown.
"A cast iron Dutch oven gives you the best bottom crust. [This is what I use](https://challengerbreadware.com/?ref=henryhunterjr)."
Day 1
Cool
Let the interior finish setting before slicing. Cutting too early releases steam and can make the gummy.
Click each step to mark complete
Transfer to rack
Remove bread from oven and place on a wire cooling rack.
Wait
Let cool completely, at least 1 hour.
⏱ Wait Time
Patience—the crumb is still setting
Precise Timers
Use these interactive timers to track your stages.
Cool
Nutrition Facts
Per 1 slice (about 55g) • 16 servings per recipe
* Values are estimates based on standard ingredients
Storage
Room Temperature
2-3 days in a paper bag or bread box. Avoid plastic, which softens the crust. Sourdough version keeps 3-4 days due to natural acidity.
Refrigerated
Not recommended. Refrigeration accelerates staling.
Frozen
Up to 3 months. Slice before freezing for easy access. Toast directly from frozen.
Refresh
Toast slices directly from frozen, or warm a whole loaf at 350°F (175°C) for 10-12 minutes.
💡 Run the loaf under water briefly and bake at 375°F (190°C) for 10 minutes to revive a day-old crust.
Your Feedback
Rate This Recipe
Loading ratings...
Troubleshooting
Baker's Notes
Common questions and solutions for perfect results
If you're serious about scoring, you need the right blade in your hand. Wire Monkey makes handcrafted bread lames from black walnut — built to last, balanced in the hand, and sharp enough to glide through cold dough cleanly every single time. No dragging, no hesitation marks. Just a clean cut.

Wire Monkey Handcrafted Bread Lames
You Might Also Enjoy
More recipes from our pantry that pair well with this bake.

Get More Recipes in Your Inbox
Join thousands of home bakers receiving weekly recipes, tips, and techniques to elevate your bread game.
No spam, ever. Unsubscribe anytime.
More from Baking Great Bread at Home
Tools, resources, and community to help you bake better bread

Crust & Crumb Academy
Go deeper into your craft. FREE courses, challenges, and real feedback. No gatekeeping. Perfection is not required.

Sourdough Starter Companion
Your AI-powered starter assistant. Track feedings, troubleshoot issues, and keep your starter thriving.

BakingGreatBread.com
Real bread for the rest of us

Baking Great Bread Blog
Recipes, tips, and stories from the bread journey

Recipe Converter
Convert sourdough recipes to yeast and back again

Crust & Crumb App
Your AI-powered baking assistant

Facebook Community
Join 50,000+ bakers sharing, learning, and supporting each other

Sourdough for the Rest of Us
Free beginner's guide to sourdough