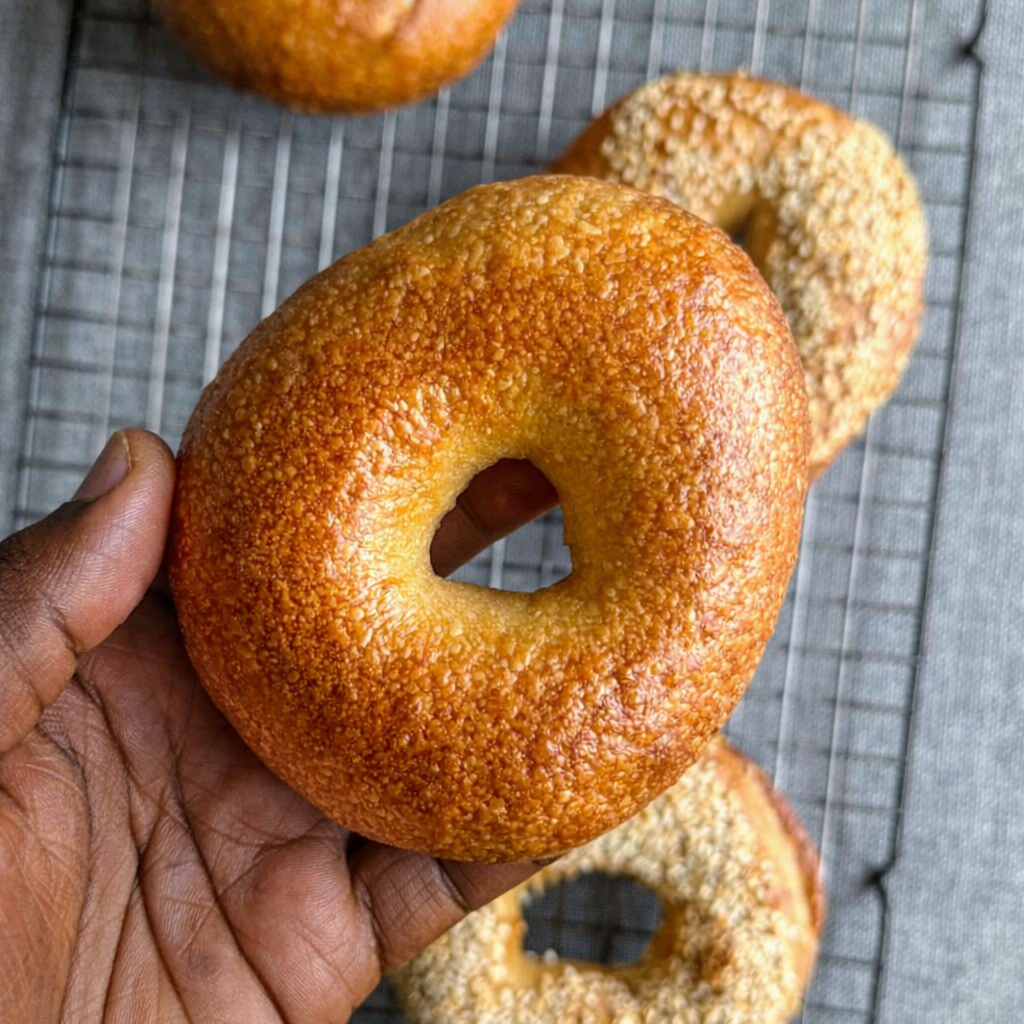
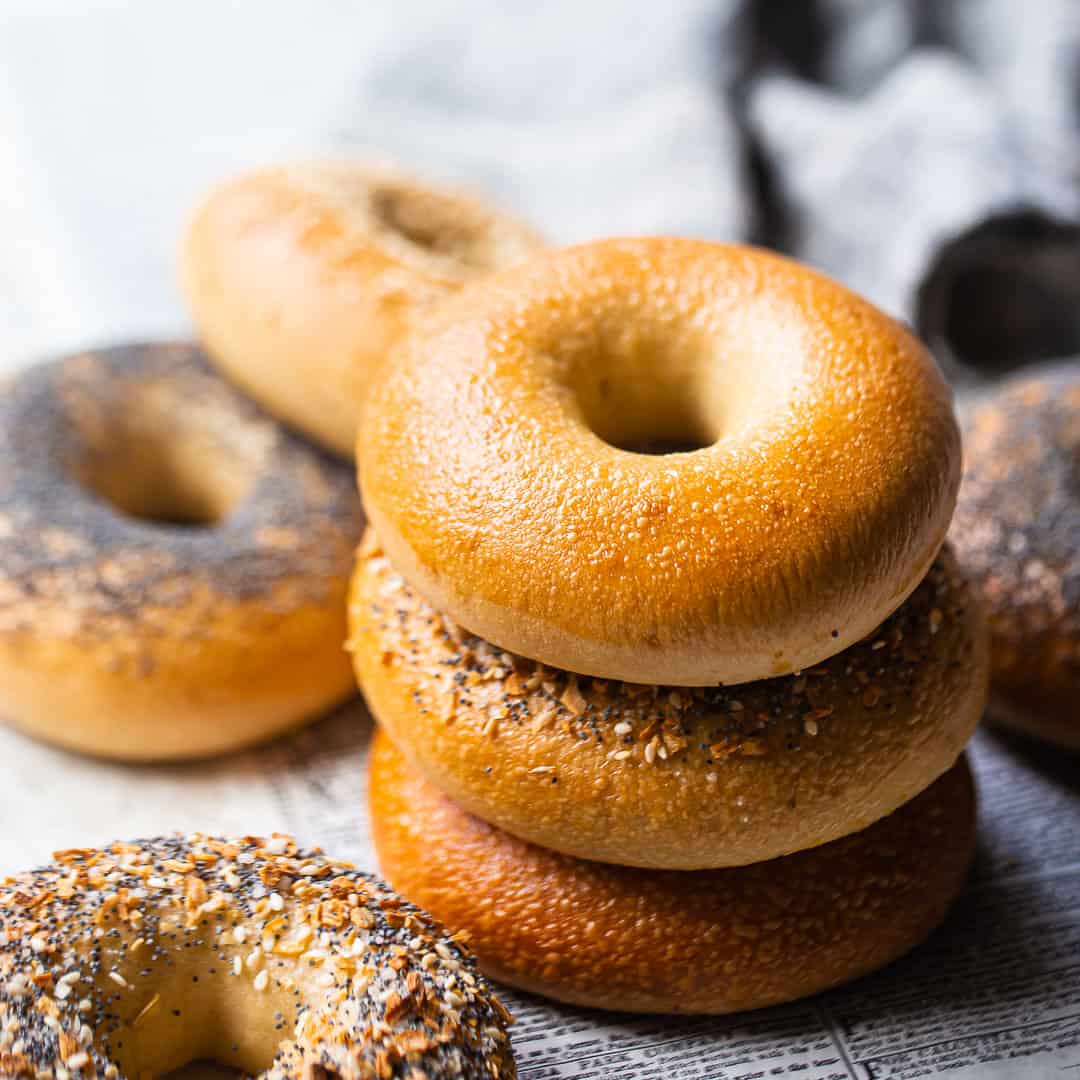
Chewy, Malt-Kissed Perfection from Your Own Kitchen
IntermediateSourdough New York StyleBagels
by Henry Hunter Jr.
The bagel you've been craving, made with your sourdough starter
Fermentation
14-18 hours
Bake Time
20-25 minutes
Yield
8 New York style bagels

Perfection is not required
"Great bread isn't about perfect technique—it's about understanding the dough."— Henry Hunter Jr.
By Henry Hunter Jr., founder of Crust & Crumb Academy and Baking Great Bread at Home.
Authentic Flavor
These authentic New York style bagels deliver that unmistakable chew, shiny crust, and deep malt flavor, all powered by your instead of commercial yeast. The overnight develops incredible flavor while fitting into a real schedule. Once you make these at home, you'll never look at store-bought bagels the same way.
Equipment Needed
Ingredients
Levain (Build the Night Before)
A small {{levain}} built to peak activity for maximum rise and flavor
Final Dough
A stiff, low-hydration dough that creates the signature chewy texture
Boiling Water
The boil is what makes a bagel a bagel
Toppings (Choose Your Own)
Classic options for finishing your bagels
Pro Tip
High-gluten flour (14%+ protein) makes even chewier bagels if you can find it. King Arthur Bread Flour works great. This is a stiff dough—that's intentional.
Day 1, Evening
Build the Levain
We build a small the night before to ensure it's at peak activity when we mix the dough. This gives your bagels the best rise and flavor.
Click each step to mark complete
Combine ingredients
In a small jar or bowl, mix 50g active starter with 50g bread flour and 50g warm water until no dry flour remains.
Cover and rest
Cover loosely and leave at room temperature (70-75°F / 21-24°C) for 8-12 hours until doubled and bubbly.
Now
8-12 hours
Let the levain ferment overnight until doubled and domed
Day 2, Morning
Mix the Dough
20 minutes
Bagel dough is stiff. Much stiffer than bread dough. This is what gives bagels their characteristic chew. Don't add extra water even if it seems dry.
Click each step to mark complete
Combine dry and wet
In a stand mixer bowl, add the flour, warm water, ripe , salt, and .
Mix on low
Using the dough hook, mix on low speed for 2-3 minutes until a shaggy dough forms.
Knead on medium
Increase to medium speed and knead for 10-12 minutes. The dough should become smooth, very stiff, and pull away from the bowl sides.
Window pane test
Pinch off a small piece and stretch it thin. It should stretch without tearing (). If it tears easily, knead another 2-3 minutes.
Hand mixing alternative
If mixing by hand, combine ingredients in a large bowl, then turn out onto an unfloured surface and knead vigorously for 15-20 minutes. This is a workout.
Pro Tip
The dough should feel like a firm stress ball. If it's sticky or soft, you'll get puffy bread rolls instead of chewy bagels.
Precise Timers
Use these interactive timers to track your stages.
Initial Mix
Knead
Day 2
Bulk Fermentation
3-4 hours
Unlike bread, we want minimal rise here. Bagels shouldn't proof much—that's what keeps them dense and chewy.
Click each step to mark complete
Shape into ball
Form the dough into a tight ball and place in a lightly oiled bowl.
Cover
Cover with plastic wrap or a damp towel.
Ferment at room temperature
Let rest at room temperature (70-75°F / 21-24°C) for 3-4 hours. The dough should increase by about 25-50%, not double.
Check readiness
The dough should feel slightly puffy but not airy. If you poke it, it should slowly spring back.
⏱ Wait Time
Let the dough rise 25-50%, not double
Pro Tip
Over-proofing is the #1 bagel mistake. If your dough doubles, it's gone too far and your bagels will deflate in the boil.
Precise Timers
Use these interactive timers to track your stages.
Bulk Fermentation
Day 2
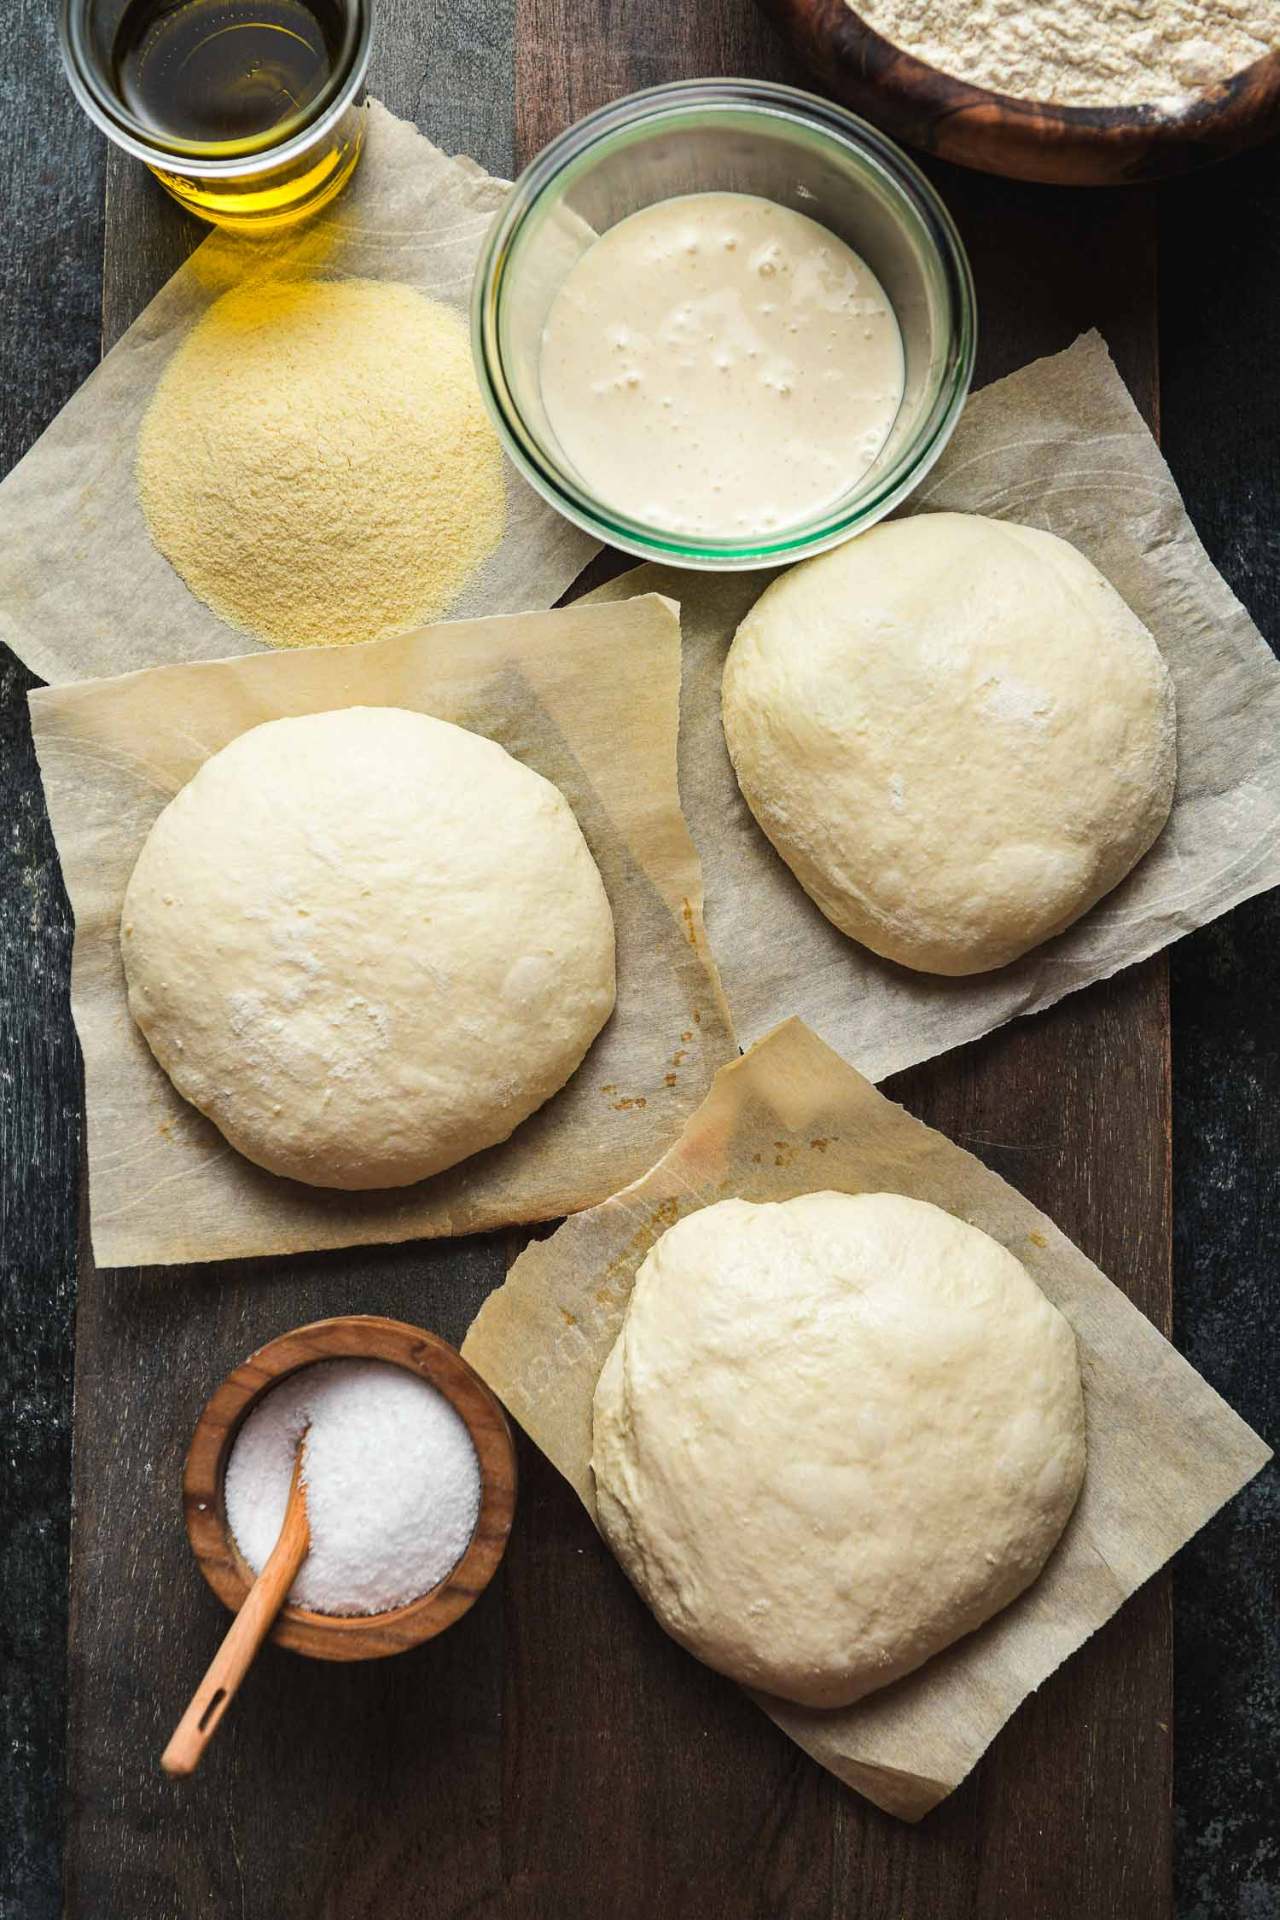
Divide and Pre-Shape
10 minutes
We divide into equal portions for consistent bagels. The weight matters more than eyeballing.
Click each step to mark complete
Turn out dough
Gently turn the dough onto an unfloured work surface.
Divide
Using a and scale, divide into 8 equal pieces (about 120g each).
Pre-shape into balls
Working with one piece at a time, cup your hand over the dough and move in tight circles on the counter to form a taut ball. The friction should pull the surface tight.
Rest briefly
Cover the balls with a damp towel and let rest 5 minutes. This relaxes the for easier shaping.
Pro Tip
Don't flour your work surface. The friction helps create tension in the dough balls.
Precise Timers
Use these interactive timers to track your stages.
Bench Rest
Day 2, Evening to Day 3
Cold Retard (Overnight Proof)
1 minute active
The overnight is where the magic happens. The cold slows while enzymes continue breaking down starches, developing deep flavor and better texture.
Click each step to mark complete
Arrange on sheet
Place shaped bagels on a parchment-lined baking sheet, spaced 2 inches apart.
Cover
Cover loosely with plastic wrap.
Refrigerate
Place the covered baking sheet in the refrigerator.
Cold proof
Leave for 12-24 hours. Longer gives more sour flavor.
⏱ Wait Time
Cold ferment overnight for maximum flavor
Pro Tip
The bagels should puff slightly but not double. They're ready when they pass the .
Precise Timers
Use these interactive timers to track your stages.
Cold Retard (min)
Day 3, Morning
Float Test and Prep
30 minutes
The tells you if your bagels are ready for boiling. This step also gets everything prepped for the fast-moving boil-and-bake process.
Click each step to mark complete
Remove from fridge
Take bagels out of the refrigerator.
Float test
Fill a small bowl with room temperature water. Gently drop one bagel in. If it floats within 10 seconds, they're ready. If it sinks, let them rest at room temperature for 20-30 minutes and test again.
Preheat oven
Heat your oven to 450°F (230°C) with a rack in the center position.
Prepare boiling water
Fill a large pot with 4 quarts of water. Add and baking soda. Bring to a rolling boil.
Set up topping station
Place your chosen toppings in shallow bowls or plates near the stove.
Prepare baking sheets
Line two baking sheets with parchment paper.
Pro Tip
The baking soda in the boiling water raises the pH, which helps create that characteristic shiny, chewy crust.
Precise Timers
Use these interactive timers to track your stages.
Preheat Oven
Day 3
Boil the Bagels
15 minutes
The boil is what makes a bagel a bagel. It gelatinizes the surface starch, creating the shiny crust and preventing the bagel from rising too much in the oven.
Click each step to mark complete
Boil in batches
Working with 2-3 bagels at a time (don't crowd), gently lower them into the boiling water.
Time the boil
Boil for 30-60 seconds per side. Shorter boil = lighter crust. Longer boil = chewier, denser bagel.
Flip carefully
Use a slotted spoon to flip each bagel.
Remove and drain
Lift bagels out with the slotted spoon, letting excess water drip off for a few seconds.
Apply toppings immediately
While still wet, dip the top of each bagel into your chosen toppings. The wet surface acts as glue.
Transfer to baking sheet
Place topped bagels on the prepared baking sheets, topping side up.
Repeat
Continue with remaining bagels.
Pro Tip
Work quickly. The bagels need to go into the oven while they're still warm from the boil.
Precise Timers
Use these interactive timers to track your stages.
Boil First Side
Boil Second Side
Shaping
Shaping
There are two shaping methods. The poke method is easier for beginners. The rope method gives you more control over the hole size.
Poke and Stretch
The easiest method for beginners. Quick and reliable.
RecommendedClick each step to mark complete
Poke a hole
Take a dough ball and poke your thumb through the center.
Stretch the hole
Using both index fingers, gently stretch the hole to about 2 inches wide. It will shrink during proofing and baking.
Even the thickness
Work around the ring, stretching gently to make the bagel even in thickness.
Make it bigger than you think
The hole shrinks significantly during proofing and baking, so err on the larger side.
Rope Method
Gives you more control over the hole size and shape.
Click each step to mark complete
Roll into rope
Roll a dough ball into a rope about 9-10 inches long, slightly tapered at the ends.
Wrap around hand
Wrap the rope around your palm so the ends overlap by about 1.5 inches.
Seal the seam
Roll the overlapped section back and forth on the counter to seal completely.
Stretch to even out
Gently stretch to even out if needed.
Proof Test: Unlike bread, bagels should NOT pass a traditional . The dough should feel firm and spring back quickly. Use the instead to determine readiness.
Day 3
Bake
High heat gives bagels their golden color and sets that chewy crust. They bake quickly, so watch them.
Step by Step
Bake
Place bagels in the preheated 450°F (230°C) oven.
Rotate at halfway
After 10-12 minutes, rotate the pan 180 degrees for even browning.
Check for doneness
Bagels are done when deep golden brown all over, 20-25 minutes total. The internal temperature should reach 200-205°F (93-96°C).
Cool on rack
Transfer immediately to a wire . Let cool at least 15 minutes before slicing.
Bake First Half
Bake Second Half
Cool Before Slicing
Bagels continue cooking as they cool. Cutting too early releases steam and can make the interior gummy.
Baking Methods
Standard baking sheet method. Works great for most home ovens.
Equipment: Standard oven, baking sheets, parchment paper
Preheat
Preheat to 450°F (230°C) with rack in center position.
Arrange bagels
Place boiled bagels on parchment-lined sheets, topping side up.
Bake
Bake 20-25 minutes, rotating pan halfway through.
Check doneness
Bagels should be deep golden brown all over.
Nutrition Facts
Per 1 bagel (about 120g) • 8 servings per recipe
* Values are estimates based on standard ingredients
Storage
Room Temperature
Best eaten same day. Will keep 2-3 days in a paper bag at room temperature, but they'll get chewy/stale.
Refrigerated
Not recommended. Refrigeration accelerates staling.
Frozen
Slice before freezing. Place in freezer bag with air removed. Freeze up to 3 months. Toast directly from frozen.
Refresh
Toast slices directly from frozen, or warm a whole loaf at 350°F (175°C) for 10-12 minutes.
💡 For best results, slice bagels before freezing. Toast directly from frozen—no thawing needed.
Your Feedback
Rate This Recipe
Loading ratings...
Troubleshooting
Baker's Notes
Common questions and solutions for perfect results
If you're serious about scoring, you need the right blade in your hand. Wire Monkey makes handcrafted bread lames from black walnut — built to last, balanced in the hand, and sharp enough to glide through cold dough cleanly every single time. No dragging, no hesitation marks. Just a clean cut.

Wire Monkey Handcrafted Bread Lames
You Might Also Enjoy
More recipes from our pantry that pair well with this bake.
Get More Recipes in Your Inbox
Join thousands of home bakers receiving weekly recipes, tips, and techniques to elevate your bread game.
No spam, ever. Unsubscribe anytime.
More from Baking Great Bread at Home
Tools, resources, and community to help you bake better bread

Crust & Crumb Academy
Go deeper into your craft. FREE courses, challenges, and real feedback. No gatekeeping. Perfection is not required.

Sourdough Starter Companion
Your AI-powered starter assistant. Track feedings, troubleshoot issues, and keep your starter thriving.

BakingGreatBread.com
Real bread for the rest of us

Baking Great Bread Blog
Recipes, tips, and stories from the bread journey

Recipe Converter
Convert sourdough recipes to yeast and back again

Crust & Crumb App
Your AI-powered baking assistant

Facebook Community
Join 50,000+ bakers sharing, learning, and supporting each other

Sourdough for the Rest of Us
Free beginner's guide to sourdough