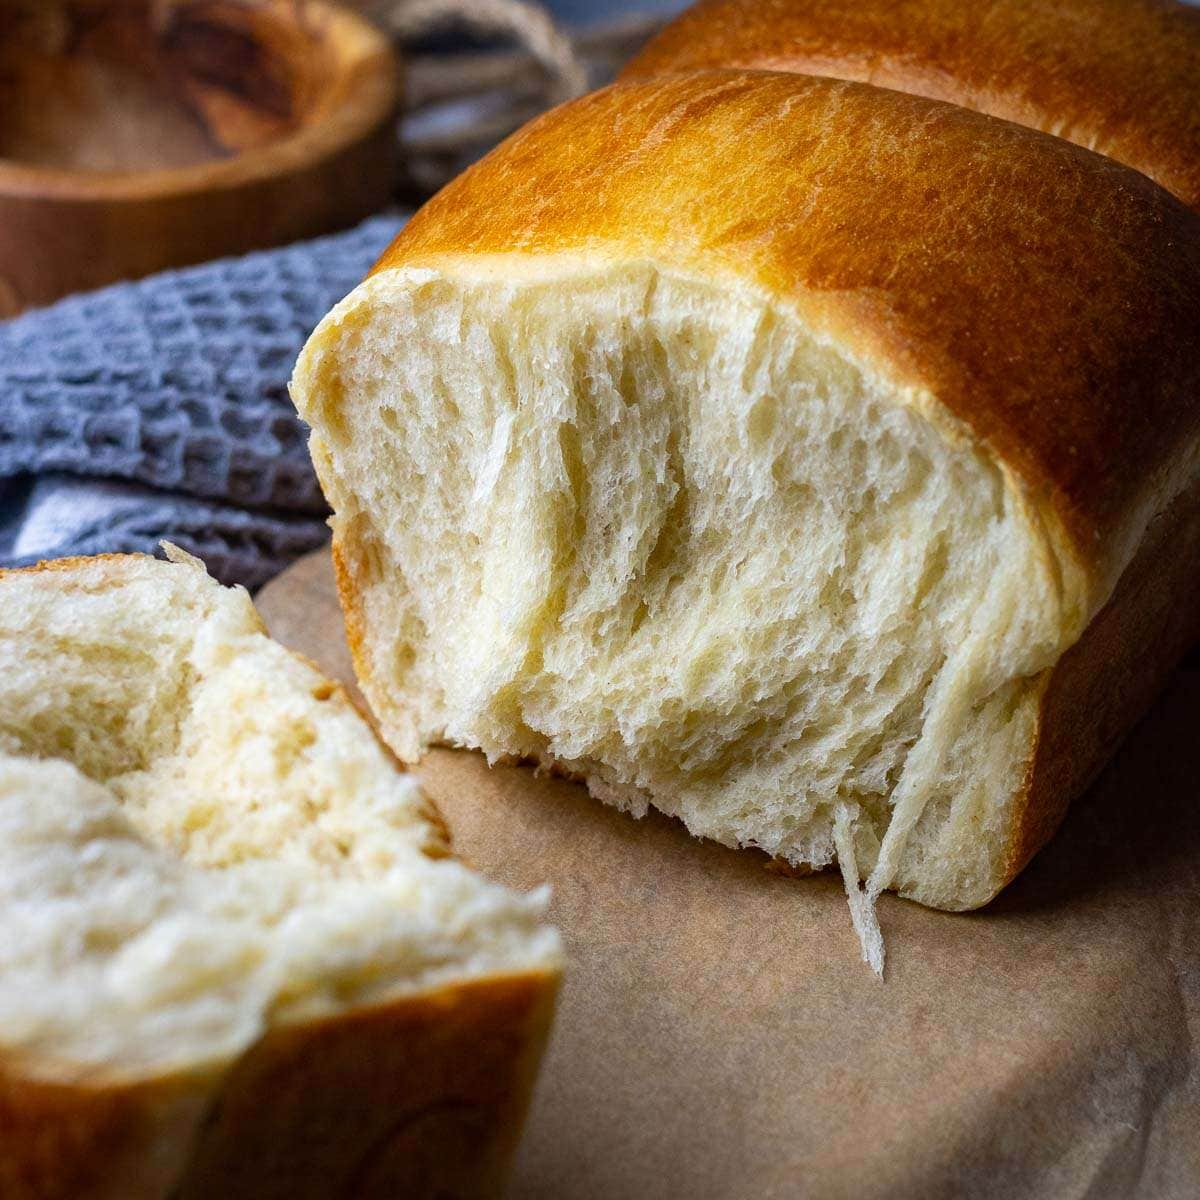
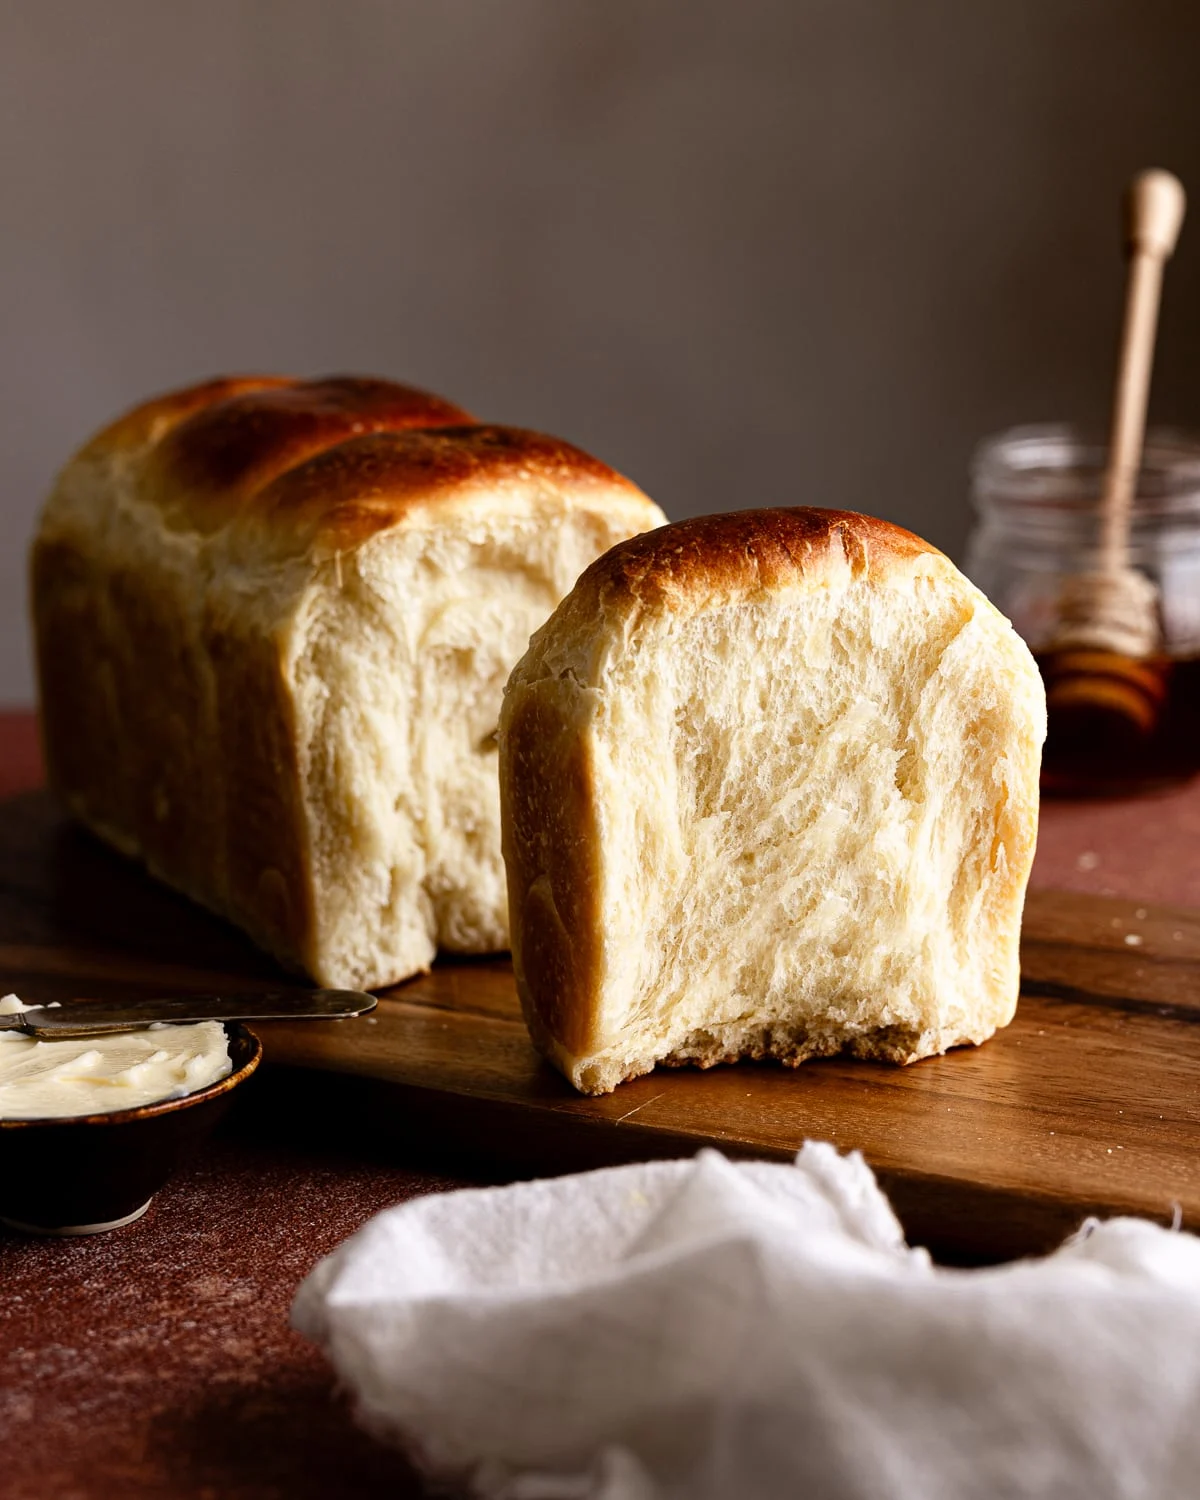
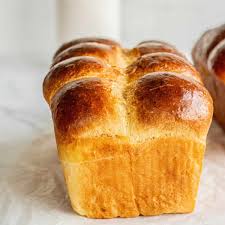
Naturally leavened pillowy softness
Henry's Sourdough Japanese Milk Bread(Shokupan)
by Henry Hunter Jr.
Sweet levain meets tangzhong for the ultimate naturally leavened sandwich bread
Rise Time
Varies
Bake Time
Varies
Yield
1 loaf

Perfection is not required
"Great bread isn't about perfect technique—it's about understanding the dough."— Henry Hunter Jr.
By Henry Hunter Jr., founder of Crust & Crumb Academy and Baking Great Bread at Home.
Authentic Bread Flavor
All the pillowy softness of traditional milk bread, naturally leavened with sourdough starter. Subtle tang, incredible tenderness, and it stays fresh for days.
Equipment Needed
Ingredients
Sweet Levain (build night before)
Tangzhong
Main Dough
For the Top
Build the Sweet Levain
The sweet is the key to this recipe. Adding sugar feeds the yeast, speeds fermentation, and results in a sweeter, less sour flavor profile.
Click each step to mark complete
In a small jar, combine the flour, water, sugar, and active . Mix well until no dry flour remains.
Cover loosely and let ripen overnight at room temperature (70-76°F), about 10-12 hours.
The is ready when it has doubled, looks bubbly throughout, and smells mildly sweet and tangy. It should dome slightly on top, not collapse.
Make the Tangzhong
The gelatinizes the starches in the flour, allowing them to hold more moisture for an incredibly soft crumb.
Watch the Technique
The tangzhong should reach a thick, pudding-like consistency
Click each step to mark complete
In a small saucepan, whisk together the flour and milk until smooth.
Cook over medium-low heat, stirring constantly, until the mixture thickens into a paste (like mashed potatoes), about 3-5 minutes. It should reach approximately 150°F (65°C).
Spread onto a plate to cool quickly. Press plastic wrap directly on the surface to prevent a skin. Let cool to room temperature before using.
Precise Timers
Use these interactive timers to track your stages.
Cook Tangzhong
Mix the Dough
Building gluten in enriched doughs takes patience. The goes in last so it doesn't interfere with gluten development.
Click each step to mark complete
Cut the into ½-inch pieces and set out to soften.
In the bowl of a fitted with the paddle attachment, combine: bread flour, warm milk, beaten egg, sugar, salt, all of the ripe sweet , and all of the cooled .
Mix on low speed (Stir on a KitchenAid) for 1-2 minutes until everything comes together and no dry flour remains.
Switch to the dough hook. Mix on medium speed (setting 2-3) for 4-5 minutes until the dough smooths out and starts clinging to the hook. It will still stick to the bottom of the bowl. That's okay.
Let the dough rest in the bowl for 10 minutes.
Resume mixing on low speed for 2-3 minutes until the dough gains more strength.
With the mixer running on low, add the softened one piece at a time. Wait for each piece to mostly incorporate before adding the next. This takes 5-8 minutes total.
The finished dough will be very soft and slightly sticky. It won't fully clear the sides of the bowl. That's normal for this enriched dough.
Transfer to a lightly greased container for .
Precise Timers
Use these interactive timers to track your stages.
Initial Mix
Gluten Development
Dough Rest
Second Mix
Butter Addition
Bulk Fermentation
Keep the dough at 74-78°F. If your kitchen is cool, use a or your oven with just the light on.
Click each step to mark complete
First set of (30 minutes in): With wet hands, stretch one side of the dough up and fold it over to the opposite side. Rotate the bowl 90° and repeat. Do this 4 times total, going around the bowl. The dough will feel loose and extensible.
Second set (1 hour in): Turn the dough out onto a clean counter. Perform a few gentle until the dough tightens and smooths. Shape into a ball and return to the container.
Let the dough rest undisturbed for the remaining 2½ hours.
Pro Tip
The dough is ready when it has roughly doubled in volume, looks puffy and smooth, small bubbles are visible on the surface and sides, and it feels light and airy when you lift the container.
Precise Timers
Use these interactive timers to track your stages.
First Stretch & Fold
Second Fold
Remaining Rest
Shaping
Divide and Shape
This is a soft dough, so handle it gently. The three-ball method creates the signature pull-apart look.
Watch: Shaping Milk Bread
See the three-ball shaping method in action
Three-Ball Method
Creates even rising and the classic pull-apart look
Click each step to mark complete
Grease a 9x5-inch (or Pullman pan) with butter or neutral oil
Gently turn the dough onto a lightly floured surface
Divide into 3 equal pieces (about 200g each)
Working with one piece at a time, cup your hands around the dough
Drag it toward you on the counter, using the friction to create tension on the surface
Rotate slightly and repeat until you have a taut ball
Place each ball seam-side down in the pan, fitting them snugly side by side
Cover the pan with a large plastic bag or damp towel
Final Proof
The longer proof time compared to commercial yeast is normal for sourdough. Watch the dough, not the clock.
Click each step to mark complete
Cover the pan with a large plastic bag or damp towel.
Let the dough rise at room temperature (74-78°F) until it reaches about 1 inch above the rim of the pan.
Pro Tip
The dough should look puffy and pillowy, jiggle gently when you shake the pan, and spring back slowly when poked (leaving a slight indent). At cooler temperatures, this could take 4-5 hours. Don't rush it.
Precise Timers
Use these interactive timers to track your stages.
Final Proof
The Final Step
Bake the Bread
Preheat oven to 350°F (175°C) with a rack in the lower third, about 20-30 minutes before baking.
Baking Methods
Produces a golden, domed top perfect for toast
Equipment: 9x5-inch loaf pan, Instant-read thermometer
Brush top
Gently brush the top with milk or egg wash.
Bake
Bake uncovered for 30-40 minutes until the top is deep golden brown and internal temperature reaches 190-195°F (88-91°C).
Tent if needed
If the top browns too quickly, tent with foil for the last 10 minutes.
Nutrition Facts
Per 1 slice (about 65g) • servings per recipe
* Values are estimates based on standard ingredients
Storage
Room Temperature
5-7 days wrapped tightly in plastic or in a zip-top bag. This bread stays soft remarkably long thanks to the tangzhong and natural fermentation.
Refrigerated
Not recommended — refrigeration accelerates staling. Freeze instead for longer storage.
Frozen
Up to 3 months. Slice first, separate with parchment, freeze in a bag. Toast directly from frozen.
Refresh
Toast slices or warm whole loaf at 350°F (175°C) for 10 minutes
Your Feedback
Rate This Recipe
Loading ratings...
Troubleshooting
Baker's Notes
Common questions and solutions for perfect results
Temperature is the invisible ingredient. I use the Goldie and DoughBed from SourHouse to keep my starter and dough at the perfect temperature, every time.

SourHouse Temperature Control Products
You Might Also Enjoy
More recipes from our pantry that pair well with this bake.

Get More Recipes in Your Inbox
Join thousands of home bakers receiving weekly recipes, tips, and techniques to elevate your bread game.
No spam, ever. Unsubscribe anytime.
More from Baking Great Bread at Home
Tools, resources, and community to help you bake better bread

Crust & Crumb Academy
Go deeper into your craft. FREE courses, challenges, and real feedback. No gatekeeping. Perfection is not required.

Sourdough Starter Companion
Your AI-powered starter assistant. Track feedings, troubleshoot issues, and keep your starter thriving.

BakingGreatBread.com
Real bread for the rest of us

Baking Great Bread Blog
Recipes, tips, and stories from the bread journey

Recipe Converter
Convert sourdough recipes to yeast and back again

Crust & Crumb App
Your AI-powered baking assistant

Facebook Community
Join 50,000+ bakers sharing, learning, and supporting each other

Sourdough for the Rest of Us
Free beginner's guide to sourdough