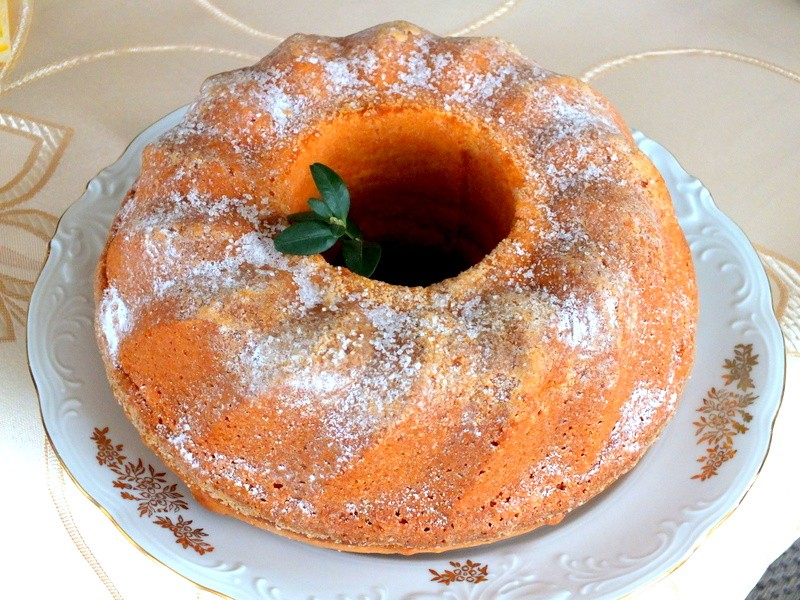
The Loaf That Started It All
IntermediateHenry's Sourdough ChocolateBabka
by Henry Hunter Jr.
Rich, chocolatey, and impossibly tender.
Rise Time
18-20 hours
Bake Time
40-45 minutes
Yield
One 9x5-inch loaf (approximately 800g)

Perfection is not required
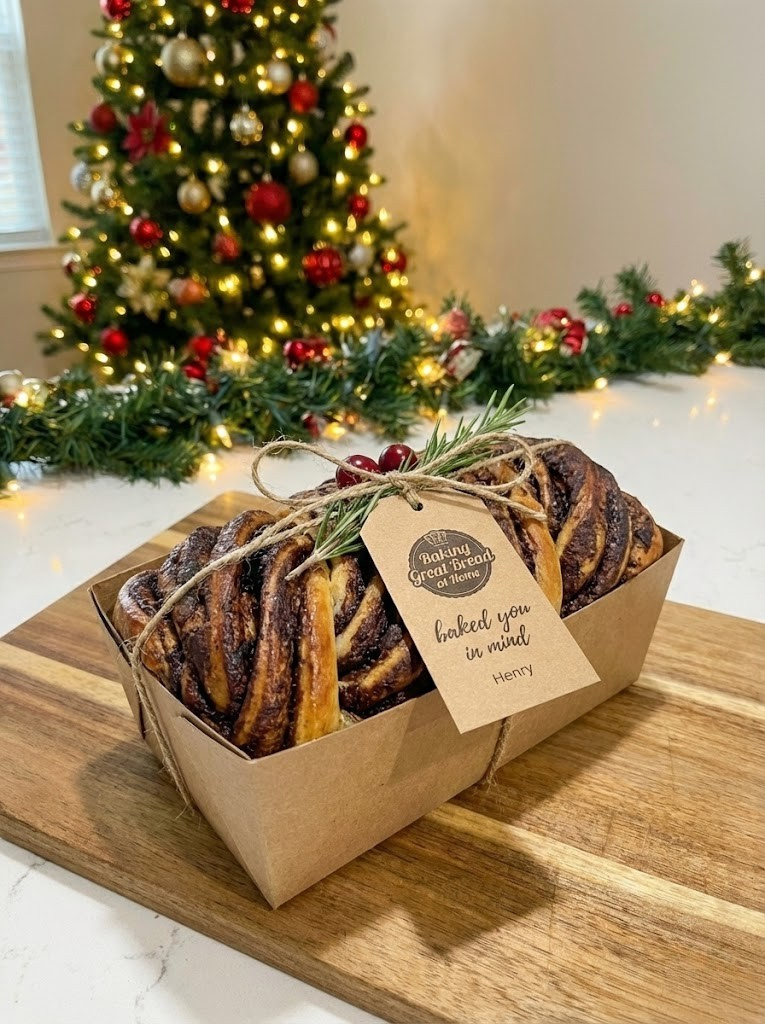
"Babka looks complicated but is actually quite forgiving. The messier it looks going into the pan, the more dramatic those chocolate swirls will be when you slice into it."— Henry Hunter Jr.
By Henry Hunter Jr., founder of Crust & Crumb Academy and Baking Great Bread at Home.
Authentic Flavor
This is one of those breads that proves sourdough isn't just for crusty loaves. The subtle tang pairs beautifully with rich chocolate, and the overnight cold retard makes your morning bake easy.
Equipment Needed
Ingredients
Levain
Build the night before
Dough
Enriched sourdough dough
Chocolate Filling
Rich chocolate spread
Simple Syrup
For moisture and shine
Optional Egg Wash
Pro Tip
Your should be bubbly, domed, and pass the . If it's not at peak, wait until it is or build a instead.
Day 1 Evening
Build the Levain
Prepare your the night before for maximum activity.
Click each step to mark complete
Combine ingredients
In a small jar, combine 25g starter, 40g flour, and 40g water. Mix until no dry flour remains.
Cover and ferment
Cover loosely and let ripen at room temperature (70-75°F) for 8-12 hours, or until doubled, bubbly throughout, and domed on top.
Check readiness
The is ready when it smells mildly sweet and tangy, not sharp or alcoholic. It should pass the .
Now
8-12 hours
Let the levain ripen overnight
Day 2 Morning
Mix the Dough
9:00 AM
Combine your peak with flour, milk, eggs, and sugar.
Click each step to mark complete
Combine wet and dry
In the bowl of a stand mixer fitted with the dough hook, combine all-purpose flour, milk, eggs, sugar, and all of the ripe .
Mix to shaggy dough
Mix on low speed (setting 2) for 2-3 minutes until a shaggy dough forms and no dry flour remains.
Rest
Cover the bowl and let rest for 20-30 minutes. This hydrates the flour and makes the dough easier to work with.
⏱ Wait Time
Resting period for flour hydration
Precise Timers
Use these interactive timers to track your stages.
Rest
Day 2
Add Salt and Butter
Develop the structure while incorporating fat.
Click each step to mark complete
Add salt
Sprinkle the salt over the dough. Mix on medium-low speed (setting 3) for 2 minutes until incorporated.
Add butter gradually
With the mixer running on medium-low, add the softened butter one or two pieces at a time. Wait until each addition is mostly incorporated before adding more. This takes 8-10 minutes total.
Develop gluten
Continue mixing on medium speed (setting 4) for another 5-8 minutes until the dough pulls away cleanly from the sides, is smooth, shiny, and elastic, and passes the .
Pro Tip
The dough will be soft and slightly sticky. That's correct for an enriched dough.
Day 2
Bulk Fermentation
Allow the dough to ferment with s to build structure.
Click each step to mark complete
Transfer dough
Transfer the dough to a lightly greased bowl or container.
First set of folds
Perform s: wet your hands, grab one side of the dough, stretch it up, and fold it over to the opposite side. Rotate the bowl 90° and repeat 4 times total. Cover and rest 30-45 minutes.
Second set of folds
Repeat the process. Cover and rest undisturbed for 1-2 more hours at room temperature.
Check readiness
The dough is ready when it has increased by about 50% (not doubled), looks puffy and slightly domed, and has small bubbles visible on the surface.
⏱ Wait Time
Don't wait for it to double. Enriched doughs ferment slower.
Pro Tip
Over-fermentation leads to a dense, heavy babka. Watch for 50% rise, not doubling.
Precise Timers
Use these interactive timers to track your stages.
First Fold Rest
Second Fold Rest
Day 2 Evening
Overnight Cold Retard
11:00 PM
The firms up the butter and develops flavor.
Click each step to mark complete
Cover tightly
Cover the bowl tightly with plastic wrap.
Refrigerate
Refrigerate for at least 8 hours or up to 24 hours.
⏱ Wait Time
The cold retard makes the dough much easier to roll out
Pro Tip
This step is not optional. Cold dough is essential for easy handling and clean layers.
Day 3 Morning
Make the Chocolate Filling
9:00 AM
Prepare a rich, spreadable chocolate filling.
Click each step to mark complete
Set up double boiler
Place a heatproof bowl over a pot of barely simmering water. The bowl should not touch the water.
Melt chocolate and butter
Add the chopped chocolate and butter. Stir occasionally until melted and smooth.
Add dry ingredients
Remove from heat. Whisk in the cocoa powder, powdered sugar, cinnamon (if using), and salt until completely smooth.
Cool
Let the filling cool to room temperature, about 30-45 minutes. It should be spreadable like soft peanut butter, not runny.
Pro Tip
If the filling is too loose, it will seep out during shaping. If it's too firm, pop it in the microwave for 10 seconds.
Precise Timers
Use these interactive timers to track your stages.
Filling Cool
Day 3
Roll and Fill
10:00 AM
Roll out the chilled dough and spread with chocolate filling.
Click each step to mark complete
Prepare pan
Grease a 9x5-inch loaf pan with butter or cooking spray. Line the bottom with a strip of parchment paper for easy removal.
Roll the dough
Remove the dough from the refrigerator. On a lightly floured surface, roll into a rectangle approximately 12x16 inches (30x40 cm), with the long side facing you. The dough should be about ¼ inch thick.
Spread filling
Spread the chocolate filling evenly over the dough, leaving a ½-inch border on all sides.
Roll up
Starting from the long side closest to you, roll the dough up tightly into a log. Pinch the seam to seal.
Slice lengthwise
Place the log seam-side down on the counter. Using a sharp knife or bench scraper, slice the log in half lengthwise, exposing all the layers.
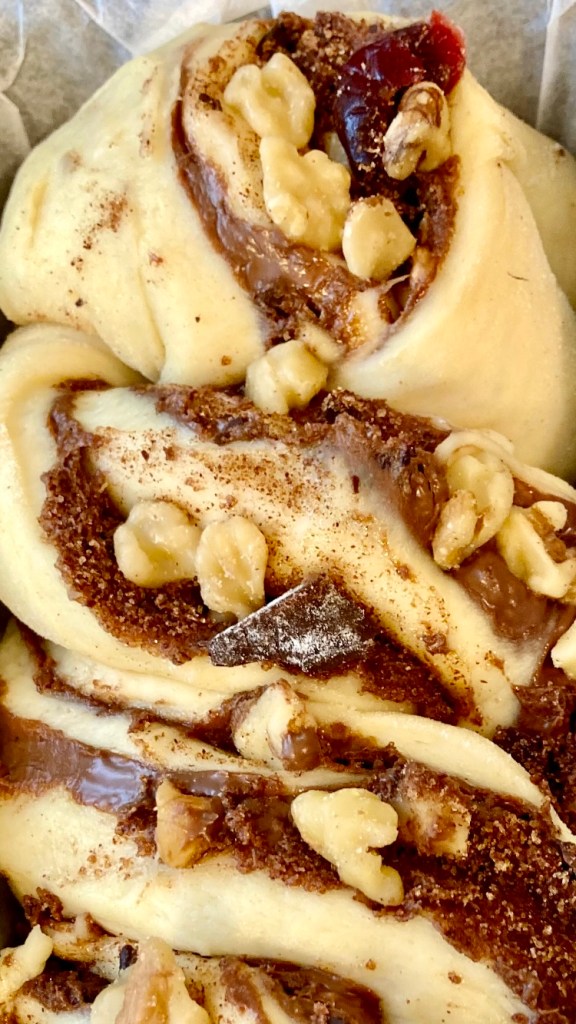
Cut the log lengthwise to expose the layers
Day 3
Braid and Pan
Create the signature babka twist.
Click each step to mark complete
Position halves
Lay the two halves side by side, cut sides facing up.
Pinch top ends
Pinch the top ends together firmly.
Braid
Cross the right half over the left, keeping the cut sides facing up. Then cross the left over the right. Continue alternating until you reach the end.
Secure ends
Pinch the bottom ends together and tuck underneath.
Transfer to pan
Carefully transfer the braided loaf to the prepared pan, gently pressing it down to fit.
Pro Tip
Don't worry about perfection. The messier it looks going into the pan, the more dramatic those chocolate swirls will be when you slice into it.
Day 3
Final Proof
10:30 AM - 2:30 PM
Allow the shaped babka to rise until puffy.
Click each step to mark complete
Cover
Cover the pan loosely with a damp towel or plastic wrap.
Proof
Let proof at room temperature (75-78°F) for 3-4 hours.
Check readiness
The dough is ready when it has risen to about ½ inch below the rim of the pan, looks puffy, and jiggles slightly when you shake the pan. A gentle poke leaves an indent that slowly springs back.
⏱ Wait Time
Don't let it rise above the rim
Pro Tip
Overproofed babka collapses in the oven. Watch it carefully.
Precise Timers
Use these interactive timers to track your stages.
Final Proof
The Final Step
Bake
Bake until deeply golden with an internal temperature of 185-190°F.
Baking Methods
The classic approach for perfectly baked babka
Equipment: 9x5-inch loaf pan
Preheat oven
During the last 30 minutes of proofing, preheat your oven to 350°F (175°C).
Apply egg wash (optional)
If using egg wash, whisk together the egg and milk. Gently brush the top of the babka.
Initial bake
Bake for 20 minutes.
Check color
If the top is browning too quickly, tent loosely with aluminum foil.
Continue baking
Bake for another 20-25 minutes until deep golden brown and the internal temperature reaches 185-190°F (85-88°C).
Test doneness
The babka should sound hollow when tapped. Total baking time: 40-45 minutes.
"If the top browns too quickly, tent with foil after 20 minutes."
Nutrition Facts
Per 1 slice • 12 servings per recipe
* Values are estimates based on standard ingredients
Storage
Room Temperature
Wrap tightly in plastic wrap or store in an airtight container for up to 4 days. Babka actually improves on day 2 as the flavors meld.
Frozen
Wrap tightly in plastic wrap, then foil. Freeze for up to 2 months. Thaw at room temperature overnight.
💡 This makes an incredible gift. Wrap it in parchment, tie it with twine, and watch people's faces light up.
Your Feedback
Rate This Recipe
Loading ratings...
Troubleshooting
Baker's Notes
Common questions and solutions for perfect results
If you're serious about scoring, you need the right blade in your hand. Wire Monkey makes handcrafted bread lames from black walnut — built to last, balanced in the hand, and sharp enough to glide through cold dough cleanly every single time. No dragging, no hesitation marks. Just a clean cut.

Wire Monkey Handcrafted Bread Lames
You Might Also Enjoy
More recipes from our pantry that pair well with this bake.
Get More Recipes in Your Inbox
Join thousands of home bakers receiving weekly recipes, tips, and techniques to elevate your bread game.
No spam, ever. Unsubscribe anytime.
More from Baking Great Bread at Home
Tools, resources, and community to help you bake better bread

Crust & Crumb Academy
Go deeper into your craft. FREE courses, challenges, and real feedback. No gatekeeping. Perfection is not required.

Sourdough Starter Companion
Your AI-powered starter assistant. Track feedings, troubleshoot issues, and keep your starter thriving.

BakingGreatBread.com
Real bread for the rest of us

Baking Great Bread Blog
Recipes, tips, and stories from the bread journey

Recipe Converter
Convert sourdough recipes to yeast and back again

Crust & Crumb App
Your AI-powered baking assistant

Facebook Community
Join 50,000+ bakers sharing, learning, and supporting each other

Sourdough for the Rest of Us
Free beginner's guide to sourdough