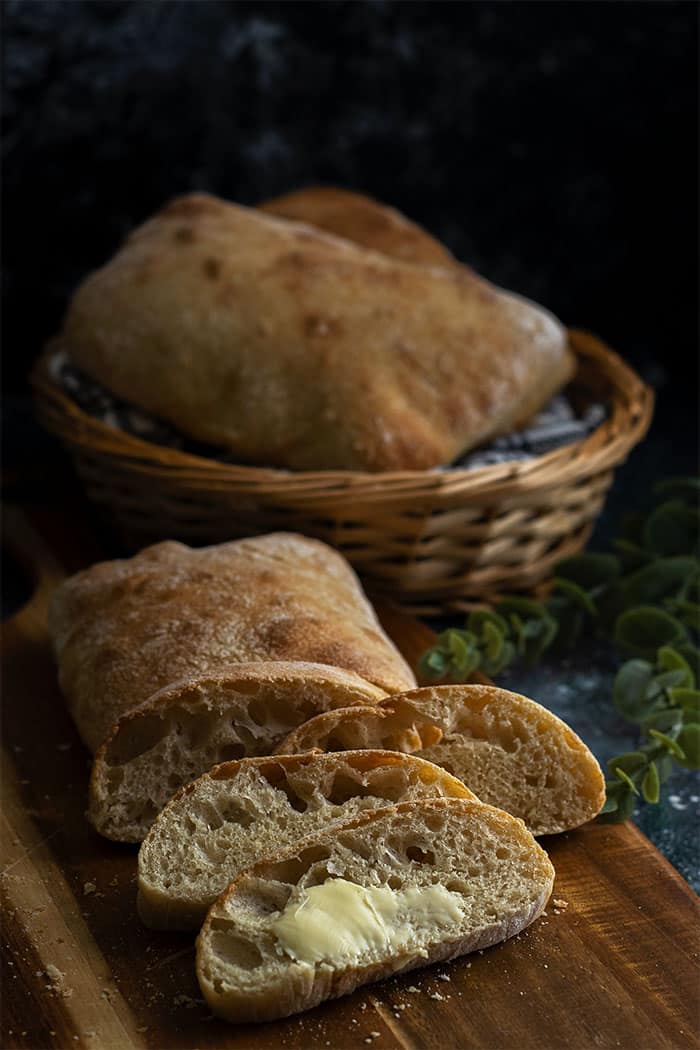
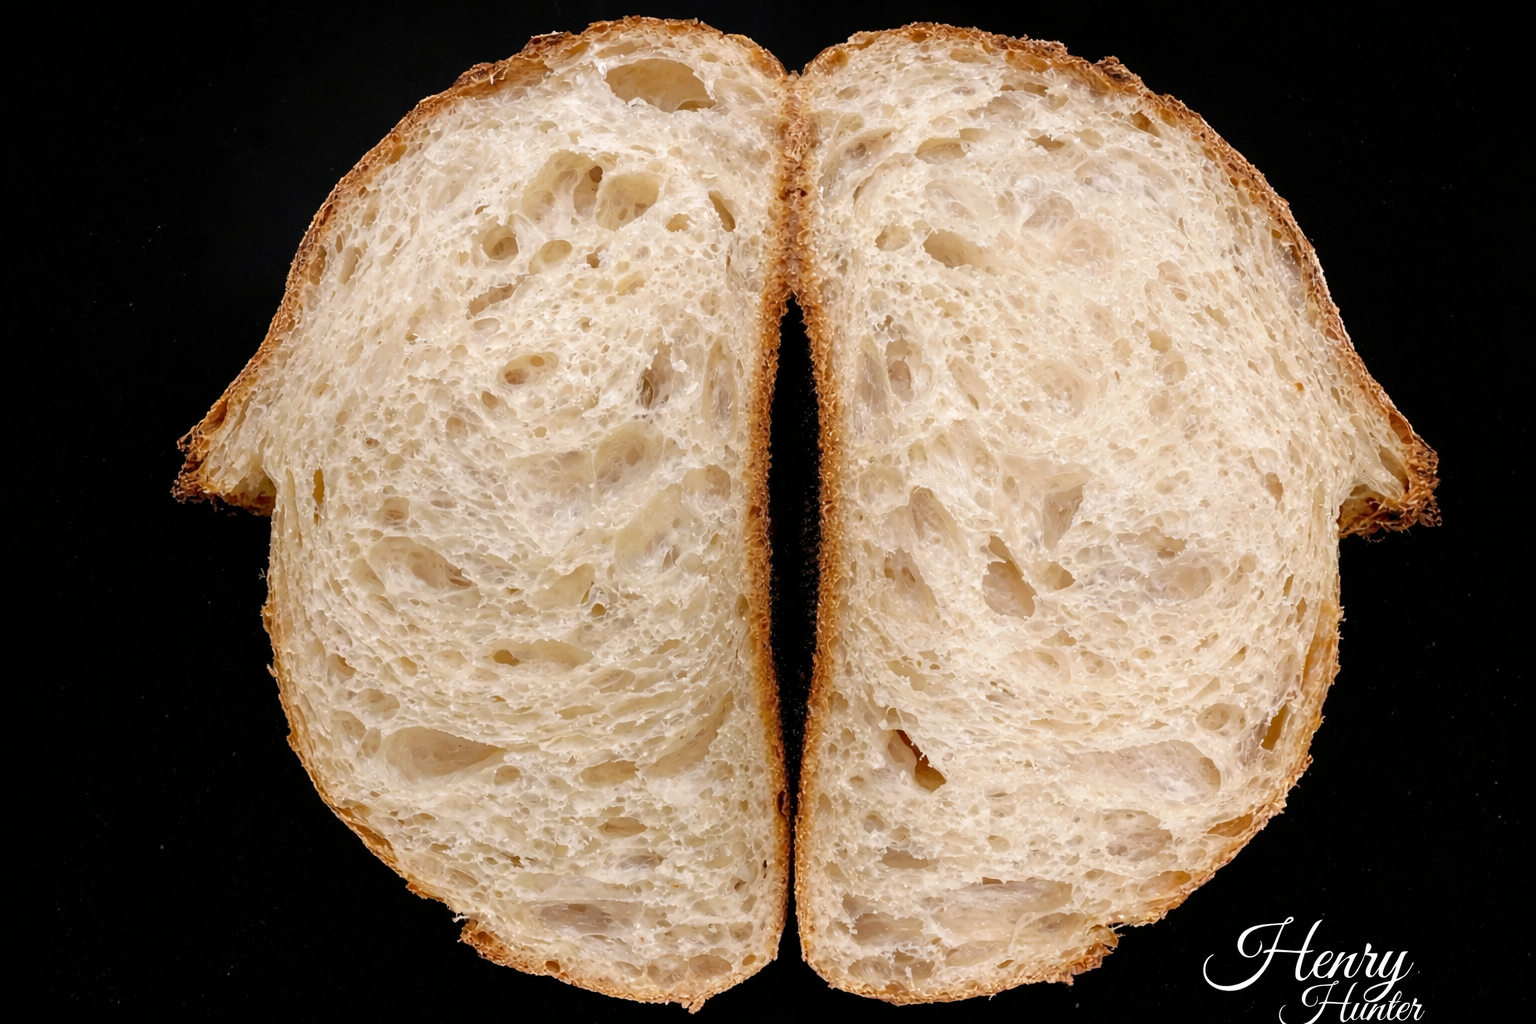
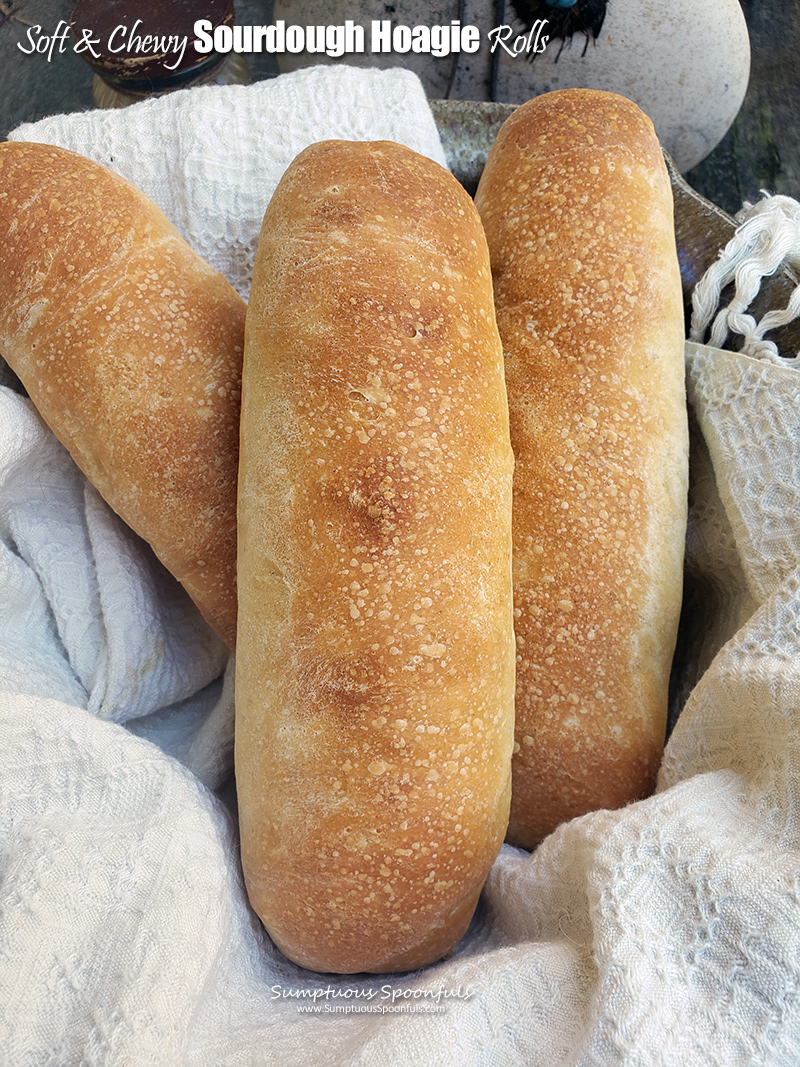
High-hydration sourdough slipper with crackly crust and honeycomb crumb
IntermediateSourdough ItalianCiabatta
by Henry Hunter Jr.
No yeast, no shaping, all flavor
Fermentation
8-12 hours (levain) + 4-5 hours (bulk)
Bake Time
22-25 minutes
Yield
Makes 2 slipper-shaped loaves, about 450g each

Perfection is not required
"A ripe levain does work that no commercial yeast can match. Ciabatta is where you taste the difference."— Henry Hunter Jr.
By Henry Hunter Jr., founder of Crust & Crumb Academy and Baking Great Bread at Home.
Authentic Flavor
Henry is the founder of Crust & Crumb Academy and the author of six books on bread baking, including Vitale Sourdough Mastery and From Oven to Market.
Equipment Needed
Ingredients
Active Levain (built night before)
Build this 8-12 hours before mixing the final dough. It's ripe when it's doubled, domed, and passes the {{float-test}}.
Final Dough
Built with the ripe levain the next morning. No commercial yeast.
Pro Tip
Use a high-protein bread flour (12%+) for best results. Your levain needs to be at peak activity, meaning it's doubled, domed, and floats in water. An underperforming levain is the #1 cause of dense sourdough ciabatta.
Day 1 - Evening
Build the Levain
5 minutes of work, then it does its thing overnight
The is your natural leavening. Built from ripe starter, flour, and water, it ferments overnight and becomes the engine for the entire bake.
Click each step to mark complete
Mix the Levain
In a small jar or bowl, combine the ripe sourdough starter, flour, and water. Stir until smooth and no dry flour remains. Mark the level on the side of the jar with a rubber band or tape so you can track the rise.
Cover and Rest
Cover loosely with plastic wrap or a loose lid (gases need to escape) and leave at room temperature (72-76F / 22-24C) for 8-12 hours. The levain is ready when it's doubled, domed on top, and passes the (a spoonful dropped in water floats).
⏱ Wait Time
8-12 hours
Pro Tip
The colder your kitchen, the longer it takes. If your kitchen runs cold (under 68F), build the levain a few hours earlier. If it runs warm (76F+), check at 7-8 hours. A collapsed levain has lost its leavening power. Catch it at peak.
Natural leavening
A is a stiff preferment built from your active starter. It's strong enough to raise a 500g dough on its own, without any commercial yeast. The wild yeast and lactic acid bacteria work together during that 8-12 hour ferment to build complex flavor and reliable rise.
Flavor development
The extended fermentation produces organic acids (lactic and acetic) that give sourdough its signature tang. Ciabatta made this way has a deeper, more complex flavor than the yeasted version, with notes that commercial yeast simply can't produce.
The float test
Drop a teaspoon of your levain into a glass of water. If it floats, there's enough trapped gas to leaven your dough. If it sinks, give it more time. This is the most reliable readiness check for any sourdough preferment.
The Takeaway
A ripe levain does the work of both the poolish and the yeast. One preferment, two jobs.
Day 2 - Morning
Mix the Final Dough
Wet, sticky, and nothing to panic about
This dough is supposed to be wet. Don't fight it. We're building gluten through time and folds, not kneading.
Click each step to mark complete
Combine Levain and Water
In a large bowl, add the ripe levain and the lukewarm water. Whisk or stir to break up the levain into the water. It'll look cloudy with some clumps, that's fine. You just want it mostly dispersed.
Add Flour
Add the bread flour. Hold back the salt and olive oil for now. Mix with a dough whisk, wooden spoon, or wet hand until no dry flour remains. It'll be shaggy and sticky.
Rest (Fermentolyse)
Cover the bowl and let it rest 30-45 minutes. This is a . The flour fully hydrates and the gluten starts organizing itself while the levain begins its work on the larger dough.
Add Salt and Olive Oil
Sprinkle the salt over the dough and drizzle the olive oil on top. With a wet hand, pinch and fold the salt and oil into the dough until fully incorporated. It'll feel slack and weird. That's normal.
⏱ Wait Time
30-45 minutes
Pro Tip
Your dough temperature matters more than you think. Aim for a final dough temp of 76-78F (24-26C). Cooler water in summer, warmer in winter. Sourdough is temperature-sensitive and a cold dough will drag your timeline out by hours.
Day 2 - Morning
Bulk Fermentation with Coil Folds
Four gentle folds, 45 minutes apart
Sourdough bulk runs longer than yeasted bulk. We're building strength and gas slowly using s, then letting fermentation finish the job.
Click each step to mark complete
First Coil Fold
With wet hands, reach under the middle of the dough, lift it up gently, and let it fold under itself. Rotate the bowl 90 degrees and repeat. Do this 4 times total so you've worked all four sides. Cover and rest 45 minutes.
Second Coil Fold (Inclusions Go In Here)
Same technique as the first fold. If you're adding inclusions (olives, cheese, roasted garlic, herbs), this is the moment. Scatter them across the dough before you start the fold, then let each fold wrap around and redistribute them. See the Inclusions Guide below for prep tips and amounts. Cover and rest 45 minutes.
Third Coil Fold
By now the dough should be holding its shape and have visible air bubbles. Cover and rest 45 minutes.
Fourth Coil Fold
Final fold. The dough should feel alive, airy, and smooth. After this fold, let it finish bulk for another 90-120 minutes, covered. Total bulk time runs 4-5 hours at 75F.
⏱ Wait Time
4-5 hours
Pro Tip
The dough is ready when it's jiggly, airy, and has increased in volume by 50-70%. Don't wait for it to double. Overproofed ciabatta dough is a sad, flat slipper. Sourdough bulk takes longer than yeasted bulk, so watch the dough, not the clock.
Why coil folds, not stretch and folds
A pulls the dough up and over itself, which works great for medium-hydration doughs. A coil fold lifts from the center and lets the dough fold on itself, which is gentler and preserves the gas already developing inside. Sourdough ciabatta's open crumb depends on keeping those bubbles alive. Gentle hands, open crumb.
When to add inclusions (the second fold, not the last)
Fold inclusions in during the Second Coil Fold. The dough has developed enough strength from the first fold to hold them, and there's still 3+ hours of bulk ahead for the gluten to reorganize around them. Adding inclusions on the last fold risks tightening the crumb because there's no time for the dough to heal before shaping.
Prep matters more than you think
Olives: pat dry between paper towels, dust lightly with flour. Sun-dried tomatoes: squeeze the oil out, chop small. Roasted garlic: cool completely, mash slightly. Fresh herbs: tear, don't chop, and add at the second fold only so they don't bruise. Cheese: shred or crumble, keep cold. Wet ingredients will slacken your dough, so drain them hard.
How much to add
Target around 15-20% of total flour weight for dry or firm inclusions. For this 500g recipe, that's 75-100g total. Less for anything wet. More than that and the structure starts to suffer.
The Takeaway
Second fold, prep dry, 75-100g max. That's the ciabatta inclusion rule.
Precise Timers
Use these interactive timers to track your stages.
Between Folds
Final Bulk Rest
Day 2 - Afternoon
Divide and Cut (Not Shape)
This is the ciabatta secret
Ciabatta doesn't get shaped. It gets poured, dusted, and cut. The word ciabatta literally means slipper, and that's exactly what we're after.
Click each step to mark complete
Prepare Your Surface
Generously flour a clean work surface with bread flour (or a 50/50 mix of bread flour and semolina for extra texture on the bottom crust). Be more generous than you think.
Pour the Dough
Gently scrape the dough out onto the floured surface. Don't deflate it. It should flop out as a rough rectangle. Dust the top with more flour.
Stretch Gently
With floured hands, gently stretch the dough into a rough rectangle about 10x8 inches. Don't press hard. You want to keep all those bubbles alive.
Cut Into Two Loaves
With a bench scraper or sharp knife, cut the rectangle down the middle to make two long slipper-shaped loaves. That's it. No shaping, no tucking, no sealing. The rough edges are a feature.
Transfer to Parchment
Carefully lift each loaf onto a piece of parchment paper. Some bakers flip them seam-side up (bottom of the dough becomes the top) so the original bottom shows the floured, more rustic surface. Your call.
Pro Tip
The messier it looks on the counter, the better your ciabatta will be. Smooth, uniform ciabatta is the sign of a dough that was over-handled.
Day 2 - Afternoon
Final Proof
Short, warm, and watched
Unlike lean sourdough loaves that get a long cold retard, ciabatta wants a short, warm final proof to preserve the open crumb structure.
Click each step to mark complete
Cover and Rest
Cover the loaves loosely with a floured cloth or plastic wrap. Let them proof at room temperature for 45-60 minutes. Sourdough final proof runs longer than yeasted. The loaves should look puffy and relaxed but not flat.
Preheat the Oven
While the loaves proof, preheat your oven to 475F (245C) with a baking stone or steel on the middle rack and a cast iron pan on the bottom rack for steam. Preheat for at least 45 minutes.
⏱ Wait Time
45-60 minutes
Pro Tip
The works here too. Poke gently. If the dough springs back slowly but doesn't fill in completely, you're ready to bake. Overproofed sourdough ciabatta will spread flat in the oven.
Shaping
The No-Shape Method
Ciabatta is famous for having essentially no shaping step. This is what makes it approachable for beginners and still rewarding for advanced bakers.
Traditional Slipper
The classic. Long, narrow, and rustic.
RecommendedClick each step to mark complete
Pour, don't dump
Gently scrape dough onto a well-floured surface.
Flour the top
Dust generously so your hands don't stick.
Stretch lightly
Hands flat, stretch into a rough rectangle.
Cut
One clean cut down the middle with a bench scraper.
Ciabatta Rolls
Same dough, cut into 6-8 smaller pieces. Perfect for panini or sliders.
Click each step to mark complete
Divide
Cut the rectangle into 6-8 equal pieces with a bench scraper.
Space them out
Arrange on parchment with space to spread.
Proof and bake
Reduce bake time to 15-18 minutes total.
Proof Test: Poke test works the same way. Springs back slowly but not completely means it's ready.
The Final Step
Bake
High heat, big steam, fast bake. Ciabatta bakes faster than most artisan loaves because of the thin, flat shape.
Baking Methods
The classic method. A preheated stone or steel plus a steam pan gives you the best crust and spring.
Equipment: Baking stone or steel, cast iron pan for steam, pizza peel
Prep the Steam
Have 1 cup of hot water ready in a measuring cup.
Load the Loaves
Slide the parchment with both loaves onto the preheated stone using a pizza peel or the back of a sheet pan. Immediately pour the hot water into the cast iron pan below and close the oven door fast.
Bake with Steam
Bake at 475F (245C) for 12 minutes with steam.
Vent and Finish
Carefully remove the steam pan (or just crack the oven door for 10 seconds). Bake another 10-13 minutes until deep golden brown and the internal temp hits 205F (96C).
Cool
Transfer to a cooling rack. Let rest at least 30 minutes before slicing. Ciabatta cuts best when fully cool.
"Don't skip the steam. Dry oven heat gives you a pale, tough crust. Steam gives you that signature ciabatta crackle."
Nutrition Facts
Per 1 slice (50g) • 18 servings per recipe
* Values are estimates based on standard ingredients
Storage
Room Temperature
Best eaten the day it's baked. Will keep 2-3 days in a paper bag (sourdough keeps slightly longer than yeasted). The crust will soften as it cools, which is normal.
Refrigerated
Not recommended. Refrigeration stales bread fast.
Frozen
Up to 2 months. Wrap tightly in plastic, then foil. Slice before freezing for easy toasting.
Refresh
Spritz with water and reheat at 375F (190C) for 5-7 minutes. The crust will crackle back to life.
Your Feedback
Rate This Recipe
Loading ratings...
Troubleshooting
Baker's Notes
Common questions and solutions for perfect results
If you're serious about scoring, you need the right blade in your hand. Wire Monkey makes handcrafted bread lames from black walnut — built to last, balanced in the hand, and sharp enough to glide through cold dough cleanly every single time. No dragging, no hesitation marks. Just a clean cut.

Wire Monkey Handcrafted Bread Lames
You Might Also Enjoy
More recipes from our pantry that pair well with this bake.
Get More Recipes in Your Inbox
Join thousands of home bakers receiving weekly recipes, tips, and techniques to elevate your bread game.
No spam, ever. Unsubscribe anytime.
More from Baking Great Bread at Home
Tools, resources, and community to help you bake better bread

Crust & Crumb Academy
Go deeper into your craft. FREE courses, challenges, and real feedback. No gatekeeping. Perfection is not required.

Sourdough Starter Companion
Your AI-powered starter assistant. Track feedings, troubleshoot issues, and keep your starter thriving.

BakingGreatBread.com
Real bread for the rest of us

Baking Great Bread Blog
Recipes, tips, and stories from the bread journey

Recipe Converter
Convert sourdough recipes to yeast and back again

Crust & Crumb App
Your AI-powered baking assistant

Facebook Community
Join 50,000+ bakers sharing, learning, and supporting each other

Sourdough for the Rest of Us
Free beginner's guide to sourdough