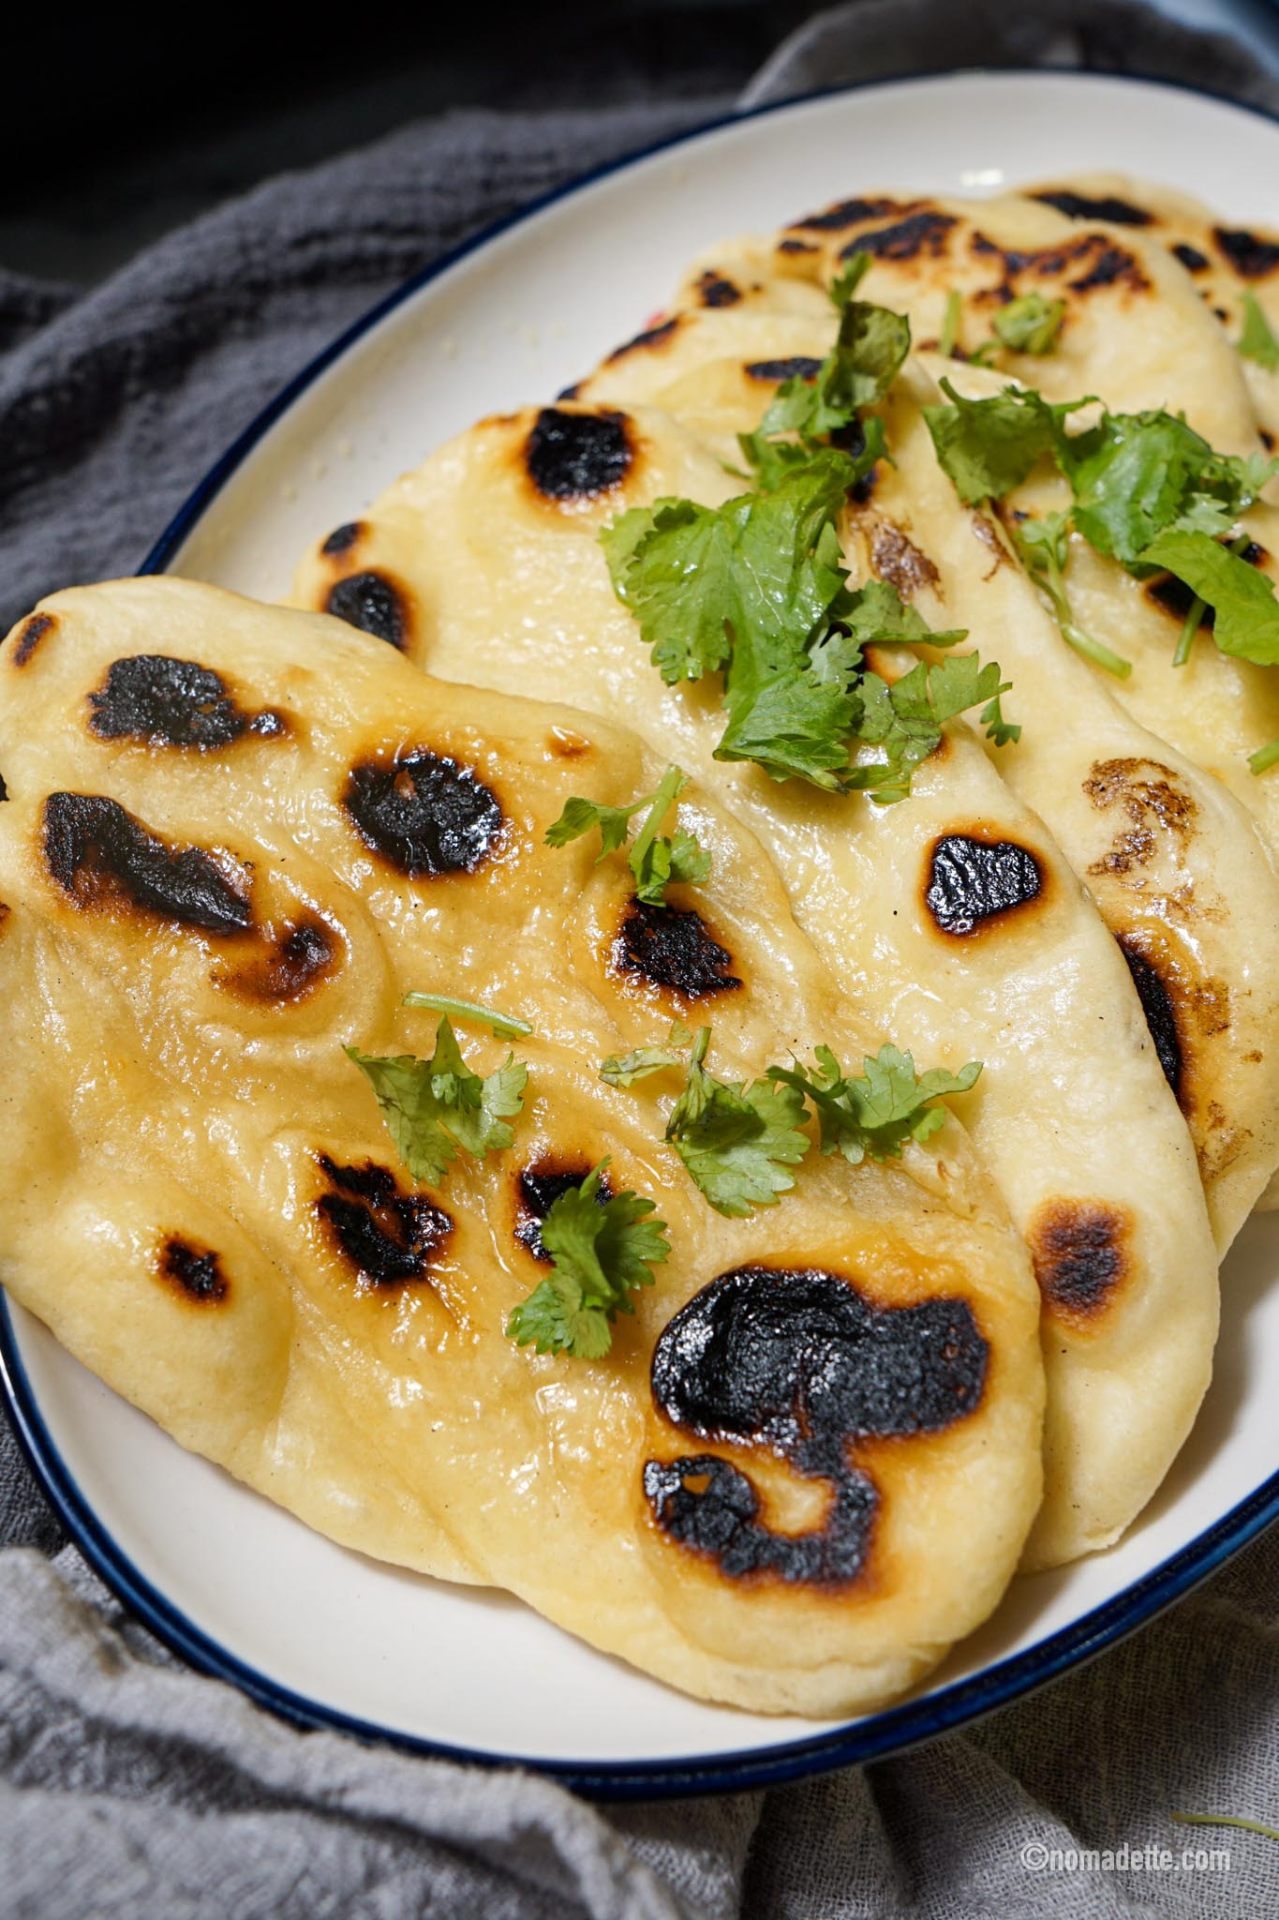
Soft, Puffy, and Blistered Indian Flatbread
BeginnerNaanBread
by Henry Hunter
Restaurant-style naan from your cast iron skillet, no tandoor required.
Fermentation
1–1.5 hours
Bake Time
20 min
Yield
8 naan (about 6–7 inches each)

Perfection is not required
"This is the naan recipe that finally made me stop ordering takeout flatbread."— Henry Hunter
By Henry Hunter Jr., founder of Crust & Crumb Academy and Baking Great Bread at Home.
Authentic Flavor
Soft, chewy, and covered in those gorgeous charred bubbles, it comes together with pantry ingredients and a hot cast iron skillet. The yogurt and egg in the dough give it that signature pillowy texture you get at your favorite Indian restaurant. Make the garlic butter version and you'll never go back.
Equipment Needed
Ingredients
Naan Dough
All-purpose works too
Garlic Butter Finish
For finishing
Pro Tip
Use full-fat regular yogurt, not Greek. Greek yogurt has less moisture and more protein, which can make the dough tighter than you want. If Greek is all you have, reduce the flour by about 25g.
Step 1
Activate Yeast
Getting the yeast going and building the dough. This takes less time than you think.
Click each step to mark complete
Bloom the Yeast
Combine warm water (105–110°F / 40–43°C), , and sugar in a large bowl. Stir gently and let sit for 5–10 minutes until foamy and bubbly on top. If nothing happens after 10 minutes, your yeast is dead — toss it and start fresh.
Combine Wet Ingredients
Whisk the yogurt, egg, and olive oil into the yeast mixture until smooth.
Pro Tip
Even though can go straight into dough, it in warm water first gives you a fluffier naan. I've tested both ways. The bloomed version wins every time.
Precise Timers
Use these interactive timers to track your stages.
Bloom Yeast
Step 2
Mix and Knead the Dough
Building the dough structure. You want soft and slightly sticky, not stiff.
Click each step to mark complete
Add Dry Ingredients
Add the flour and salt to the wet mixture. Stir with a fork or your hand until a shaggy dough forms.
Knead
Turn out onto a lightly floured surface and knead for 5–6 minutes until smooth and slightly tacky. The dough should spring back when you poke it. If it's too sticky to handle, dust your hands with flour rather than adding more flour to the dough. You want to keep this on the softer side.
Form a Ball
Shape into a smooth ball and place in a lightly oiled bowl. Cover with plastic wrap or a damp towel.
Pro Tip
Resist the urge to add extra flour. A slightly sticky dough makes softer, puffier naan. Think "tacky like a Post-it note," not "glue on your fingers."
Step 3
First Rise
Let the yeast do its thing. The dough should roughly double in size.
Click each step to mark complete
Rise
Place the covered bowl in a warm spot (75–80°F / 24–27°C is ideal). Let the dough rise until doubled, about 1 to 1.5 hours. If your kitchen is cool, turn your oven light on and place the bowl inside with the door cracked — that's a free box.
⏱ Wait Time
1–1.5 hours
Precise Timers
Use these interactive timers to track your stages.
First Rise
Step 4
Divide and Shape
Portioning and rolling the naan. Don't overthink the shape — rustic and uneven is traditional.
Click each step to mark complete
Punch Down
Gently deflate the dough by pressing it with your fingertips.
Divide
Turn out onto a lightly floured surface and use a to cut into 8 equal pieces (about 75–80g each).
Shape into Balls
Roll each piece into a smooth ball, tucking the edges under. Cover with a towel and let rest for 5 minutes. This brief rest relaxes the gluten and makes rolling easier.
Roll Out
Using a floured rolling pin, roll each ball into an oval or teardrop shape about 6–7 inches long and roughly ¼ inch thick (5–6mm). Don't stress about perfection — irregular shapes are how naan looks when it's handmade.
Pro Tip
Roll them to about ¼ inch thick. Too thin and they'll crisp up instead of staying soft. Too thick and you won't get those signature bubbles.
Shaping
Shape the Naan
Don't overthink the shape — rustic and uneven is traditional.
Oliver Wing's Naan Shaping Tutorial
Watch Oliver break down exactly how to roll, shape, and cook naan on the skillet — including his layered paratha technique.
Classic Teardrop
The traditional naan shape, wider at one end.
RecommendedClick each step to mark complete
Roll
Roll each ball into a rough oval or teardrop, about 6–7 inches long.
Orient
The wider end goes down on the skillet first.
Round (for Wraps or Pizza)
Versatile flat rounds for wraps and flatbread pizza.
Click each step to mark complete
Roll
Roll into a circle about 7–8 inches across.
Use
These work great as flatbread pizza bases or sandwich wraps.
Stuffed Naan
Cheese or potato-filled naan for a complete meal.
Click each step to mark complete
Fill
Roll to about 4 inches, place 2 tbsp filling in center.
Seal
Pinch edges closed, flip seam-side down, roll gently to 6 inches.
Cook
Cook seam-side down first.
Step 5
Cook on the Skillet
High heat is what makes naan puff up with those gorgeous blistered spots. Get the pan screaming hot.
Click each step to mark complete
Preheat the Skillet
Place your cast iron skillet over medium-high heat for at least 3–4 minutes. It needs to be seriously hot. You should see a slight shimmer or wisps of smoke.
Cook First Side
Place one rolled naan onto the dry skillet (no oil needed). Cook for 1–2 minutes until the bottom has golden-brown spots and you see large bubbles forming on the surface.
Flip
Flip the naan and cook for another 1–2 minutes until the second side has charred spots. Press down gently with a spatula if any large air pockets form to help even cooking.
Brush and Stack
Immediately brush the hot naan with garlic butter and sprinkle with cilantro and flaky salt. Stack cooked naan on a plate and cover with a clean towel to keep them warm and pliable while you cook the rest.
Pro Tip
Cook them one at a time. I know it's tempting to rush, but each naan needs full contact with that hot surface. While one cooks, roll the next one out. You'll get into a rhythm fast.
Precise Timers
Use these interactive timers to track your stages.
Preheat Skillet
Cook Per Naan
The Final Step
Cook the Naan
High heat on a dry skillet creates the signature bubbles and char.
Baking Methods
The best method for home naan. A screaming-hot dry skillet mimics a tandoor.
Equipment: 12-inch cast iron skillet
Preheat
Heat dry cast iron skillet over medium-high for 3–4 minutes until you see a slight shimmer or wisps of smoke.
Cook First Side
Place naan on dry skillet. Cook 1–2 minutes until golden-brown spots on bottom and large bubbles on top.
Flip
Cook second side 1–2 minutes until charred spots develop. Press gently with a spatula if large air pockets form.
Finish
Immediately brush with garlic butter, sprinkle with cilantro and flaky salt. Stack under a towel.
Nutrition Facts
Per 1 naan (about 85g) • 8 servings per recipe
* Values are estimates based on standard ingredients; actual values vary by brands and portion size.
Storage
Room Temperature
1–2 days in a zip-top bag or airtight container (best eaten same day)
Refrigerated
Up to 3 days, wrapped in foil. The texture changes but it reheats well.
Frozen
Up to 3 months. Cool completely, stack with parchment between each naan. Reheat on a hot skillet for 30–60 seconds per side or in a 350°F (175°C) oven for 5 minutes.
Refresh
Reheat at 375°F (190°C) for 8-10 minutes to restore the crust. A quick pass under the broiler at the end brings back crispness.
💡 Naan is best eaten fresh and warm. If reheating, a hot skillet brings back the softness better than a microwave.
Your Feedback
Rate This Recipe
Loading ratings...
Troubleshooting
Baker's Notes
Common questions and solutions for perfect results

If you're serious about scoring, you need the right blade in your hand. Wire Monkey makes handcrafted bread lames from black walnut — built to last, balanced in the hand, and sharp enough to glide through cold dough cleanly every single time. No dragging, no hesitation marks. Just a clean cut.

Wire Monkey Handcrafted Bread Lames
You Might Also Enjoy
More recipes from our pantry that pair well with this bake.
Get More Recipes in Your Inbox
Join thousands of home bakers receiving weekly recipes, tips, and techniques to elevate your bread game.
No spam, ever. Unsubscribe anytime.
More from Baking Great Bread at Home
Tools, resources, and community to help you bake better bread

Crust & Crumb Academy
Go deeper into your craft. FREE courses, challenges, and real feedback. No gatekeeping. Perfection is not required.

Sourdough Starter Companion
Your AI-powered starter assistant. Track feedings, troubleshoot issues, and keep your starter thriving.

Fermentation Compass
Stop guessing when bulk fermentation is finished. Read your dough. Nail your bake.

BakingGreatBread.com
Real bread for the rest of us

Baking Great Bread Blog
Recipes, tips, and stories from the bread journey

Recipe Converter
Convert sourdough recipes to yeast and back again

Crust & Crumb App
Your AI-powered baking assistant

Facebook Community
Join 50,000+ bakers sharing, learning, and supporting each other

Sourdough for the Rest of Us
Free beginner's guide to sourdough