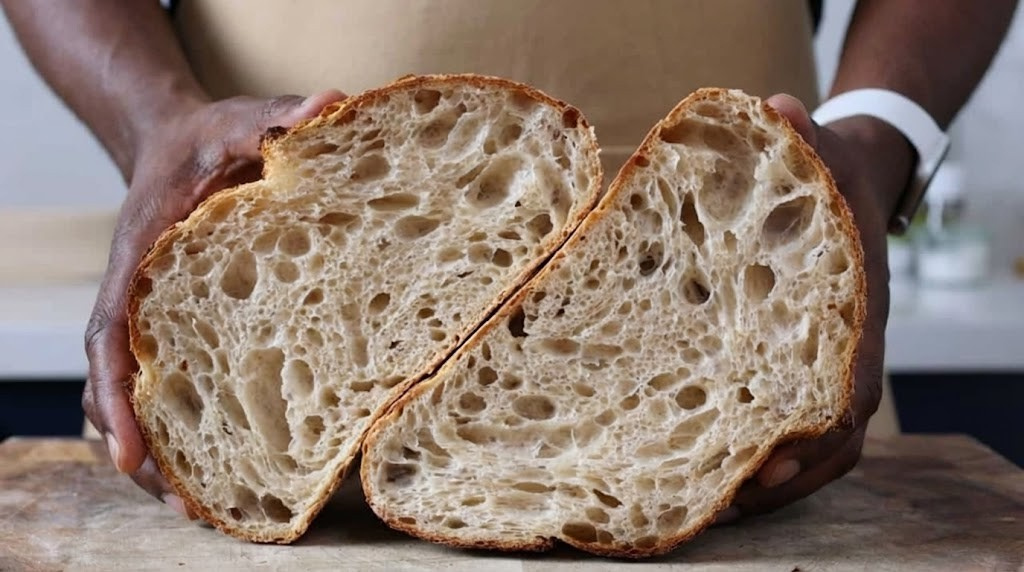
A real, tangy, open-crumb sourdough — made entirely without wheat
IntermediateGluten-Free SourdoughBread
by Henry Hunter Jr.
Sourdough doesn't have to mean wheat.
Rise Time
4–5 hours bulk + 8–12 hours cold retard
Bake Time
50–55 minutes
Yield
One round loaf, approximately 750g

Perfection is not required
"Great bread isn't about perfect technique—it's about understanding the dough."— Henry Hunter Jr.
By Henry Hunter Jr., founder of Crust & Crumb Academy and Baking Great Bread at Home.
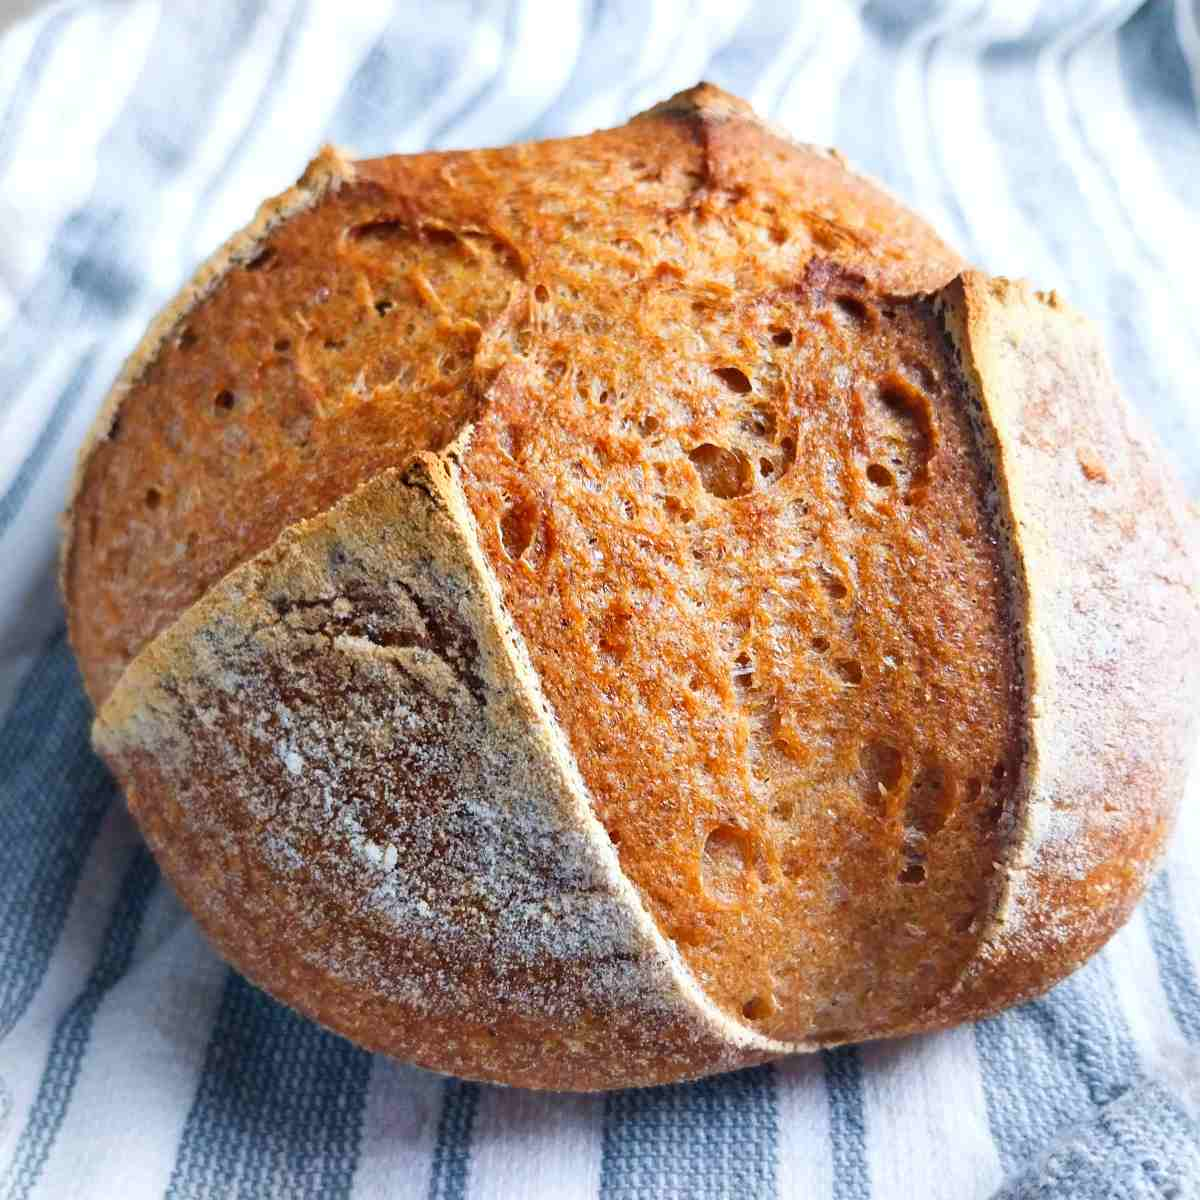
Authentic Bread Flavor
An open-crumb gluten-free sourdough boule with real tang and a crackling crust, baked in a Dutch oven using a rice flour starter.
Equipment Needed
Round 8–9 inch banneton dusted with rice flour
Ingredients
GF Sourdough Starter (prepare 8–12 hours ahead)
Your starter should be an active, 100% hydration GF starter (equal weights rice flour and water). Feed it 8–12 hours before mixing so it's at peak activity.
Main Dough
Pro Tip
Brown rice flour adds nuttiness and more complex flavor than white rice flour alone. Sorghum brings a mild, wheat-like quality that makes this taste more like 'real' sourdough. Don't skip it.
Step 1
Confirm Starter Peak Activity
GF sourdough starters behave differently than wheat starters — they often rise less dramatically but are still active. Knowing how to read your starter's peak is the most important skill in this recipe.
Click each step to mark complete
The float test and visual check
Drop a small spoonful of starter into water — if it floats, it's ready. Also look for: bubbles throughout (not just on top), a domed or slightly fallen top, and a pleasantly sour, yeasty smell. GF starters often don't double the way wheat starters do — look for at least 50% volume increase and visible bubbles.
How to Maintain a GF Starter
A GF uses brown rice flour or sorghum flour as food for wild yeast and lactobacillus bacteria. Feed it equal weights flour and water (100% ) every 12–24 hours at room temperature. It will develop a tangy smell and bubbly texture within 5–7 days. Store in the fridge between bakes and feed 8–12 hours before use.
The Takeaway
Feed your GF starter 8–12 hours before you mix dough. Bubbles + dome = ready to bake.
Step 2
Mix the Dough
This dough mixes more like a very thick batter than a traditional sourdough. The psyllium gel will form quickly — work with confidence and don't second-guess the texture.
Click each step to mark complete
Combine dry ingredients
Whisk together the brown rice flour, white rice flour, sorghum flour, tapioca starch, psyllium husk powder, and salt in a large bowl until fully uniform.
Mix wet ingredients and starter
In a separate bowl, whisk the warm water, starter, olive oil, and apple cider vinegar together. Add the wet mixture to the dry, and mix vigorously with a dough whisk or stiff spatula for 2–3 minutes until smooth and uniform. The dough will thicken significantly over 2–3 minutes as the psyllium activates.
Step 3
Bulk Fermentation
Unlike wheat sourdough, GF dough doesn't get stretch and fold sets — the psyllium structure can't be rebuilt once disrupted. Instead, you do a single, undisturbed bulk fermentation. Cover the bowl tightly and ferment at 75–78°F (24–26°C) for 4–5 hours until the dough has increased by 40–50% and feels airy to the touch.
Click each step to mark complete
Cover and ferment undisturbed
Transfer dough to a lightly oiled bowl, cover tightly with plastic wrap, and ferment at room temperature. GF is a hands-off process — no folds, no punching down. The psyllium gel forms a structure that doesn't benefit from manipulation. Look for 40–50% volume increase and visible surface bubbles.
⏱ Wait Time
Bulk ferment 4–5 hours at 75–78°F (24–26°C) undisturbed
Pro Tip
If your kitchen is cooler than 72°F (22°C), bulk fermentation can take 6–7 hours. A proofing box or turned-off oven with the light on helps maintain consistent temperature.
What's Happening During Bulk
Wild yeast consumes sugars in the rice and sorghum flours, producing CO2 that inflates bubbles in the psyllium gel. Simultaneously, lactobacillus bacteria produce lactic and acetic acids — these acids develop the characteristic sour flavor and also strengthen the psyllium gel structure. More acid = stronger gel = better rise.
Why Not to Over-Ferment
Over-fermented GF dough develops too much acid, which weakens the psyllium network. The result is a flat, dense loaf that won't recover in the oven. Signs of over-fermentation: dough smells aggressively sour, surface looks collapsed or watery, texture is slack and sticky when you try to shape.
The Takeaway
4–5 hours at 75°F (24°C) is the sweet spot for flavor and structure.
Precise Timers
Use these interactive timers to track your stages.
Bulk Fermentation
Step 4
Shape and Cold Retard
GF sourdough shaping is gentler than wheat shaping. You're transferring a thick batter into a banneton — not building surface tension the traditional way. The cold retard overnight develops deeper flavor and makes the dough easier to score.
Click each step to mark complete
Prepare the banneton
Generously dust a round banneton with white rice flour (not tapioca starch — it clumps). The dough will stick badly if the basket isn't well floured. You can also line the banneton with a linen cloth dusted with rice flour.
Transfer the dough
Using a wet bench scraper and wet hands, gently transfer the dough from the bowl into the banneton. Wet hands prevent sticking without adding flour. Smooth the top (which will become the bottom of the baked loaf) as evenly as possible. Don't worry about building tension — the psyllium gel holds the shape.
Cold retard overnight
Cover the banneton with a clean shower cap or plastic wrap and refrigerate for 8–12 hours (overnight is perfect). Cold slows fermentation to a crawl, allows more complex flavors to develop, and makes the cold dough much easier to score cleanly before baking.
⏱ Wait Time
Cold retard in refrigerator 8–12 hours overnight
Pro Tip
The cold retard is optional but highly recommended. If you want same-day baking, proof the shaped dough at room temperature for 45–60 minutes instead, then bake.
Step 5
Preheat, Score, and Bake
Preheat your Dutch oven in a 500°F (260°C) oven for at least 45 minutes. The blast of heat from the preheated vessel creates the steam burst that gives GF sourdough its crust and oven spring.
Step by Step
Preheat Dutch oven
Place the Dutch oven (with lid) on the center rack. Heat oven to 500°F (260°C). Preheat for at least 45 minutes — the vessel needs to be fully saturated with heat for proper crust development.
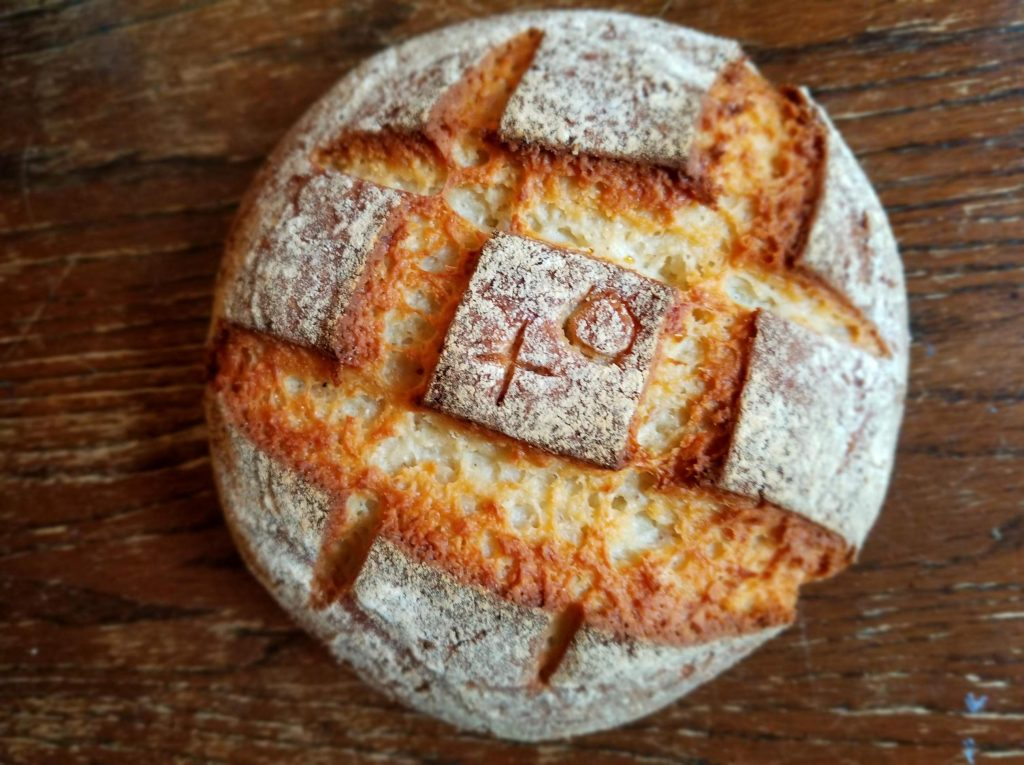
Score the cold dough
Remove the banneton from the fridge. Cut a piece of parchment to fit inside the Dutch oven. Invert the dough onto the parchment, then score immediately with a or sharp serrated knife at a 45-degree angle, ½ inch deep. A single curved slash or an X pattern works well. Cold dough scores cleanly — this is why we retarded.
Bake covered, then uncovered
Lower the parchment and dough into the preheated Dutch oven using the parchment as a sling. Cover and bake at 500°F (260°C) for 20 minutes. Remove lid, reduce heat to 450°F (230°C), and bake an additional 30–35 minutes until deep golden brown. Internal temperature should read 208–212°F (98–100°C).
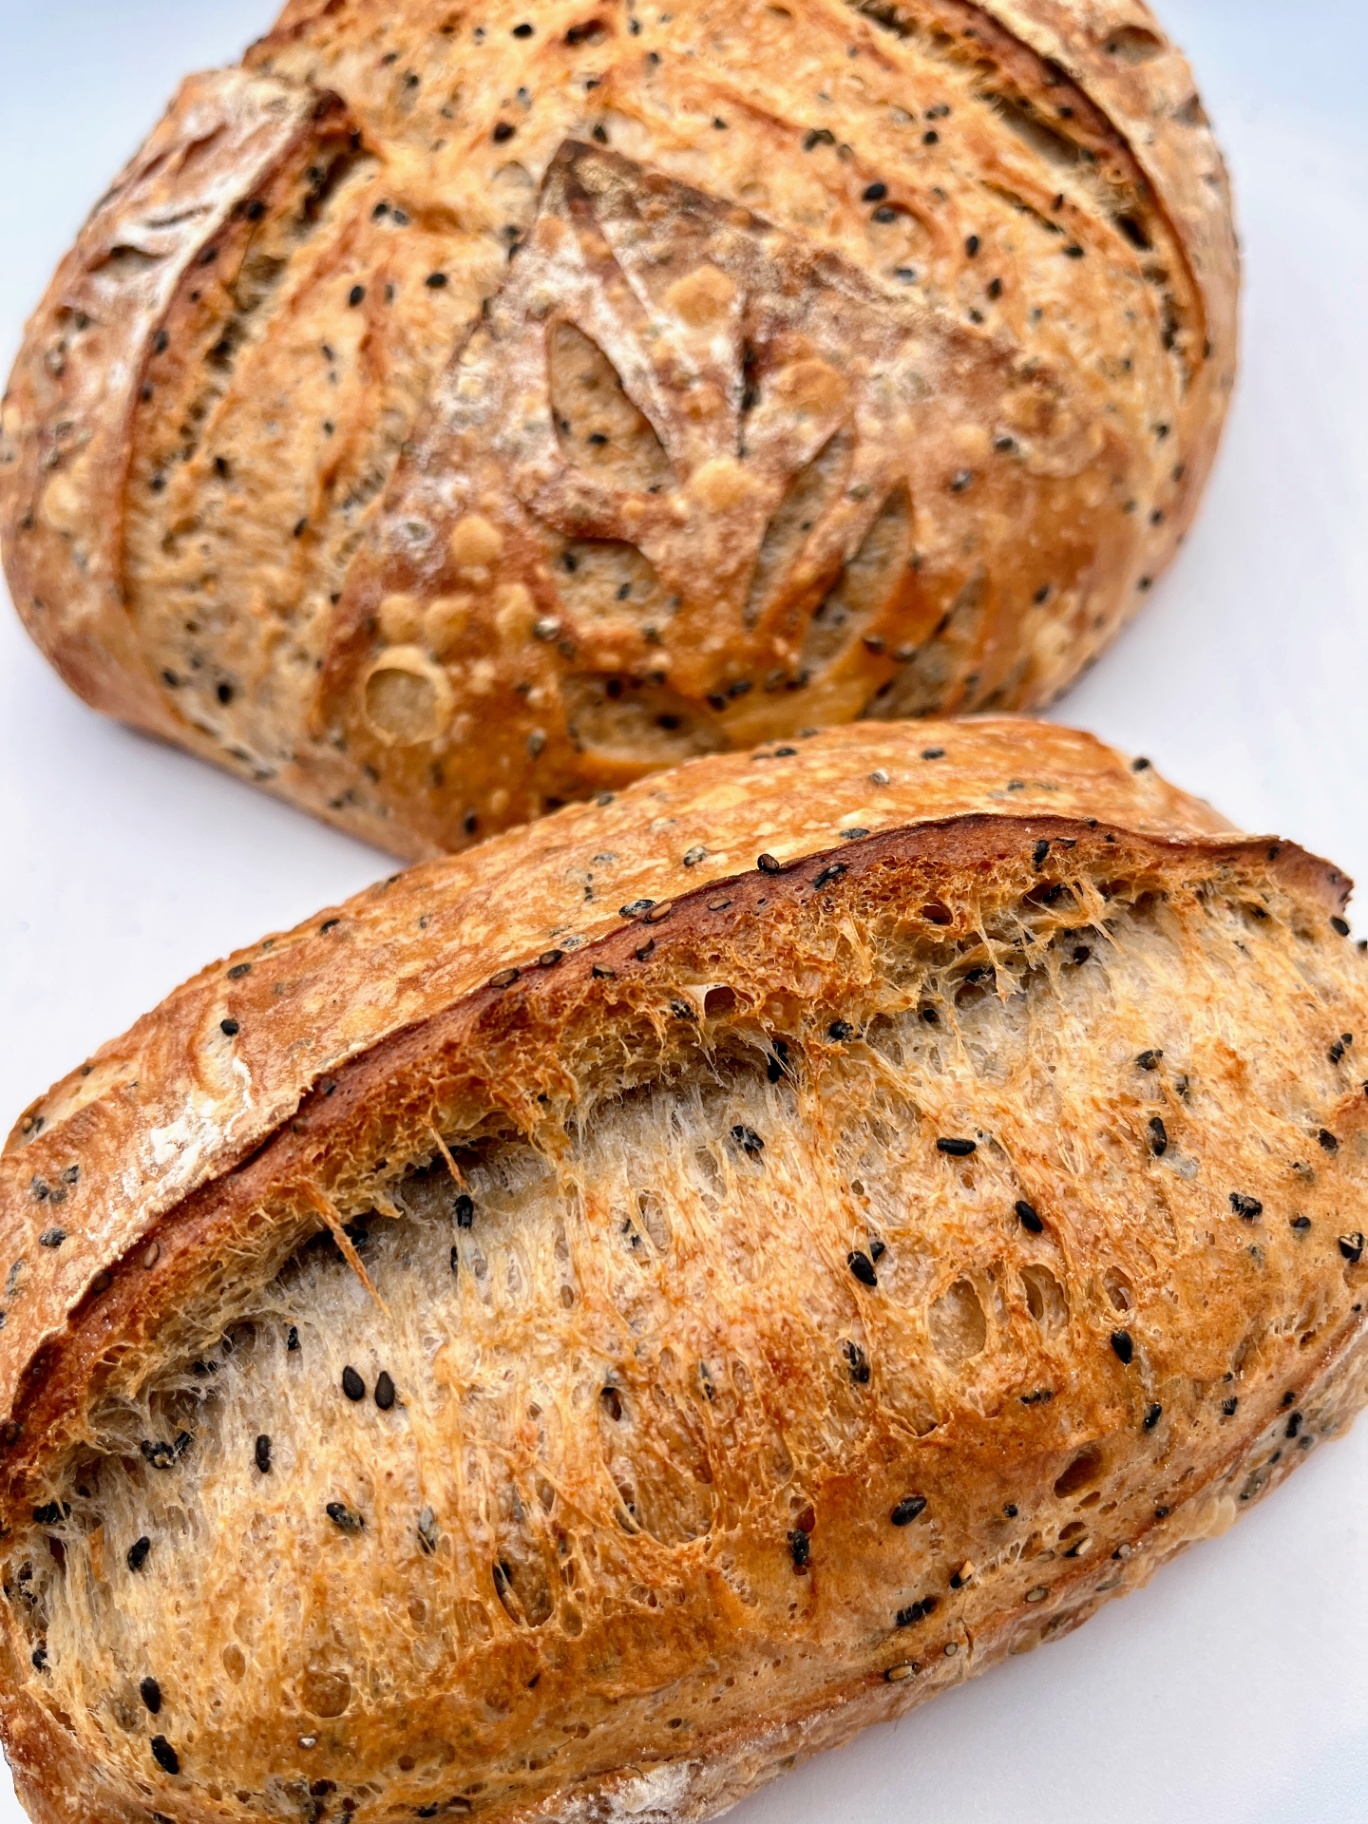
Cool completely
Transfer to a wire rack and cool for a minimum of 2 hours — 3 hours is better for GF sourdough. The interior crumb continues to set long after the crust forms. Cutting early produces a gummy, wet interior even in a fully baked loaf.
Covered Bake
Uncovered Bake
Storage
Room Temperature
2–3 days cut-side down on a cutting board or wrapped in a linen cloth
Frozen
Up to 3 months. Slice and freeze with parchment between slices.
💡 GF sourdough's crust softens overnight. Reheat in a 350°F (175°C) oven for 8–10 minutes to revive the crust.
Your Feedback
Rate This Recipe
Loading ratings...
Troubleshooting
Baker's Notes
Common questions and solutions for perfect results
Temperature is the invisible ingredient. I use the Goldie and DoughBed from SourHouse to keep my starter and dough at the perfect temperature, every time.

SourHouse Temperature Control Products
You Might Also Enjoy
More recipes from our pantry that pair well with this bake.

Get More Recipes in Your Inbox
Join thousands of home bakers receiving weekly recipes, tips, and techniques to elevate your bread game.
No spam, ever. Unsubscribe anytime.
More from Baking Great Bread at Home
Tools, resources, and community to help you bake better bread

Crust & Crumb Academy
Go deeper into your craft. FREE courses, challenges, and real feedback. No gatekeeping. Perfection is not required.

Sourdough Starter Companion
Your AI-powered starter assistant. Track feedings, troubleshoot issues, and keep your starter thriving.

BakingGreatBread.com
Real bread for the rest of us

Baking Great Bread Blog
Recipes, tips, and stories from the bread journey

Recipe Converter
Convert sourdough recipes to yeast and back again

Crust & Crumb App
Your AI-powered baking assistant

Facebook Community
Join 50,000+ bakers sharing, learning, and supporting each other

Sourdough for the Rest of Us
Free beginner's guide to sourdough