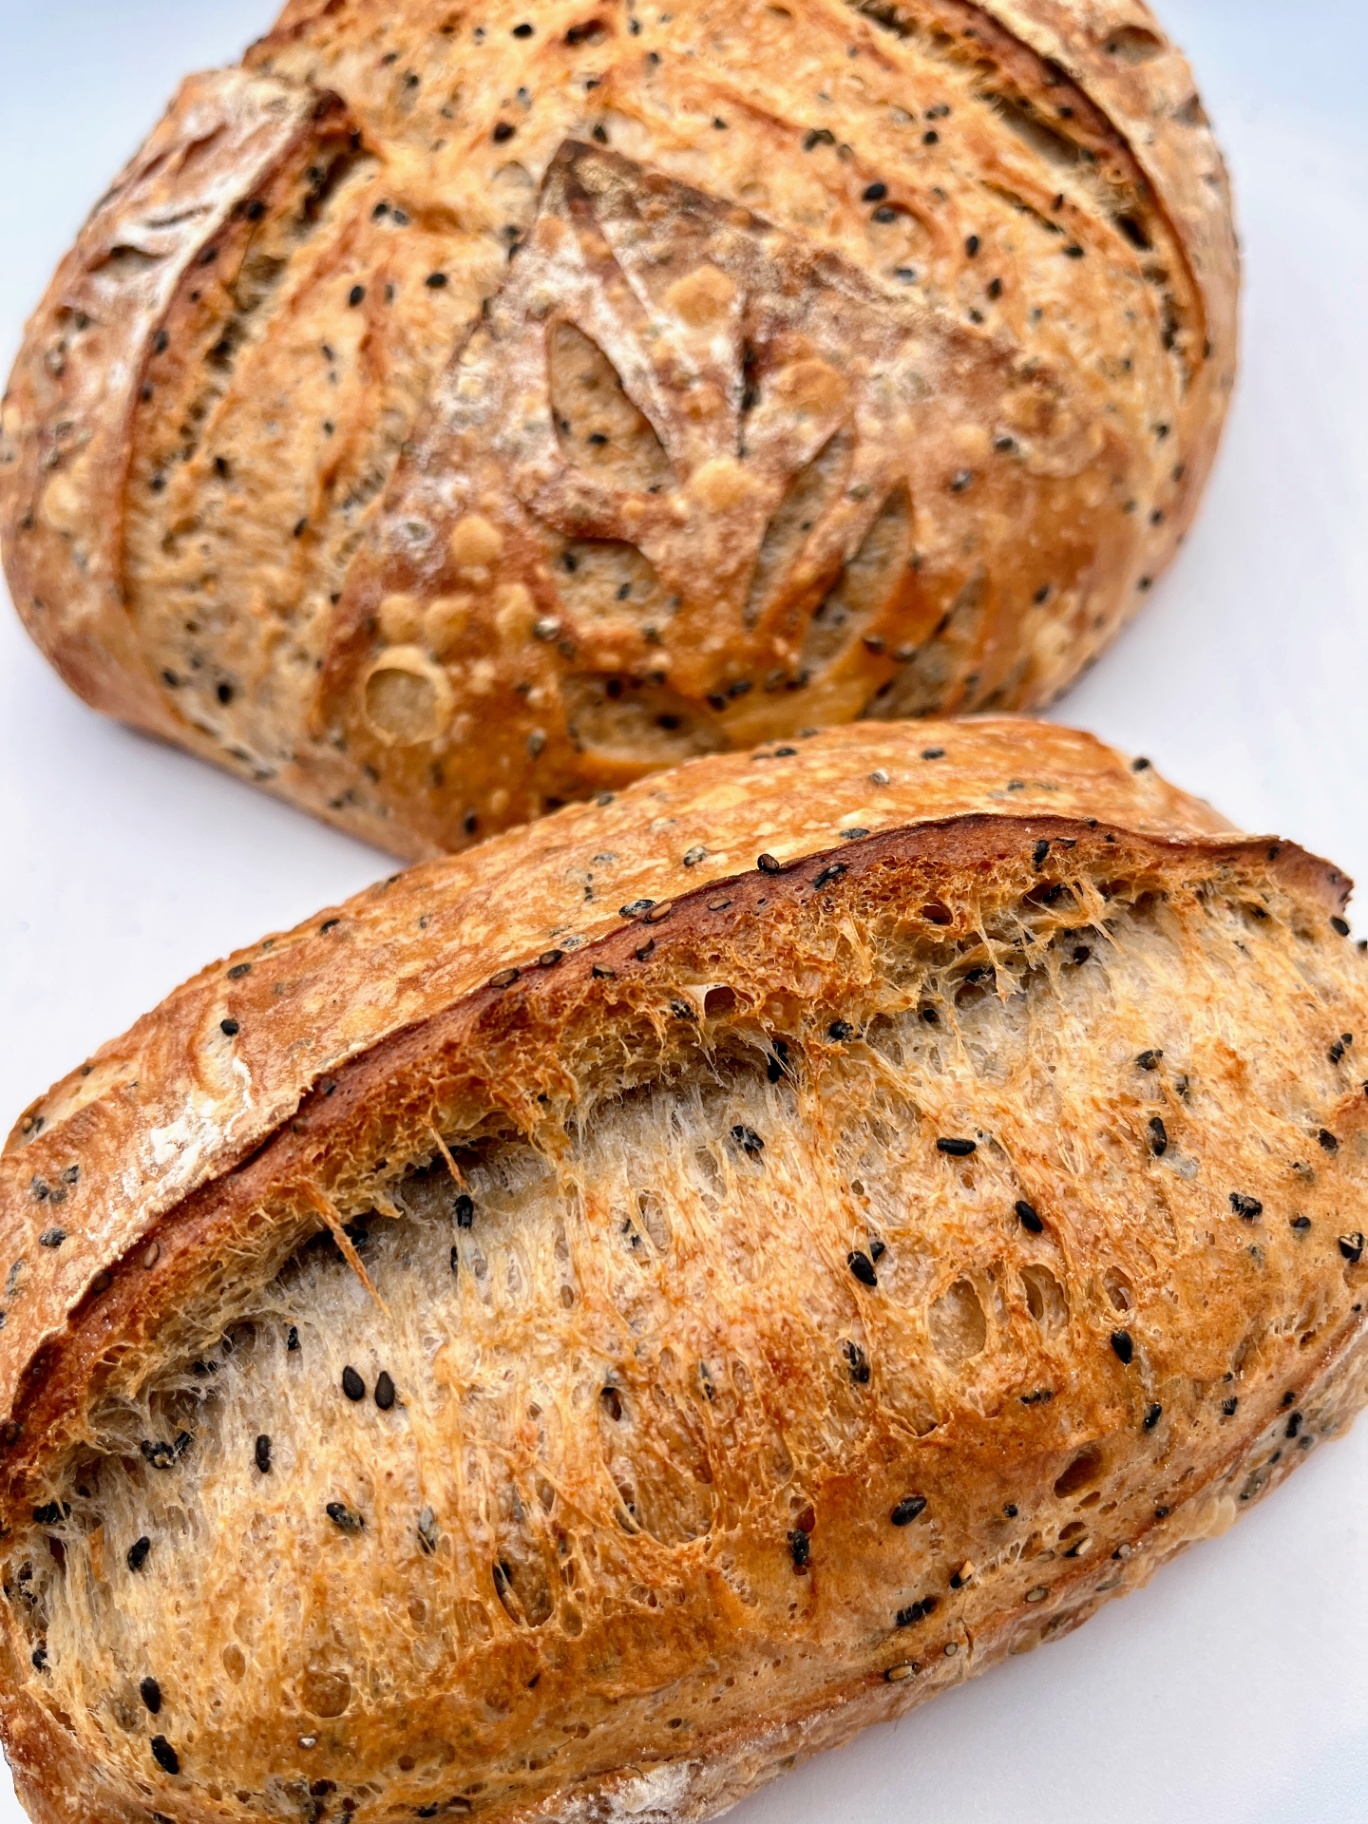
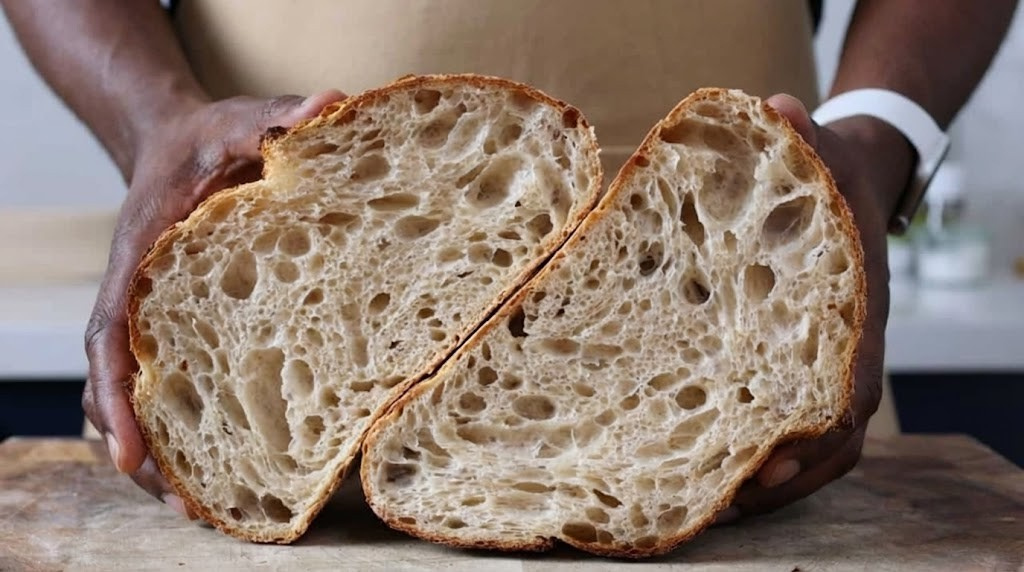
Toasted sesame, poppy seeds, and everything bagel seasoning in a bold, tangy sourdough boule
IntermediateEverything BagelSourdough
by Henry Hunter Jr.
All the flavor of your favorite bagel in a crusty sourdough loaf
Rise Time
3-4 hours bulk + 6-8 hours cold retard
Bake Time
45-50 minutes
Yield
approximately 900g

Perfection is not required
"All the flavor of your favorite bagel in a crusty sourdough loaf."— Henry Hunter Jr.
By Henry Hunter Jr., founder of Crust & Crumb Academy and Baking Great Bread at Home.
Authentic Bread Flavor
I've always loved everything bagels. That combination of toasted sesame, poppy seeds, dried onion, garlic, and salt is one of the best flavor profiles in bread. So I thought, why not put that into a sourdough boule?
Equipment Needed
Ingredients
Final Dough
Seed Mix
Pro Tip
Your starter should be bubbly, domed, and pass the . If it's not at peak, wait until it is or build a levain instead.
Day 1
Prepare the Seed Mix
Toast the sesame seeds and combine your seed mix while your is at peak.
Click each step to mark complete
Toast sesame seeds
In a dry skillet over medium heat, toast sesame seeds until golden and fragrant, 3-4 minutes. Stir frequently to prevent burning.
Cool
Transfer to a plate and let cool completely.
Combine
Mix toasted sesame seeds, poppy seeds, and everything bagel seasoning in a small bowl.
Divide
Separate into two equal portions. One for folding into the dough, one for coating the outside.
Pro Tip
Don't toast the poppy seeds. They burn easily and turn bitter.
Day 1
Mix the Dough
Combine your peak with flour and water.
Click each step to mark complete
Combine water and starter
In a large bowl, add 375g room temperature water and 100g active starter. Mix with your hand until the starter is mostly dissolved.
Add flour
Add 450g bread flour and 50g whole wheat flour.
Mix
Stir with your hand or a dough whisk until a shaggy dough forms with no dry spots.
Rest ()
Cover and let sit for 30-45 minutes.
⏱ Wait Time
Autolyse rest
Precise Timers
Use these interactive timers to track your stages.
Autolyse
Day 1
Add Salt
Incorporate salt and strengthen the dough.
Click each step to mark complete
Sprinkle salt
Add 10g salt over the dough.
Dimple and fold
Use wet fingers to dimple the salt into the dough, then fold the dough over itself several times.
Pinch and squeeze
Pinch through the dough to distribute the salt evenly.
Rest
Cover and let rest 30 minutes.
⏱ Wait Time
Rest after salt incorporation
Precise Timers
Use these interactive timers to track your stages.
Rest
Day 1
Stretch and Fold with Seeds
Build dough strength and incorporate seeds.
Click each step to mark complete
First fold
With wet hands, grab one side of the dough, stretch it up, and fold it over the center. Rotate the bowl 90 degrees and repeat until you've gone around the entire dough. Cover and rest 30 minutes.
Second fold with seeds
Perform another set of s. After completing the folds, sprinkle half of your seed mix over the dough. Fold the dough over the seeds 2-3 times to distribute. Cover and rest 30 minutes.
Third fold (optional)
If the dough still feels slack, perform one more set of folds. Cover and rest 30 minutes.
Let the dough continue to ferment at room temperature until increased by about 50%, with visible bubbles and a domed surface. This may take 2-3 more hours depending on your kitchen temperature.
⏱ Wait Time
Rest between each fold
Pro Tip
Add the seeds after gluten has started to develop. Adding them too early interferes with gluten formation.
Precise Timers
Use these interactive timers to track your stages.
First Rest
Second Rest
Third Rest
Bulk Fermentation
Day 1 (Evening)
Shape and Coat
Shape the dough and coat it with the remaining seed mix.
Click each step to mark complete
Turn out
Lightly flour your work surface and turn the dough out onto it.
Pre-shape
Gently shape into a round and let rest 15-20 minutes.
Final shape
Shape into a boule (round).
Coat with seeds
Lightly mist the shaped loaf with water or roll it on a damp towel, then press it into the remaining seed mix so the entire surface is coated.
Into
Place the dough seam-side down in a floured banneton (so seeds end up on top when you flip it out for baking).
⏱ Wait Time
Bench rest before final shaping
Pro Tip
Don't skip the misting step. The moisture helps the seeds stick.
Precise Timers
Use these interactive timers to track your stages.
Bench Rest
Day 1 → Day 2
Cold Retard
Refrigerate overnight for flavor development.
Click each step to mark complete
Cover
Cover the banneton with a damp towel or plastic wrap.
Refrigerate
Place in the refrigerator for 6-8 hours or overnight.
⏱ Wait Time
Cold retard for flavor development
Pro Tip
Cold retarding makes the dough easier to score and develops deeper flavor.
Shaping
Shaping Options
Choose your preferred shape for this seeded loaf.
Boule (Round)
RecommendedClick each step to mark complete
Turn dough out
Turn dough out onto lightly floured surface.
Pre-shape
Pre-shape into a round, rest 15-20 minutes.
Final shape
Pull edges to center, flip seam-side up, cup hands around dough and rotate to build tension.
Coat with seeds
Coat with seed mix, place seam-side down in banneton.
Bâtard (Oval)
Click each step to mark complete
Flip
After , flip the dough smooth-side down.
Fold like a letter
Fold the top third down and the bottom third up, like a letter.
Seal
Seal the seam with the heel of your hand.
Taper
Roll gently to taper the ends.
Coat and transfer
Mist, coat with seeds, place seam-side up in an oval banneton.
Proof Test: Gently the dough. It should slowly spring back halfway. If it springs back completely, it needs more time. If it doesn't spring back at all, it's overproofed.
Day 2
Bake
Bake in a preheated for a crispy crust.
Step by Step
Preheat
Place your Dutch oven (with lid) in the oven and preheat to 475°F (245°C) for 30 minutes.
Turn out
Turn the cold dough out of the banneton onto a piece of parchment paper.
Score
the top with a or sharp knife.
Load
Carefully lift the parchment and dough into the hot Dutch oven.
Bake covered
Cover with the lid and bake for 20 minutes.
Uncover
Remove the lid and bake for another 25-30 minutes until deep golden brown.
Internal temp
The internal temperature should reach 205-210°F (96-99°C).
Cool
Transfer to a wire rack and cool completely before slicing (at least 1 hour).
Preheat
Covered Bake
Uncovered Bake
Cool
Don't skip the cooling time. The continues to set as it cools.
Baking Methods
Equipment: Dutch oven with lid
Preheat
Preheat Dutch oven at 475°F for 30 minutes.
Turn dough onto parchment
Turn dough onto parchment, score.
Load
Load into hot Dutch oven, cover.
Bake covered
Bake covered 20 minutes.
Uncover
Uncover, bake 25-30 minutes until deep golden.
Nutrition Facts
Per 1 slice (75g) • 12 slices servings per recipe
* Values are estimates based on standard ingredients
Storage
Room Temperature
2-3 days in a paper bag or bread box
Frozen
Up to 3 months. Slice first, then freeze in a zip-top bag. Toast slices straight from frozen.
💡 Run the loaf under water briefly and bake at 375°F for 10 minutes to revive the crust.
Your Feedback
Rate This Recipe
Loading ratings...
Troubleshooting
Baker's Notes
Common questions and solutions for perfect results
Temperature is the invisible ingredient. I use the Goldie and DoughBed from SourHouse to keep my starter and dough at the perfect temperature, every time.

SourHouse Temperature Control Products
You Might Also Enjoy
More recipes from our pantry that pair well with this bake.
Get More Recipes in Your Inbox
Join thousands of home bakers receiving weekly recipes, tips, and techniques to elevate your bread game.
No spam, ever. Unsubscribe anytime.
More from Baking Great Bread at Home
Tools, resources, and community to help you bake better bread

Crust & Crumb Academy
Go deeper into your craft. FREE courses, challenges, and real feedback. No gatekeeping. Perfection is not required.

Sourdough Starter Companion
Your AI-powered starter assistant. Track feedings, troubleshoot issues, and keep your starter thriving.

BakingGreatBread.com
Real bread for the rest of us

Baking Great Bread Blog
Recipes, tips, and stories from the bread journey

Recipe Converter
Convert sourdough recipes to yeast and back again

Crust & Crumb App
Your AI-powered baking assistant

Facebook Community
Join 50,000+ bakers sharing, learning, and supporting each other

Sourdough for the Rest of Us
Free beginner's guide to sourdough