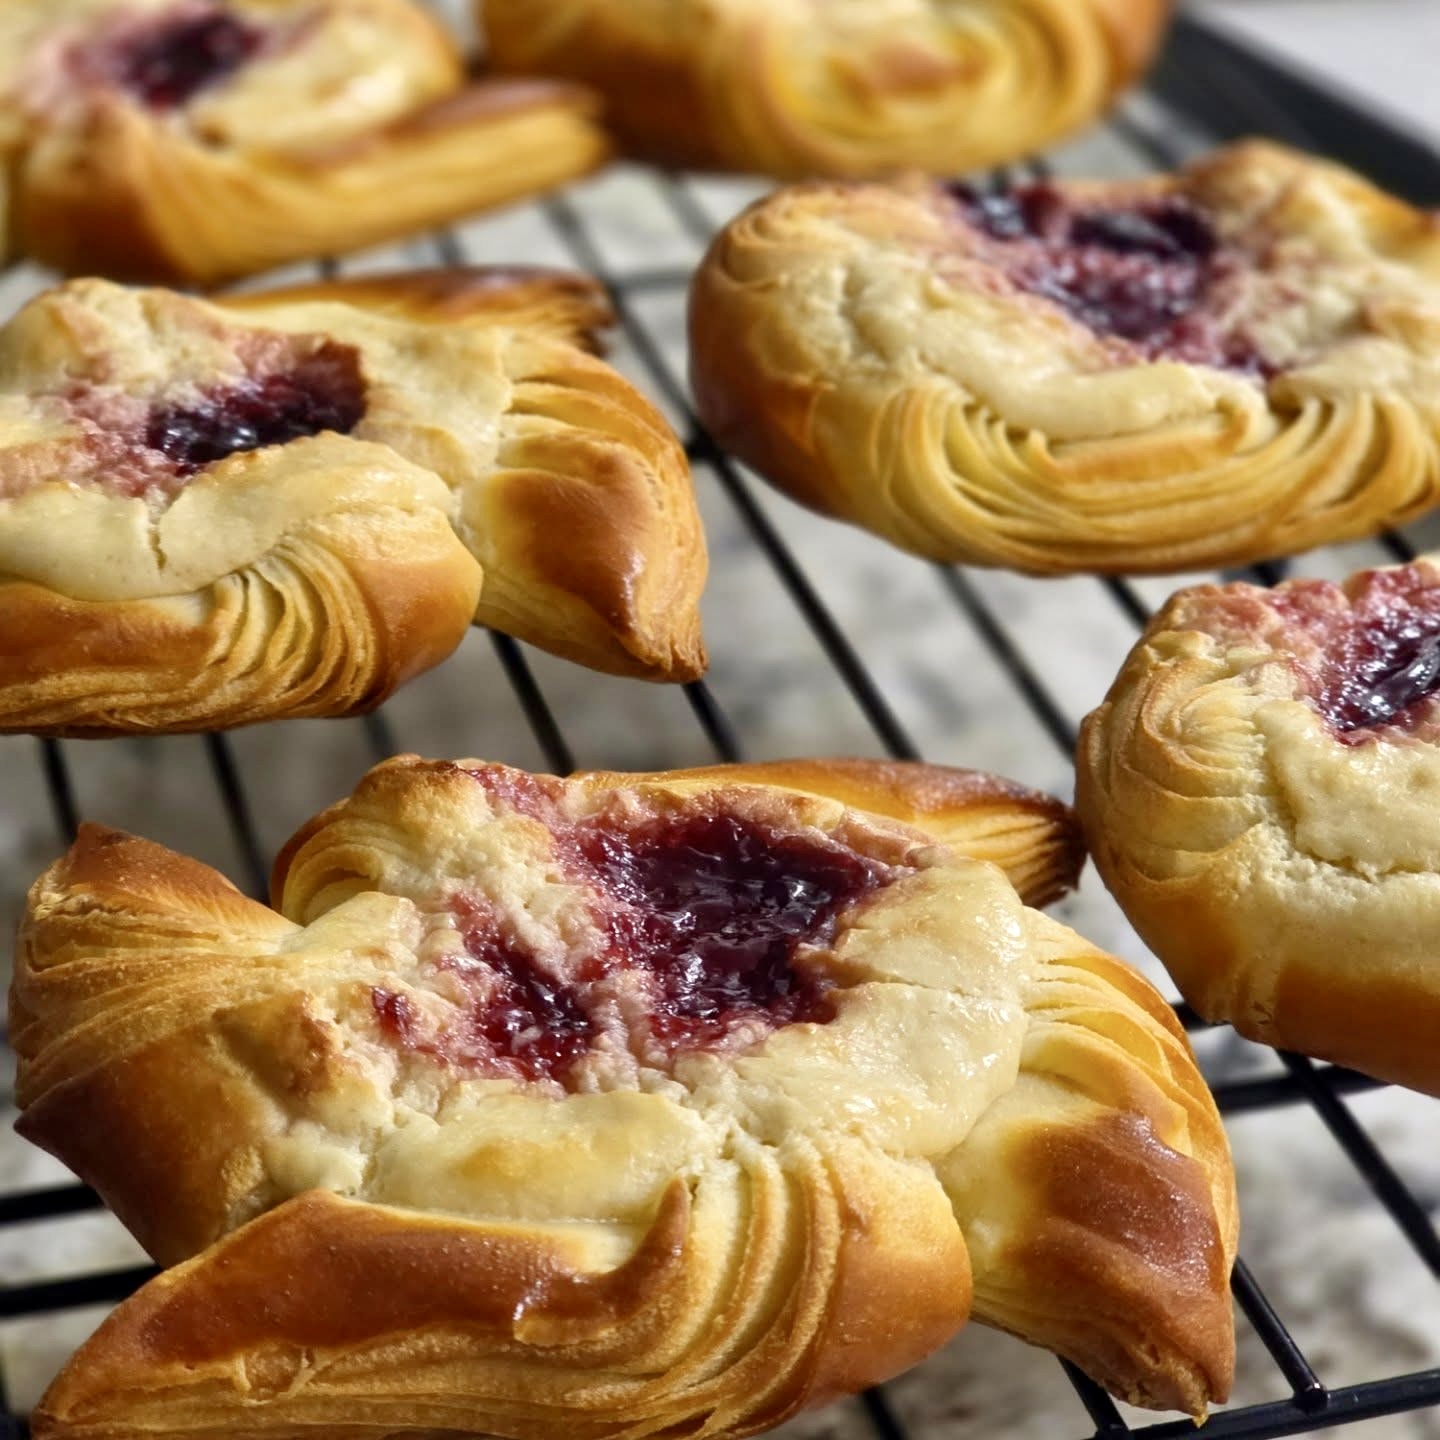
Soft, Buttery Layers with Classic Danish Structure
IntermediateDanish Pastry (True PuffMethod)
by Donna May
Weekend baking at its finest—Saturday prep, Sunday reward
Fermentation
12 hours (overnight chill)
Bake Time
18-22 minutes
Yield
8-12 Danish pastries depending on size

Perfection is not required
"Great bread isn't about perfect technique—it's about understanding the dough."— Donna May
By Henry Hunter Jr., founder of Crust & Crumb Academy and Baking Great Bread at Home.
Authentic Flavor
Most Danish recipes skip the real work. This one doesn't. You'll build a proper butter block, execute a book fold and letter fold, and produce pastries with visible layers that shatter and puff. The two-day schedule makes it approachable: prep the dough and butter on Saturday, laminate and bake on Sunday.
Equipment Needed
Ingredients
Danish Dough
An {{enriched-dough}} that stays pliable during {{lamination}}
Butter Block
Cold butter combined with flour for easier handling during {{lamination}}
Egg Wash
For golden, glossy finish
Filling Options
Choose your favorite or mix and match
Pro Tip
The flour in the butter block absorbs moisture and helps the butter stay pliable without melting. This trick makes lamination more forgiving for home bakers.
Day 1 (Saturday)
Mix the Dough
20 minutes active, 4+ hours chill
This is intentionally under-developed. Unlike bread, you don't want strong here—just enough structure to hold the layers. The cold milk and minimal keep things tender.
Click each step to mark complete
Combine dry ingredients
In a large bowl or stand mixer bowl, combine flour (500g), sugar (60g), salt (10g), and (9g). Whisk to distribute evenly.
Add wet ingredients ()
Add the cold milk (250g) and egg (1). Mix until a shaggy dough forms. It will look rough—that's fine.
Add butter and
Add the softened butter (40g). Knead until the dough is smooth, elastic, and slightly tacky but not sticky. About 5-7 minutes by mixer or 8-10 minutes by hand.
Shape and chill
Shape dough into a rectangle roughly 8x6 inches. Wrap tightly in plastic wrap. Refrigerate at least 4 hours or overnight.
⏱ Wait Time
The dough must be fully chilled before lamination
Pro Tip
DO NOT bulk ferment on the counter. This dough goes straight into the fridge. The cold slows fermentation while the gluten relaxes, making lamination easier.
Precise Timers
Use these interactive timers to track your stages.
Knead Time
Minimum Chill
Day 1 (Saturday)
Prepare the Butter Block
10 minutes active
The butter block needs to be cold but pliable—not rock hard and not soft. The flour helps stabilize it, making the lock-in step more forgiving.
Click each step to mark complete
Method 1: Stand Mixer (Recommended)
Place cold butter chunks (250g) and flour (15g) into the mixer bowl. Fit with the paddle attachment. Mix on LOW speed only, just until flour is fully incorporated and butter is smooth and cohesive. About 30-60 seconds.
Method 2: By Hand
Place butter and flour in a bowl. Press and fold together using a spatula, scraper, or your hands. Work quickly to keep butter cold.
Shape the block
Place butter on parchment paper. Shape into a 6 x 6 inch (15 x 15 cm) square. Wrap tightly in parchment. Refrigerate until cold, firm, and flexible (not rock hard).
Pro Tip
Do NOT cream the butter—you are combining, not aerating. Butter and dough should feel similar in firmness before lock-in.
Precise Timers
Use these interactive timers to track your stages.
Butter Mix
Day 2 (Sunday)
Lamination
1 hour with rests
is the process of folding butter into dough to create distinct layers. Each fold multiplies the layers: a book fold (4 layers) followed by a letter fold (3x) gives you 12 layers of butter. This is what creates that shattering puff.
Click each step to mark complete
Temper dough and butter
Remove dough and butter block from fridge. Leave both wrapped on counter for 15-30 minutes. The butter should be cold but flexible—it should bend without cracking or feeling soft.
Lock in the butter
Roll chilled dough into a 10 x 10 inch (25 x 25 cm) square. Place butter block diagonally (diamond shape) in the center. Fold dough corners over butter to fully enclose and seal. Press gently to secure.
First Turn: Book (Double) Fold
Roll dough into an 8 x 20 inch (20 x 50 cm) rectangle. Fold both short ends toward the center. Fold closed like a book. Wrap and refrigerate 30 minutes.
Second Turn: Letter (Single) Fold
Roll again into an 8 x 20 inch (20 x 50 cm) rectangle. Fold into thirds like a letter. Wrap and refrigerate 30-60 minutes.
⏱ Wait Time
Chilling keeps the butter cold and the gluten relaxed
Pro Tip
If the dough resists rolling or the butter starts to soften, stop immediately and chill for 15-20 minutes. Forcing it will tear the layers.
Precise Timers
Use these interactive timers to track your stages.
Temper
First Chill
Second Chill
Day 2 (Sunday)
Final Proof
1.5-2 hours at room temperature
Unlike bread, you don't want these to double. Over-proofing melts the butter layers before baking, destroying the puff. Use the to check readiness—watch for slight puffiness, not full expansion.
Click each step to mark complete
Cover loosely
Drape plastic wrap loosely over the pastries, or use a large inverted sheet pan. The covering prevents drying but shouldn't touch the pastries.
Proof at room temperature
Let rise for 1 1/2 to 2 hours until slightly puffy and relaxed. The dough should look pillowy but NOT doubled in size.
Check readiness
The pastries are ready when they jiggle slightly when the pan is moved and the layers look distinct. If the butter starts to look greasy, they've proofed too long or the room is too warm.
⏱ Wait Time
Proof for puff, not size
Pro Tip
If your kitchen is warm (over 75°F), proof for less time and keep a close eye. Warm butter = flat pastries.
Precise Timers
Use these interactive timers to track your stages.
Final Proof (min)
Final Proof (max)
Shaping
Shaping Options
The pinwheel is the classic Danish shape, but these work beautifully as pockets, spirals, or even braids.
Pinwheel
The classic shape that showcases beautiful layers. Cut corners toward center, fold alternating points inward.
RecommendedClick each step to mark complete
Cut corners
Starting from each corner, cut diagonally toward the center, stopping about 1/2 inch from the middle.
Fold points
Take every other corner point and fold it toward the center, pressing gently to secure. You'll have 4 points meeting in the middle.
Add filling
Place a dollop of filling in the center where the points meet. Press gently to nestle it into place.
Pocket (Envelope)
A simpler shape that fully encloses the filling. Great for runnier fillings like pastry cream.
Click each step to mark complete
Add filling
Place 1-2 tablespoons of filling in the center of the square.
Fold corners
Bring all four corners to the center, overlapping slightly. Press firmly to seal.
Secure
Press the center where the corners meet to ensure they stay closed during proofing and baking.
Proof Test: Use the : gently shake the pan. Ready pastries will jiggle like gelatin. If they feel dense and don't move, give them more time.
The Final Step
Baking
High heat is key. The butter needs to steam rapidly to create lift before it melts into the dough. A hot oven = dramatic puff.
Baking Methods
The straightforward approach that works for most home ovens.
Equipment: Baking sheet, parchment paper
Preheat
Preheat your oven to 375°F (190°C) for at least 20 minutes. A fully preheated oven is essential for proper puff.
Egg wash
Beat the egg with milk or cream. Brush each pastry lightly, avoiding drips that could glue them to the parchment.
Bake
Bake for 18-22 minutes until deeply golden with visible layers. The layers should be distinct and the tops should look dry, not doughy.
Optional finish
For extra shine, brush with simple syrup (equal parts sugar and water, heated until dissolved) immediately after removing from the oven.
Cool briefly
Let cool on the pan for 5 minutes, then transfer to a wire rack. These are best eaten within a few hours while the layers are still crisp.
Nutrition Facts
Per 1 pastry • 10 servings per recipe
* Values are estimates based on standard ingredients
Storage
Room Temperature
Best eaten the same day. Store loosely covered at room temperature for up to 24 hours—the layers will soften but remain delicious.
Refrigerated
Up to 5 days, tightly wrapped. Bring to room temperature or warm briefly before serving.
Frozen
Freeze baked pastries for up to 1 month. Reheat from frozen at 350°F for 8-10 minutes to restore crispness.
Refresh
Warm at 325°F (165°C) for 8-10 minutes, or microwave individual portions for 15-20 seconds.
Your Feedback
Rate This Recipe
Loading ratings...
Troubleshooting
Baker's Notes
Common questions and solutions for perfect results
If you're serious about scoring, you need the right blade in your hand. Wire Monkey makes handcrafted bread lames from black walnut — built to last, balanced in the hand, and sharp enough to glide through cold dough cleanly every single time. No dragging, no hesitation marks. Just a clean cut.

Wire Monkey Handcrafted Bread Lames
You Might Also Enjoy
More recipes from our pantry that pair well with this bake.
Get More Recipes in Your Inbox
Join thousands of home bakers receiving weekly recipes, tips, and techniques to elevate your bread game.
No spam, ever. Unsubscribe anytime.
More from Baking Great Bread at Home
Tools, resources, and community to help you bake better bread

Crust & Crumb Academy
Go deeper into your craft. FREE courses, challenges, and real feedback. No gatekeeping. Perfection is not required.

Sourdough Starter Companion
Your AI-powered starter assistant. Track feedings, troubleshoot issues, and keep your starter thriving.

BakingGreatBread.com
Real bread for the rest of us

Baking Great Bread Blog
Recipes, tips, and stories from the bread journey

Recipe Converter
Convert sourdough recipes to yeast and back again

Crust & Crumb App
Your AI-powered baking assistant

Facebook Community
Join 50,000+ bakers sharing, learning, and supporting each other

Sourdough for the Rest of Us
Free beginner's guide to sourdough