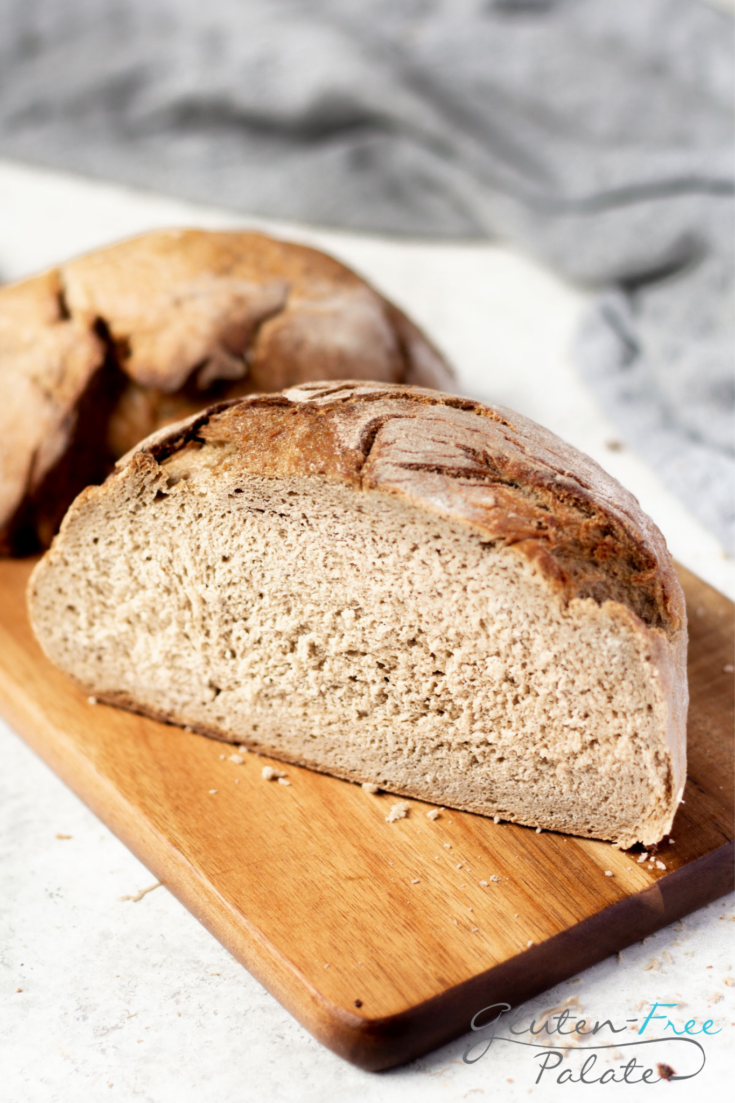
A bold, earthy sourdough with deep flavor and a stunning gray crumb
IntermediateBuckwheat SourdoughBread
by Henry Hunter Jr.
Bold flavor. Gray crumb. Zero competition.
Fermentation
5-6 hours bulk + 10-16 hours cold proof
Bake Time
40-45 minutes
Yield
One 800g artisan loaf, about 10 slices

Perfection is not required
"Perfection is not required. Progress is."— Henry Hunter Jr.
By Henry Hunter Jr., founder of Crust & Crumb Academy and Baking Great Bread at Home.
Authentic Bread Flavor
Henry Hunter Jr. is the founder of Baking Great Bread at Home and Crust & Crumb Academy. He's been baking artisan bread for over a decade and teaching home bakers how to get better, one loaf at a time.
Equipment Needed
Ingredients
The Dough
A 15% buckwheat blend. High enough to taste it, low enough to keep structure.
Pro Tip
Light buckwheat flour gives a milder, nuttier flavor. Whole buckwheat flour goes deeper and earthier. Both work — it's personal preference.
Night Before
Feed Your Starter
You want your active, domed, and ready to work. Feed it 6-8 hours before you plan to mix.
Click each step to mark complete
Feed at Peak
Feed your starter using your normal ratio and let it rise at room temperature. It should be domed, bubbly, and just at or past peak when you mix. If it's already deflating, it's too late — feed it again and wait.
Pro Tip
Not sure it's ready? The float test is your quick check: drop a small spoonful into water. If it floats, it's ready to leaven bread.
Precise Timers
Use these interactive timers to track your stages.
Starter Rise Time
Mix
Autolyse
Combining the flours and water before adding starter gives gluten a head start and helps the buckwheat fully hydrate. Don't skip this with buckwheat — it absorbs water differently than wheat flour.
Click each step to mark complete
Combine Flours and Water
Add bread flour and buckwheat flour to a large bowl and whisk briefly to combine. Pour in the water and mix with your hand or a dough whisk until no dry flour remains. The dough will look rough and slightly stiff. That's fine.
Rest
Cover the bowl with a damp towel or plastic wrap and let it rest for 45 minutes at room temperature.
⏱ Wait Time
45 minutes
What's Happening
During autolyse, the flour fully absorbs the water and gluten proteins begin linking on their own, with zero effort from you. With buckwheat in the mix, this rest period also gives the buckwheat starch time to absorb water evenly, which prevents pockets of dry flour and makes mixing easier.
The Result
Dough that's noticeably more extensible when you add the starter, easier to develop with folds, and more predictable through bulk fermentation.
The Takeaway
45 minutes of rest does more for this dough than 5 extra minutes of kneading.
Precise Timers
Use these interactive timers to track your stages.
Autolyse Rest
Add Starter
Incorporate the Starter
Add your active and work it into the dough using the squeeze-and-fold method.
Click each step to mark complete
Add Starter to Dough
Pour your active starter over the rested dough. Using your fingers, pinch the starter into the dough — squeeze it through, then fold the dough over itself. Rotate the bowl and repeat. Do this for 2-3 minutes until the starter is fully incorporated and the dough feels cohesive again.
Rest
Cover and rest 30 minutes.
⏱ Wait Time
30 minutes
Precise Timers
Use these interactive timers to track your stages.
Rest Before Salt
Add Salt
Add the Salt
Salt goes in last. It tightens the gluten and controls fermentation — you don't want it competing with the starter during those first 30 minutes.
Click each step to mark complete
Incorporate Salt
Sprinkle the salt evenly over the dough. Add a small splash of water (about 5g) to help it dissolve if you like. Fold and squeeze it in the same way you added the starter, working for 1-2 minutes until the salt is fully integrated and the dough feels smooth.
Rest
Cover and rest 30 minutes before beginning stretch and folds.
⏱ Wait Time
30 minutes
Precise Timers
Use these interactive timers to track your stages.
Rest After Salt
Build Strength
Stretch and Fold
Four sets of , spaced 30 minutes apart. Because buckwheat weakens the gluten network slightly compared to a pure wheat dough, all four sets matter. Don't cut this short.
Click each step to mark complete
Perform 4 Sets
For each set: wet your hand, grab one side of the dough, stretch it up as high as it will go without tearing, and fold it over the center. Rotate the bowl 90 degrees. Repeat 4 times per set (all four sides). You'll feel the dough getting noticeably tighter and stronger by set 3. That's exactly what you want.
⏱ Wait Time
2 hours total for all 4 sets
Pro Tip
The dough should feel noticeably more elastic and hold its shape better with each set. If it's still slack and spreading flat after set 4, give it one more.
Precise Timers
Use these interactive timers to track your stages.
Between Folds
Bulk Ferment
Bulk Fermentation
After your last fold, leave the dough alone and let do its work. At 74-76°F (23-24°C), this takes about 2-3 more hours.
Click each step to mark complete
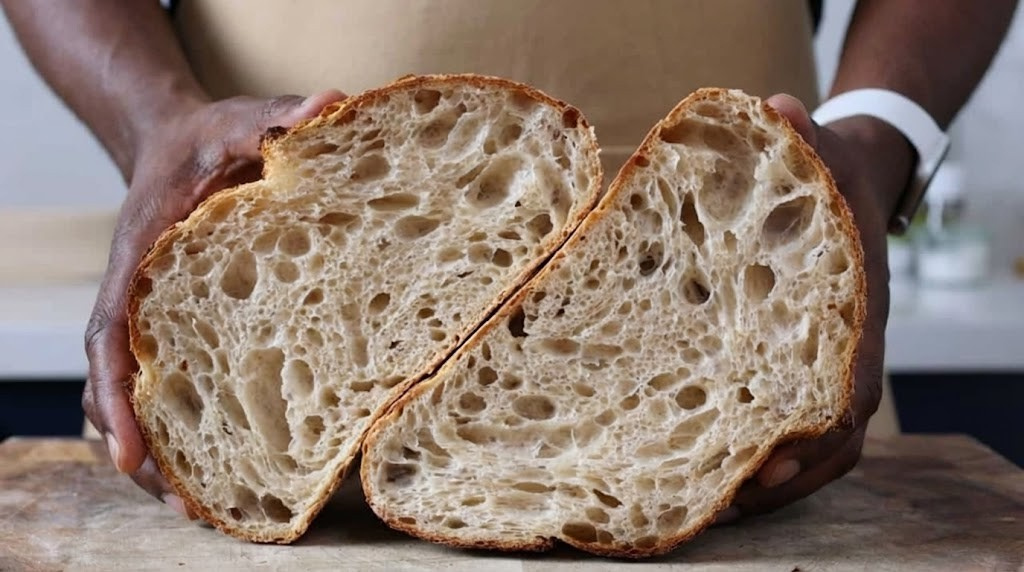
Watch the Dough, Not the Clock
Cover and let the dough ferment undisturbed. You're looking for a 50-70% rise in volume, bubbles around the edges and on the surface, and a dough that jiggles like jello when you shake the bowl. With buckwheat in the mix, it won't double the way a pure wheat loaf does — that's completely normal. Don't wait for a full double or you'll overferment it.
⏱ Wait Time
2-3 hours at 74-76°F (23-24°C)
Pro Tip
Warmer kitchen? Bulk moves faster. Cooler? Give it more time. The visual cues are the real guide here, not the clock.
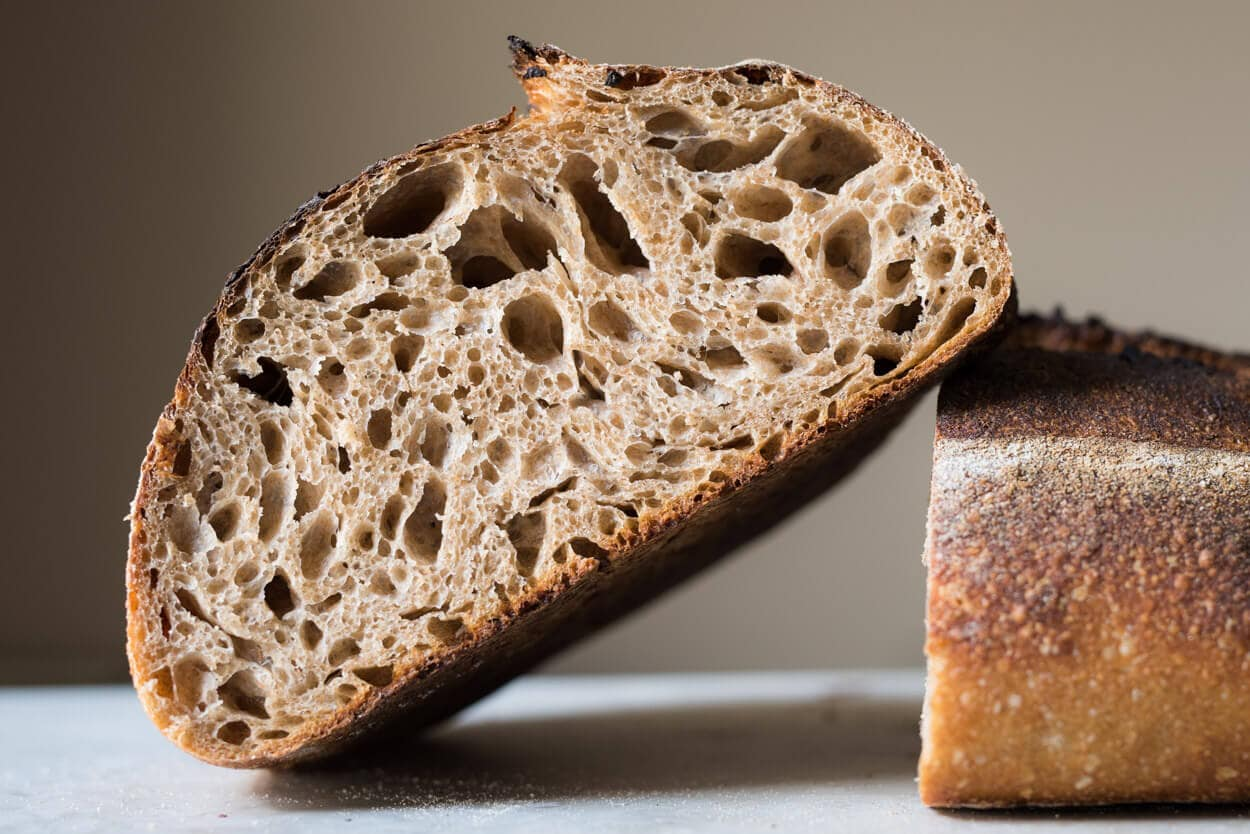
No Gluten, No Double
Buckwheat contains no gluten. When you add 15% buckwheat to a bread dough, you're slightly diluting the gluten network. The dough still ferments and builds gas, but it traps it less efficiently than pure wheat. The result: a 50-70% rise instead of a full double. The flavor development is the same. The structure is still there. The loaf will still open beautifully in the oven.
The Takeaway
Waiting for a full double on this dough is a mistake. Pull it at 50-70% and trust the process.
Shape
Pre-Shape
Turn the dough out and build the initial structure before the final shape.
Click each step to mark complete
Turn Out and Pre-Shape
Lightly flour your work surface. Use a bench scraper to gently coax the dough out of the bowl onto the surface. Using the bench scraper in one hand and your other hand, work the dough into a rough round by dragging it toward you in short strokes. You're building surface tension, not deflating the dough. Leave it uncovered on the bench.
Bench Rest
Let the pre-shaped dough rest uncovered for 20-30 minutes. It'll relax and spread slightly. That's fine — it makes the final shape easier.
⏱ Wait Time
20-30 minutes
Precise Timers
Use these interactive timers to track your stages.
Bench Rest
Final Shape
Final Shape and Proof
Shape the dough into a batard or boule and set it for the overnight cold proof.
Click each step to mark complete
Shape the Loaf
For a batard: flip the rested dough seam-side up. Fold the top third down and the bottom third up, like a letter. Then roll it toward you while pulling back slightly to build tension on the surface. Pinch the seam. For a boule: pull the edges of the dough toward the center all the way around, then flip it seam-side down and drag it toward you until the surface is taut.
Transfer to Banneton
Generously flour your banneton with rice flour (preferred) or a 50/50 mix of rice flour and bread flour. Place the shaped dough seam-side UP into the banneton. Pinch the seam closed if it opened during transfer.
Pro Tip
Rice flour releases better than bread flour from the banneton. If you've had dough stick before, rice flour is the fix.
Cold Proof
Overnight Cold Proof
Into the refrigerator for 10-16 hours. This is where the flavor of this loaf really develops. The cold slows fermentation and lets the buckwheat earthiness and sourdough tang layer on each other.
Click each step to mark complete
Cover and Refrigerate
Cover the banneton with a shower cap, reusable plastic wrap, or a plastic bag. Place it in the refrigerator. Bake directly from the fridge the next morning — no need to bring it to room temperature first.
⏱ Wait Time
10-16 hours
Preheat
Preheat the Dutch Oven
A fully heat-soaked Dutch oven is what gives you oven spring and crust. Don't rush this.
Click each step to mark complete
Preheat Oven and Dutch Oven
Place your Dutch oven with the lid on into a cold oven, then preheat to 500°F (260°C). Let it heat for at least 45 minutes once the oven reaches temperature. The Dutch oven itself needs to be fully saturated with heat, not just the air around it.
⏱ Wait Time
45 minutes at 500°F (260°C)
Precise Timers
Use these interactive timers to track your stages.
Preheat
Shaping
Shaping Options
This dough works as either a batard or a boule. The batard gives you a taller loaf with a better ear from scoring. The boule is more forgiving if you're still building your shaping skills.
Batard (Oval)
The recommended shape for this loaf — gives a taller profile and a dramatic score opening.
RecommendedClick each step to mark complete
Flip Seam Up
Flip the rested pre-shaped dough so the seam faces up.
Fold Like a Letter
Fold the top third down and the bottom third up.
Roll and Tension
Roll the dough toward you while pulling back slightly to build surface tension. Pinch the seam closed.
Boule (Round)
More forgiving, great for beginners. The open crumb is slightly less dramatic but the flavor is identical.
Click each step to mark complete
Pull Edges to Center
Pull all edges toward the center of the dough, working all the way around.
Flip and Drag
Flip seam-side down and drag toward you on an unfloured surface to build tension on the top.
Proof Test: After the cold proof, the dough should feel firm but not frozen. It should hold a light finger poke — a small indentation that springs back slowly. If it springs back immediately, it may be slightly underproofed (still fine to bake). If it doesn't spring back at all, bake it right away.
Bake
Score and Bake
The moment it all comes together. Work quickly — the Dutch oven loses heat fast when the lid is off.
Step by Step
Turn Out and Score
Cut a piece of parchment paper slightly larger than your loaf. Place it over the banneton and flip — the dough lands seam-side down on the parchment. Score with a single curved slash about 1/2 inch deep at a 45-degree angle. Work fast.
Lower Into Dutch Oven
Using the parchment paper as a sling, carefully lower the scored dough into the screaming-hot Dutch oven. Cover with the lid. Bake at 500°F (260°C) for 20 minutes with the lid on.
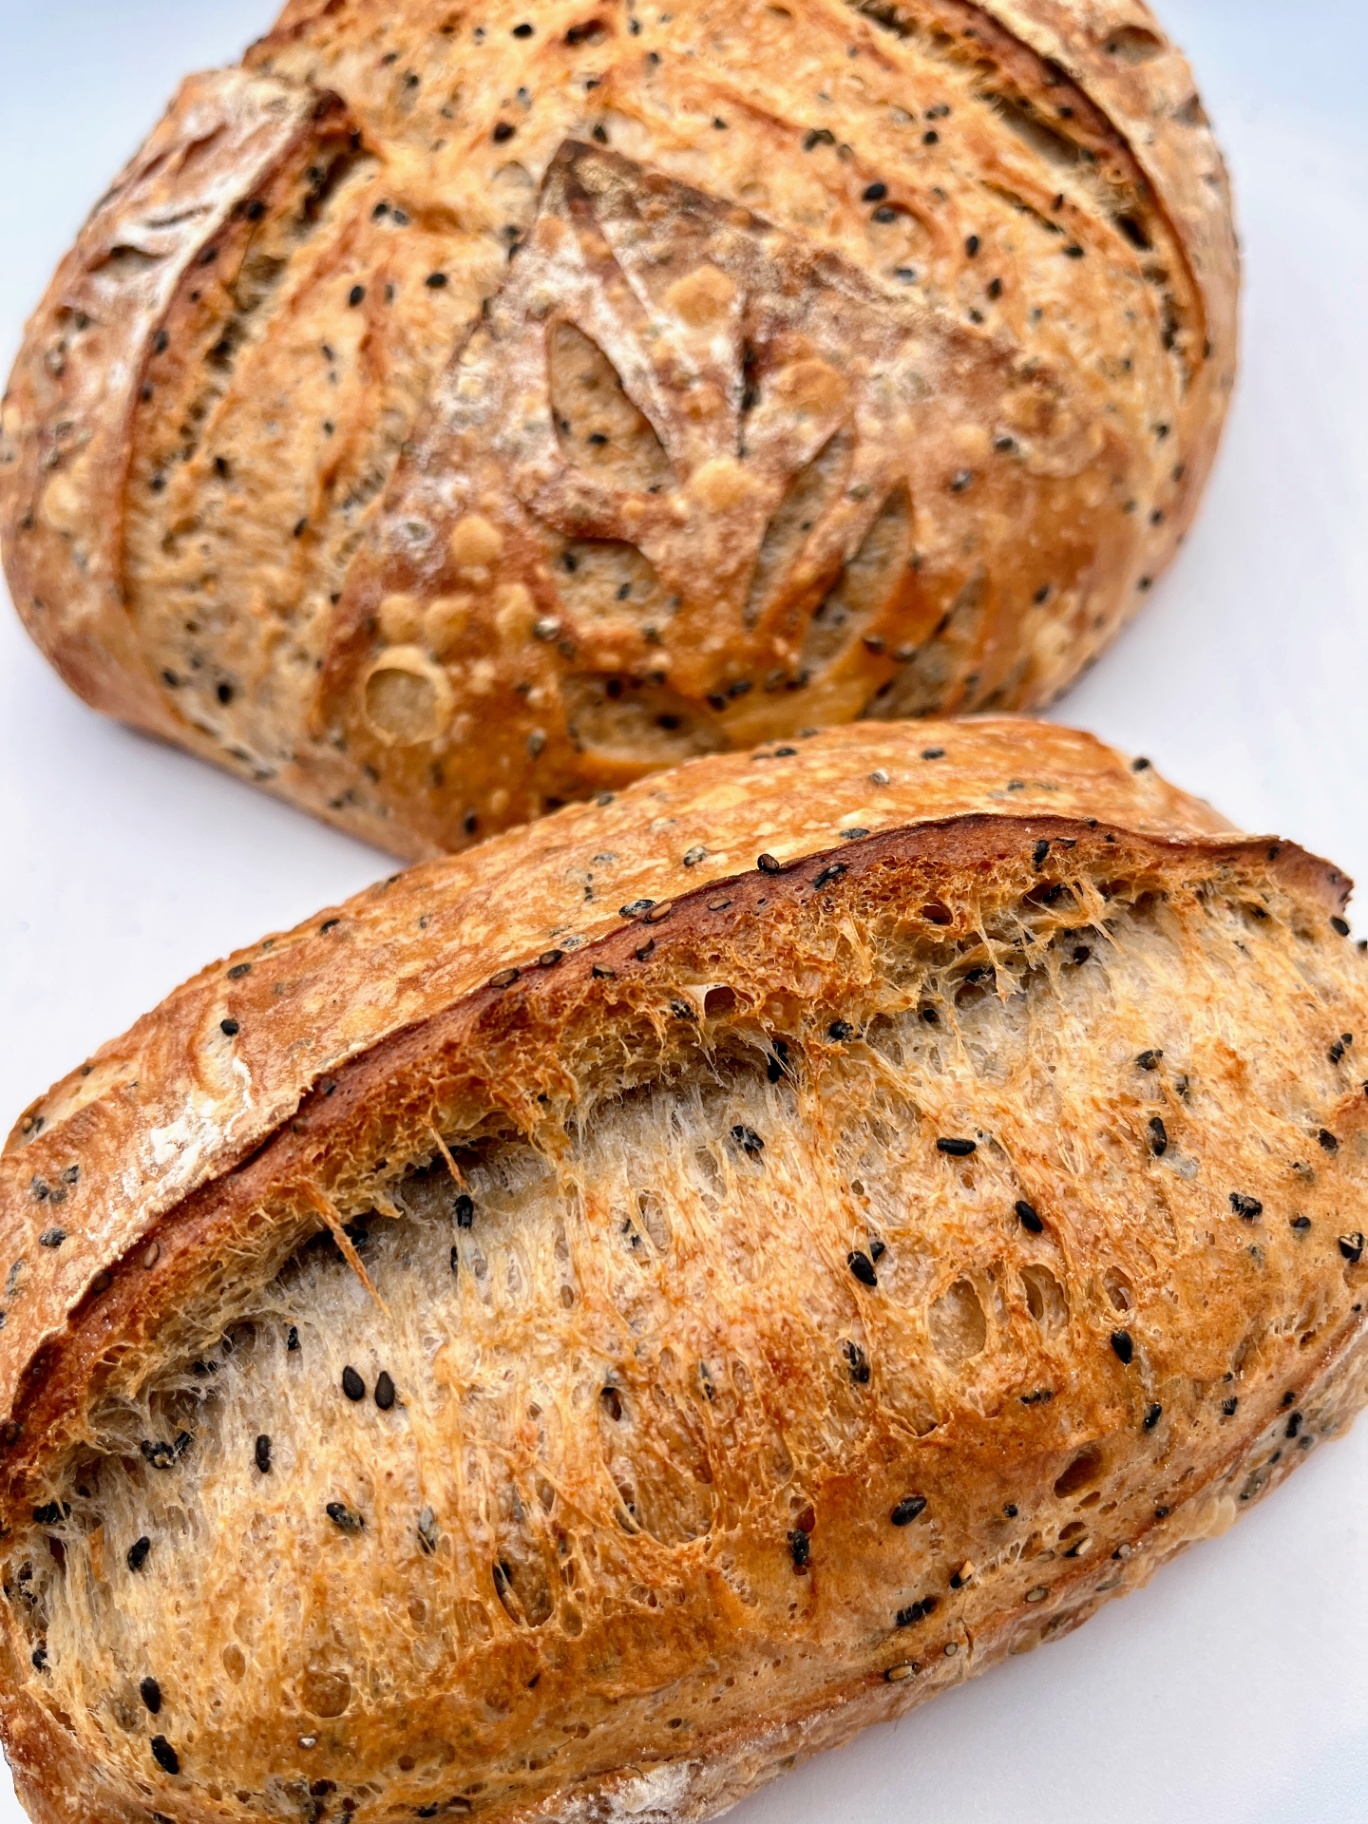
Finish Uncovered
Remove the lid, reduce temperature to 450°F (230°C), and bake another 20-25 minutes until deep brown. Because buckwheat flour gives the crumb a gray hue, this loaf will look darker than a standard sourdough. Don't pull it too early — aim for an internal temperature of 205-210°F (96-99°C).
Covered Bake at 500°F
Uncovered Bake at 450°F
Baking Methods
The recommended method. The lid traps steam from the dough itself for the first 20 minutes, giving you maximum oven spring before the crust sets.
Equipment: 5 qt or larger Dutch oven
Preheat
Preheat oven to 500°F (260°C) with Dutch oven inside for at least 45 minutes.
Score and Load
Turn dough onto parchment, score, and lower into the hot Dutch oven using the parchment as a sling.
Covered Bake
Bake covered at 500°F (260°C) for 20 minutes.
Uncovered Finish
Remove lid, reduce to 450°F (230°C), bake 20-25 more minutes until deep brown and internal temp reaches 205-210°F (96-99°C).
"The gray buckwheat crumb makes the crust look darker than a standard sourdough. Don't pull it early. Trust your thermometer — 205-210°F (96-99°C) internal is the target."
Cool
Cool Before Cutting
This is the hardest part. The crumb is still setting while the loaf cools. Cut too early and it'll be gummy inside.
Click each step to mark complete
Cool on a Wire Rack
Transfer the baked loaf to a wire rack and let it cool for at least 2 hours before slicing. The internal temperature needs to drop below 90°F (32°C) for the crumb to fully set. You'll hear it crackle and sing as it cools. That sound means you did it right.
⏱ Wait Time
At least 2 hours
Pro Tip
Toast a slice with good butter and you'll understand why this loaf is worth the wait.
Precise Timers
Use these interactive timers to track your stages.
Cooling Time
Nutrition Facts
Per 1 slice (80g) • 10 servings per recipe
* Values are estimates based on standard ingredients
Storage
Room Temperature
2 days cut-side down on a cutting board, loosely covered with a kitchen towel
Refrigerated
Not recommended — refrigeration accelerates staling in sourdough
Frozen
Up to 3 months. Slice first, then freeze in a zip bag. Pull individual slices as needed.
Refresh
Toast straight from frozen or warm a full slice at 350°F (175°C) for 8-10 minutes
Your Feedback
Rate This Recipe
Loading ratings...
Troubleshooting
Baker's Notes
Common questions and solutions for perfect results
Temperature is the invisible ingredient. I use the Goldie and DoughBed from SourHouse to keep my starter and dough at the perfect temperature, every time.

SourHouse Temperature Control Products
You Might Also Enjoy
More recipes from our pantry that pair well with this bake.
Get More Recipes in Your Inbox
Join thousands of home bakers receiving weekly recipes, tips, and techniques to elevate your bread game.
No spam, ever. Unsubscribe anytime.
More from Baking Great Bread at Home
Tools, resources, and community to help you bake better bread

Crust & Crumb Academy
Go deeper into your craft. FREE courses, challenges, and real feedback. No gatekeeping. Perfection is not required.

Sourdough Starter Companion
Your AI-powered starter assistant. Track feedings, troubleshoot issues, and keep your starter thriving.

BakingGreatBread.com
Real bread for the rest of us

Baking Great Bread Blog
Recipes, tips, and stories from the bread journey

Recipe Converter
Convert sourdough recipes to yeast and back again

Crust & Crumb App
Your AI-powered baking assistant

Facebook Community
Join 50,000+ bakers sharing, learning, and supporting each other

Sourdough for the Rest of Us
Free beginner's guide to sourdough